02-010-2 Accounts Receivable #2 - TA2QB
Overview
The TA2QB utility posts unreleased general ledger information from TransActPOS to QuickBooks.
Setup of the QuickBooks relationship within TransActPOS - Company Setup
Setting up General Ledger Chart of Accounts within TransActPOS
1. Select System
2. Select Support Files
3. Select GL Accounts
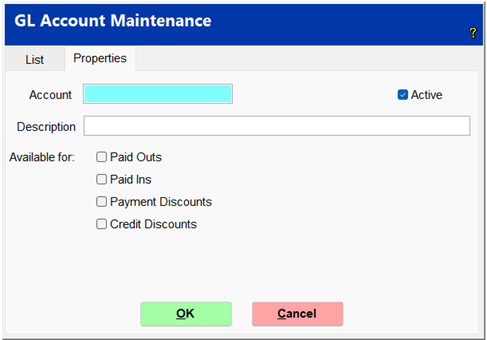
4. Select New
5. Enter the Account Number and be sure to check the Active box in the upper right-hand corner of the account screen.
6. Enter the appropriate Description
7. If the new accounts will be used for any of the following make sure to click the appropriate box.
QuickBooks integration setup
1. Install QuickBooks and create your Company File.
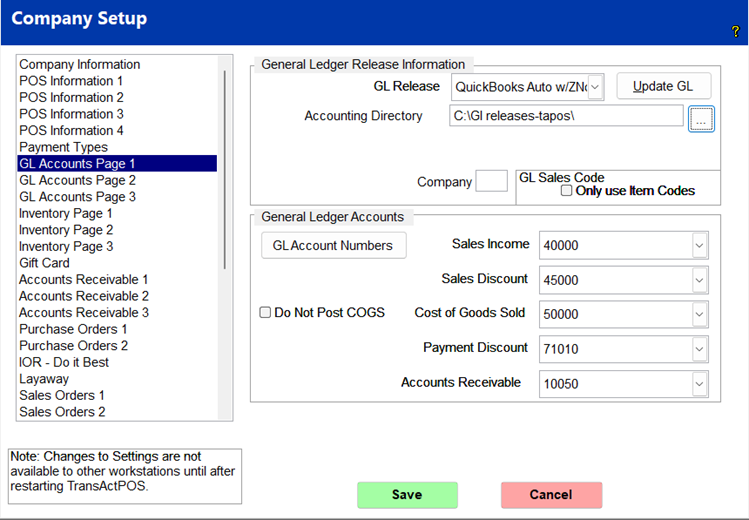
2. Within TransActPOS, select System > Company Setup.
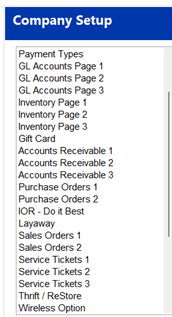
3. On the left-hand side, select GL Accounts Page 1.
4. In the dropdown menu labeled GL Release, select QuickBooks.
1. QuickBooks Auto w/ZNumber - on the GL Release GL accounts are grouped with the ZNumber they are associated with, within QuickBooks the ZNumber can be expanded to see the corresponding journal entries.
2. QuickBooks Automatic - Summarizes by account for the date
5. Next, select the location of your Accounting Directory, this is where the GL Releases will be saved so they can be posted in the TA2QB. This will typically be a folder on the C: Drive.
1. Creation of a common folder either on the QuickBooks computer if on the secure side of a PCI compliant network or using a DropBox account folder that is privately maintained is required. The GL Release from TAPOS is directed to this folder. The QuickBooks computer needs access to the same folder where the TA2QB application runs.
6. Click Save
Downloading and Installing TA2QB
On the PSDG FTP server download the ta2qb_File_Package.zip located in the following directory:
-
__PSDG Corporate Directory/Downloads/QuickBooks TA2QB
TA2QB Application Setup
Follow the steps below:
1. Connect to the computer with QuickBooks.
2. Create a folder named TA2QB on the C: Drive
3. Download the TA2QB_File_Package.zip file and unzip the contents in to the above directory C:\TA2QB
4. Locate and run QBFC130Installer.exe within the C:\TA2QB directory
5. Create a desktop shortcut to the application TA2QB.exe starting in the TA2QB folder. Right click on TA2QB.exe and then Send to Desktop (create shortcut)
6. Change the name of the shortcut to TA2QB. (Right click on the shortcut and then click rename)
7. Create a folder that both TransActPOS and TA2QB can access. (Drop Box may be used in some cases)
8. Run the new TA2QB shortcut.
9. The TA2QB application will prompt for the TransActPOS Postings Folder, select the folder created in step 2 and select OK.
10. Next TA2QB will prompt for the QuickBooks Company File Selection. (Example file location: C:\USERS\PUBLIC\DOCUMENTS\INTUIT\QUICKBOOKS\COMPANY FILES\your company.QBW)
11. TA2QB can be closed at this time, if no release has been done within TransActPOS.
12. QuickBooks notes:
1. Required use of account numbers for TransActPOS to post entries. (QuickBooks> Edit> Preferences> Accounting> checkbox Use account numbers must be checked. Requires the administrator or an External Accountant)
2. Accounts Receivable must be set up as a current asset not the Accounts Receivable QuickBooks account type. QB requires customer and item information that is retained within TransActPOS.)
3. Sales Tax account must be set up as a current liability in QuickBooks.
4. Unfunded Deposit Accounts are supported by TransActPOS and are described below.
TransActPOS employees typically do not get into QuickBooks as that is customers private financial information so the customer should be able to set this up themselves.
Set up a TransActPOS User in QuickBooks
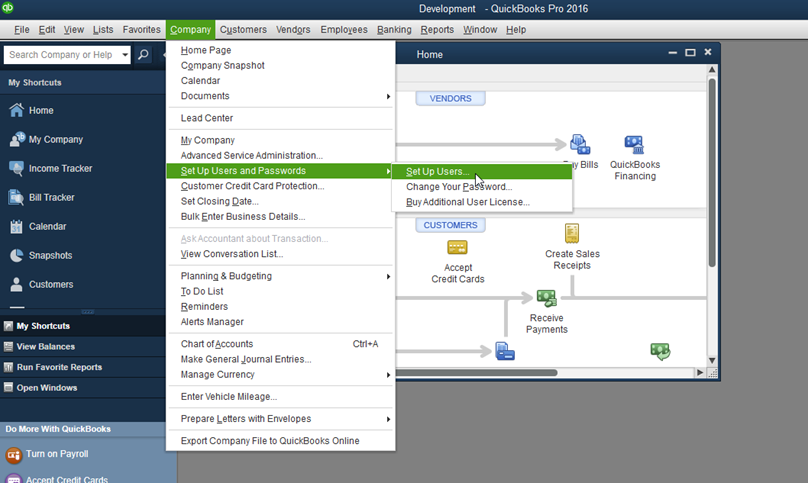
1. Click Company at the menu across the top of the screen. Then select Set up Users and Passwords and then select Set up Users…
2. In the next screen, click on Add User…
3. Fill out the username and password. It can be anything you like. For example, username of “TransActPOS” and password “superstrongpasswordthatcantbebeat”.
4. Once all of the fields are filled out, click Next.
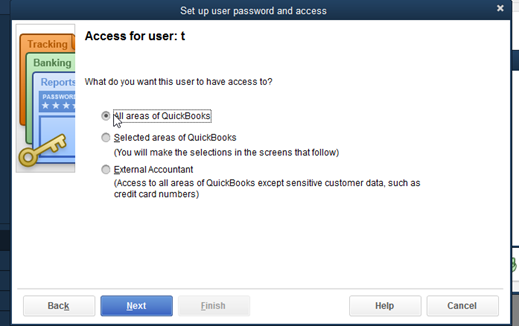
5. Select Allow access to all areas of QuickBooks
6. A warning window will appear. Click Yes.
7. Click Finish.
Set up a TransActPOS Vendor in QuickBooks
1. In QuickBooks, select Vendors on the menu across the top of the window.
2. Select Vendor Center
3. Click the New Vendor button.
4. IMPORTANT: TEXT MUST BE EXACT
In the Vendor Name field, type in “TransActPOS Vendor”
5. Click OK
Turn on Account Numbers in QuickBooks
1. On the menu across the top of the window, click on Edit and then Preferences.
2. Click on Accounting in the menu on the left-hand side.
3. Click the Company Preferences tab.
4. Check the Use account numbers box.
5. Click OK.
Add a “TransActPOS Accounts Receivable” ASSET in QuickBooks.
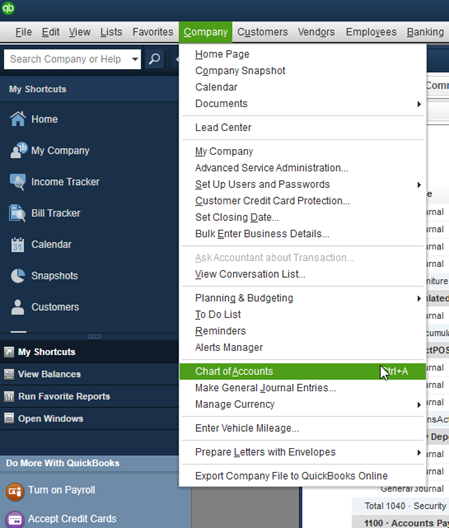
1. Select Company on the menu across the top of the window.
2. Select Chart of Accounts
3. Click Account at the bottom of the window. Then, click New
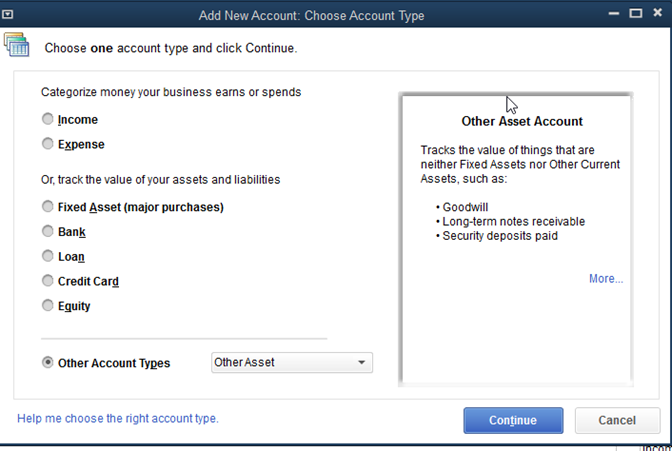
4. In the dropdown menu, select Other Asset
5. Click Continue
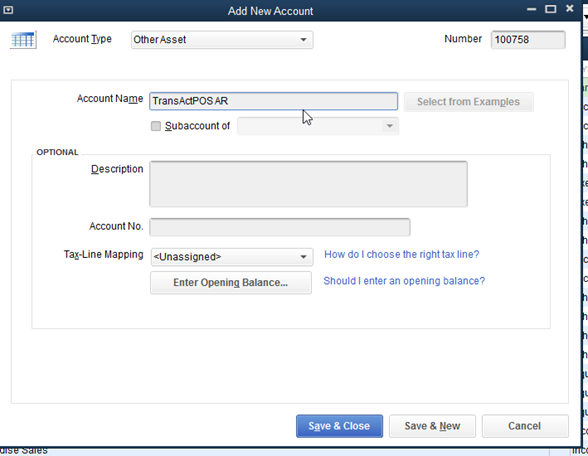
6. Type the number for your AR account from TransActPOS in the Number text box in the top right of this window.
7. You can name the Account TransActPOS AR
8. Click Save & Close
Posting Process
TA2QB Posting Process
The posting of GL Releases from TAPOS follows the steps below.
1. Release the General Ledger from within TransActPOS> System> GL Release
1. Select the Last Date to Release (All postings prior through this date will be released for posting to QuickBooks.)
2. Select the checkbox to print the release.
3. Click the Release button
4. Answer YES to the release confirmation form that appears, if the printout looks correct.
2. Start the TA2QB application.
3. Select the Select File button to select the file for the day to release. Each file is named to describe the date that it represents.
Files don't have to be selected in order as they post to the date specified within the file. BUT release them in date order anyway! It will make your life easier if there is an incorrect posting or account number. The file is erased after successfully being posted to QuickBooks by the TA2QB application. **
4. Note: The Report and Post by Date + ZNumber creates the posting with the ZNumber referenced to the individual postings.
5. It is required that you either Display or Print the posting.
6. Once satisfied with the posting click the Release button.
1. If any GL accounts do not match between TransActPOS and QuickBooks, they will be reported at this time.
2. If the information does not post to Quickbooks, the file will still be present in the folder with the GL Releases.
7. Confirm that the postings are posted correctly within QuickBooks.
Troubleshooting
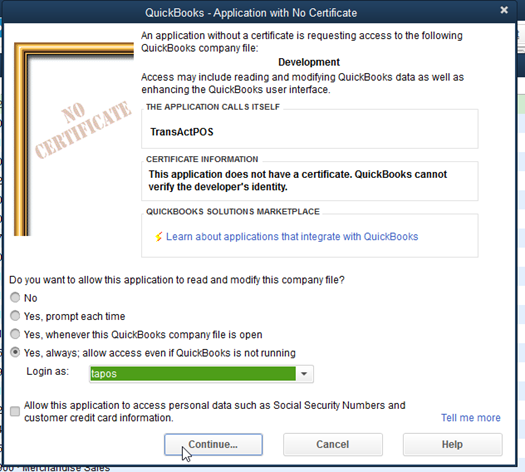
Allow TransActPOS to access QuickBooks Prompt
This prompt typically occurs only the first time the TA2QB application accesses QuickBooks
-
You may be prompted in QuickBooks to allow TransActPOS to access QuickBooks.
-
Select, Yes, always; allow access even if QuickBooks is not running.
-
Then, in the dropdown next to Login as: select the user that you created earlier.
-
QuickBooks installation location
You must have QuickBooks installed on the PC where you are releasing GL. QuickBooks does not necessarily have to be open, or even used.
Missing Accounts
If missing accounts are found, you will be given a report of the missing accounts. These are accounts that were not present in QuickBooks. You must add those accounts to QuickBooks. Be sure to use the exact account numbers that were reported to you. Once you have added the missing accounts, you must then attempt to release GL from TransActPOS again.
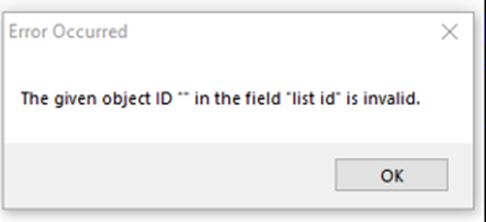
Object ID “” error…
If the following error is received, then there are issues with the account numbers. Make sure all account numbers match between QuickBooks and TransActPOS.
Error: There is an error when saving a General Journal transaction
The following error can be resolved by creating a Sales Tax Payable account under other assets that match TransActPOS.
If you already have an account within QuickBooks for Sales Tax Payable, change the account number by 1 number. Then create a new Other Asset account using the original account number with an account name of TransActPOS Sales Tax Payable.
Your Accounts Receivable account should also be an Current Asset. If it is set as Accounts Receivable it will generate an error.