07-020-1 Wireless Training
Overview
Wireless Inventory Functions
Get real-time access to inventory information from the aisles of your store.
The TransActPOS Wireless module provides a streamlined utility used within the store aisle to manage inventory. With equal access as the desktop application to the Inventory File, the TransActPOS Wireless application provides many functions as you can see below.
Wireless Device
The wireless device utilizes a remote desktop connection to either a Windows workstation or a session on a Windows Server with installed remote desktop licenses.
Real-time data
Real-time information allows for quick and accurate decision-making.
Adjusting inventory
Inventory issues, receipts, and cycle counts can be performed from within the wireless module. This streamlined process allows the user to adjust inventory in a very efficient process.
The cycle count is based upon a three-step management process:
1. Management creates a job that defines the area of inventory to be counted.
2. The user selects the job and then scans and counts the items within the designated area.
3. Management reviews the count within the system, adjusting postings as required, and then posts the job to the system.
Upon completing the cycle count, the system will report items missed during the cycle count for a specific location, allowing for additional edits to occur as required. The system automatically adjusts the non-scanned items on-hand to zero and marks items as non-sellable based upon directives.
Retail Price Changes
With the ability to view the electronic catalog for retail price reference, access to sales history, and current margins, the retail price of an item can be modified, and a new price label can be printed from the store aisle. With the addition of a wireless belt label printer, the user can apply an immediate change to the bin label.
The wireless application can be placed into a scan and update price mode to streamline the updating of bin labels. Some stores refresh the bin labels and update their retail prices with this option. Additionally, the location code for the item may be updated automatically with the selection of the update location option during this relabeling process. Further capabilities include posting a physical count resulting in a single streamlined process of updating prices, applying a location code, printing a new bin label, and a physical count, all in a 3-5 second scan.
Viewing Sales History
The clerk has access to the scanned item's inventory information to include the multi-year sales history.
Creating Purchase Orders
Many stores choose to walk the aisle and scan selected items to create their merchandise reorders. The wireless module will create multiple pre-purchase orders based upon the scanned item's primary vendor. The resulting pre-purchase orders are then reviewed and converted to purchase orders prior to submission to the vendor. Within the Purchase Order module, purchase orders within the same vendor may be combined.
Line Buster
The Line Buster feature allows the user to pre-scan a customer's shopping cart and then assign a Line Buster card number to the group of items. When the customer arrives at the point-of-sale, the clerk scans the Line Buster card to import the cart contents, thus reducing the time to check-out. The standard edit, add, delete and modify options are available to the clerk during the point-of-sale process. A simple paper label can be created from within the system, or a custom line buster 30-mil card can be created for your store by our custom printing services.
Receiving orders
IOR Receipt Processing is the wireless version of the inventory receiving process IOR communicating stores. The vendor's electronic invoice is selected from the wireless unit, and when the user scans the individual items received within the order. Over and short reporting reveals any discrepancies within the shipment. The scanned quantities are then posted to the system and tracking within the adjustments report per item.
Sales Order Shipments
Some locations utilize the Sales Order Shipment option to process items as the delivery truck is being loaded. The user selects the sales order being loaded and then scans the item's barcode and indicates the shipped quantity. This activity creates and emails an invoice automatically when the email module is installed.
Wireless Inventory
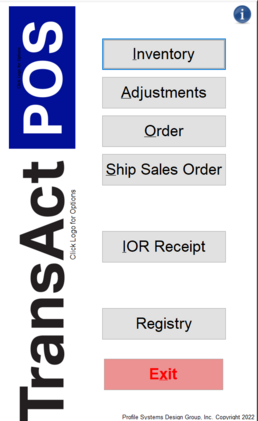
Below you will see the Wireless Main Menu Page. Click on the Inventory button.
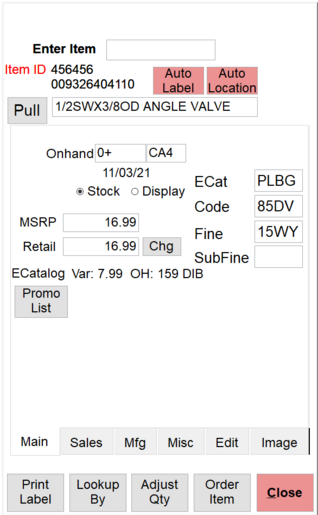
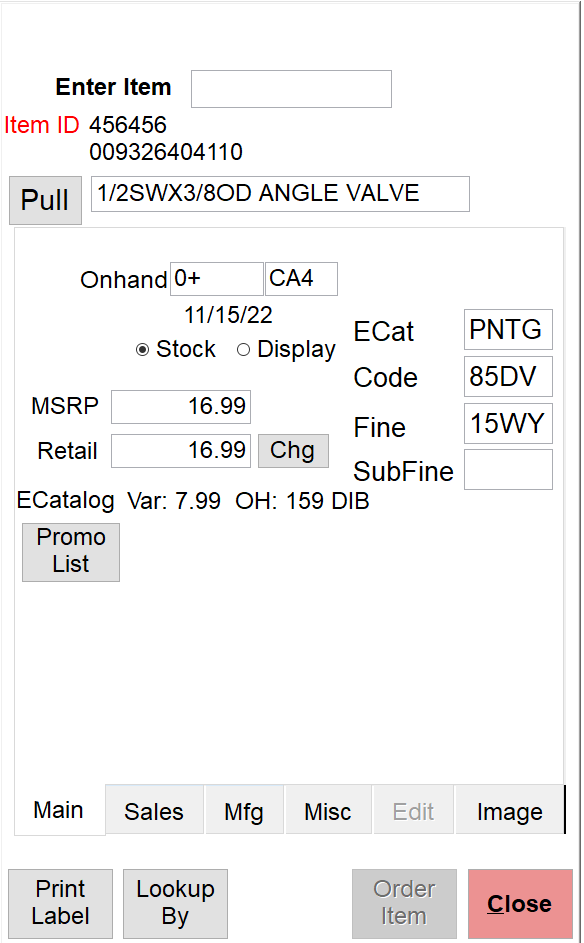
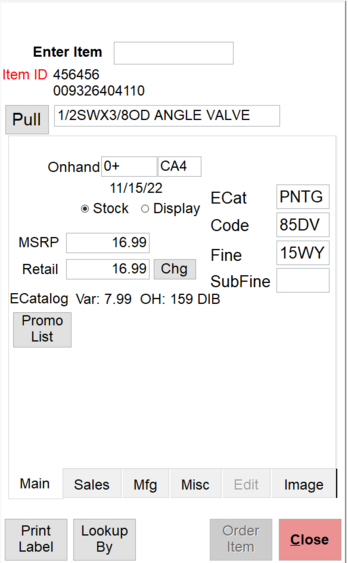
The Main tab on the inventory screen displays the basic information of the selected item. To locate an inventory item, simply enter any known item lookup number. Additionally, you can scan the UPC number, manually enter the IBM number, or enter a vendor part number. Any number that can be entered within the desktop TransActPOS application can be entered into this field.
In this example, 456456 has been entered as an item number and then the Enter key has been selected.
Item ID
Item numbers are an alphanumeric relationship to a specific item within the inventory system. On the next line you will see the UPC number. .
Pull Button
Description
The description field allows up to 60 characters to describe the product. Further information can be placed within item notes.
Auto Label
Note: Auto Label, Auto Location, and Auto Add options must be activated EVERY TIME you log in on the wireless menu.
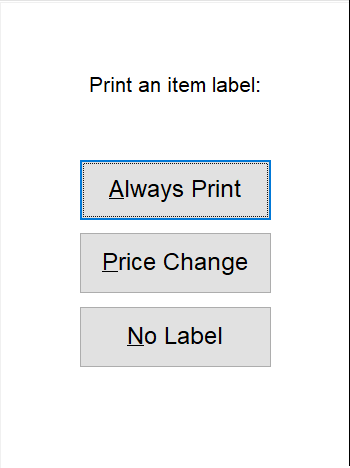
By default, the Auto Label button is not active when the application is first started and will not interact with the scanning of items. When Auto Label is activated, the system will automatically print a label for the scanned item to the indicated label printer. Once you have clicked on the Auto Label button, you will see the following screen.
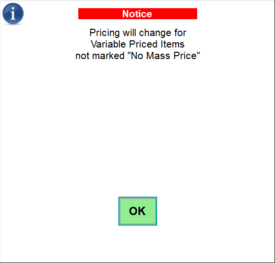
After this screen, the following notice will be shown. Click Ok to verify you understand this and want to continue.
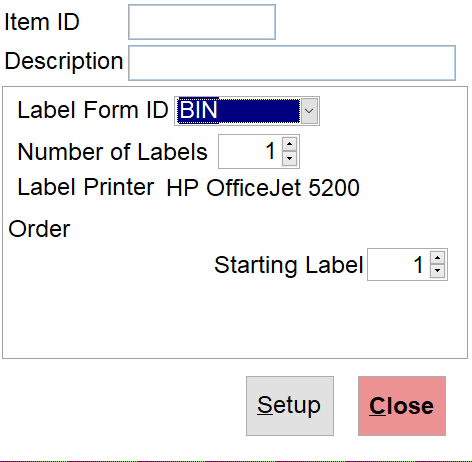
You will then be brought to the Label Print menu. Here you can select the appropriate Label Form ID, the number of labels, and the destination label printer.
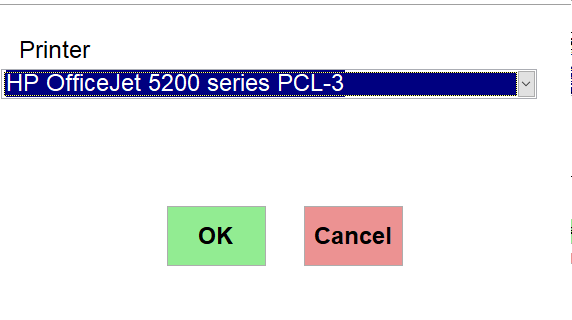
Choosing the "Setup" button will allow the user to access the printer selection option. Upon selecting the required settings, select close.
Once you have closed the Label Print menu, you will be asked about Auto Add. Below is more information about this.
Once on the Main menu, the Auto Label button will change to green which indicates that label printing has been set up and is ready for use. Now scan a barcode or type in an item number and the system will automatically print the specified item label.
Auto Add
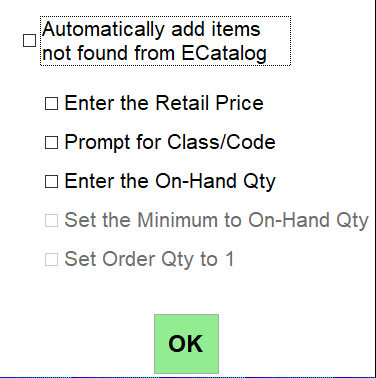
Immediately after closing out of the Auto Label option above, the system will prompt with a series of check boxes.
Checking the "Automatically add items not found from ECatalog" option will enable the other options on this screen. The options are self explanatory and listed below:
-Enter the Retail Price
-Prompt for Class/Code
-Enter the On-Hand Qty
-Set the Minimum to On-Hand Qty
-Set Reorder Qty to 1
Auto Location
By default, the Auto Location button is not active when the application is first started and will not interact with the scanning of items. When activated, upon scanning an item, the system will automatically assign the indicated location code to an item.
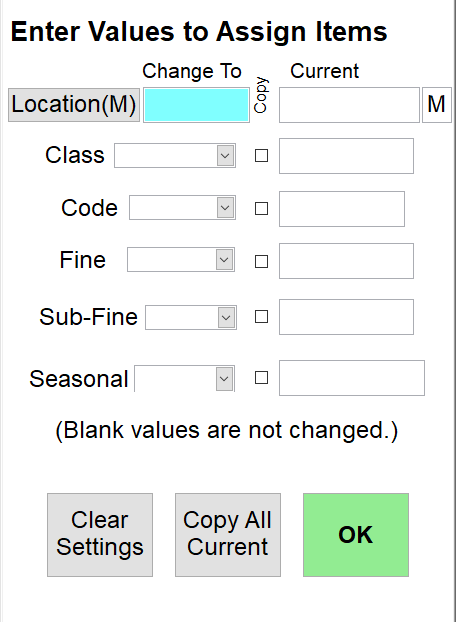
To activate the Auto Location option, select the "Auto Location" button and then enter the appropriate item location information either manually with the device keyboard or by scanning the location label.
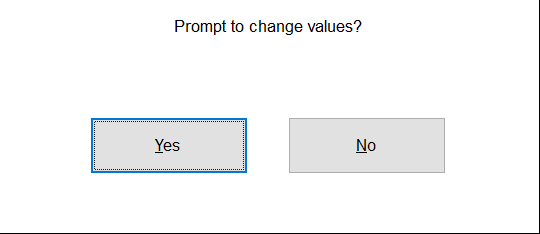
After entering in the information above, the system will ask you if you want to double check the values you entered before confirming them. Answer accordingly.
Answering Yes will confirm your values for Auto Location.
Upon returning to the Main menu, the Auto Location button will change to reflect the location ID as indicated within the previous screen.
When the Auto Location button is active, the TransActPOS system will automatically assign the location information to the scanned item.
On Hand
On Hand is the total quantity from the shelf and warehouse locations.
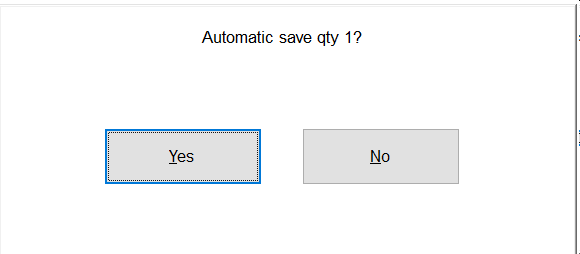
When using the Wireless application to perform a physical inventory, the system can be defaulted to one of three quantities based upon the situation. Typically, the default is left at zero which requires the user to change the value to the appropriate value of the count. Options of "1" and the on-hand quantity (as stated by your system) can be used depending upon your preference.
Stock/Display
The Stock or Display radio buttons pertain to the viewed on hand quantity. The current unit of measure is EA (Each). If the Stock unit is selected, then the on-hand value is interpreted in the stocking unit of measure.
MSRP
Manufacturer’s Suggested Retail Price
Retail Price
If no other discounts apply during the sale of the current item, this will be the price that appears on the invoice screen and will be charged to the customer.
Chg
To change the MSRP and/or the Retail Price of an item while using the hand held device, select the Chg button to access the edit screen. Enter the desired MSRP and Retail price of the item and then select Save to post the modification to the system. You can also check the No Mass Price to disable mass pricing for the selected item and/or check the No Discounts option to disable any discounts, be it customer based or coupon based. To print a new label for the item, select Print Label at the bottom of the Inventory screen (not the screen above) and then indicate the appropriate label, number of labels, and printer destination. To print a new label for the item, select Print Label at the bottom of the Inventory screen (not the screen above) and then indicate the appropriate label, number of labels, and printer destination.
Class/Code/Fine/Sub-Fine
These fields identify the item and are display fields only and can’t be changed.
At the bottom of this screen, there are a number of tabs that will allow you to access other information regarding the item selected. There are also some buttons along the bottom that serve different functions.
Inventory - Sales
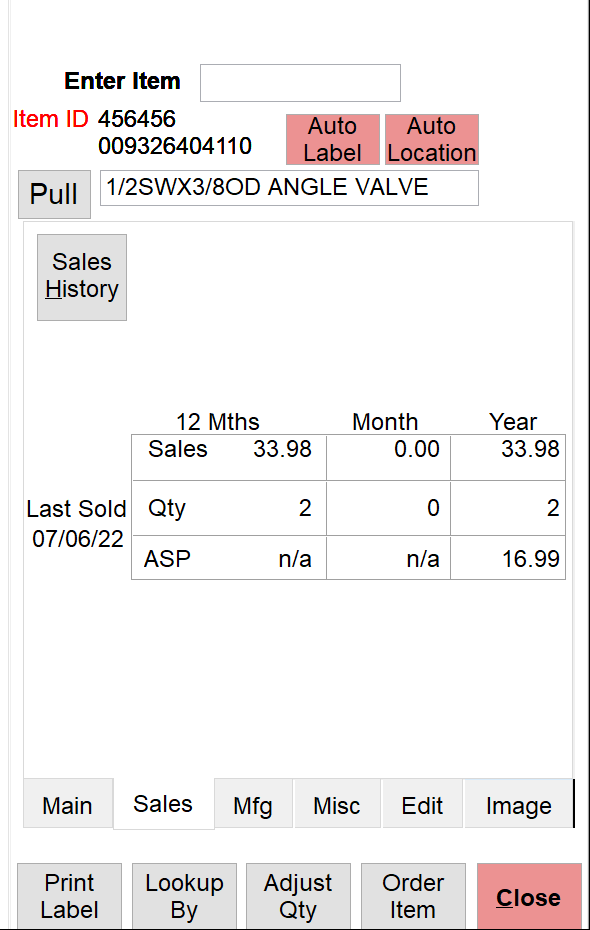
The Sales tab presents the identical information that is available within the desktop TransActPOS.
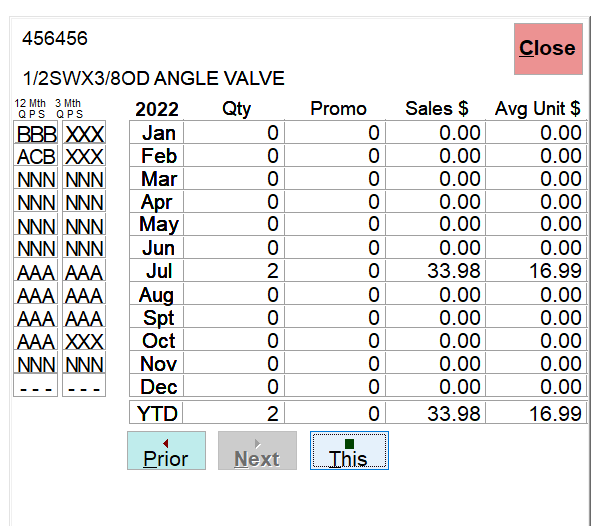
Sales History
The Sales History button presents a sales summary for the current year of the selected item. Selecting the Prior button will recalculate the report for the year before the currently displayed year. Selecting the Next button will recalculate the report for the year after the currently displayed year (as long as the year isn't the current year). Selecting This will recalculate the report for the current year. The reporting period is based upon the calendar year
Sales
The Sales in dollars is presented for the last 12 months, current month, and the current year.
Quantity
The quantity of items sold during the last 12 months, current month, and the current year.
ASP (Average Selling Price)
The average selling price of the item during the last 12 months, current month, and the current year.
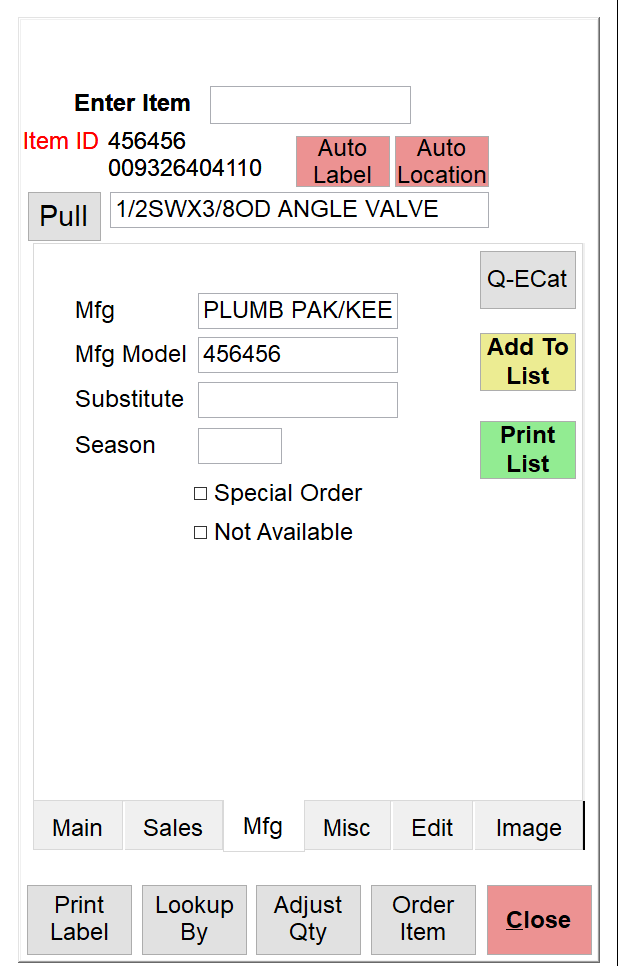
Inventory - Mfg
The Mfg (Manufacturer) tab presents the item's manufacturer ID (Mfg) and Manufacturer Model number (Mfg Model) of the selected item. You can also see the substitute item (if one is specified) and the season attached to the item (if there is one).
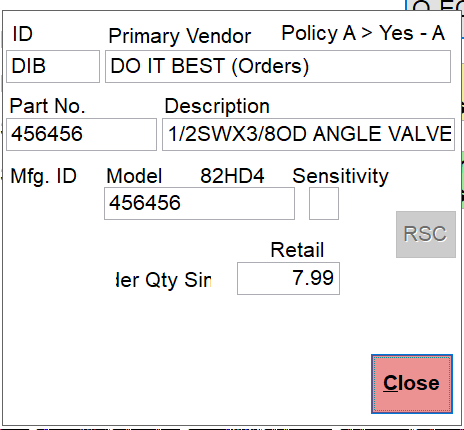
Clicking the Q-ECat button will bring up the information for the item from the ECatalog.
Add to List
You can add the scanned item to a list to print out for such use as restocking from a warehouse or adding for orders. Click on the Add to List button.
Print List
Once you have added all items that you want to the list, select Print list. This will send the report to the report printer.
Inventory - Misc.
The Miscellaneous tab provides a number of different facts about the selected item.
Location
The Location field indicates the physical location within the warehouse.
Cat. Pg.
The Catalog Page field is used to indicate the page number the current item is located in the manufacturer’s product catalog.
Weight
The Weight of the saleable unit.
On Hand
On Hand is the total quantity from the shelf and warehouse locations. The currently selected unit of measure appears to the right of this quantity.
Allocated
Displays the number of allocated items
On Order
Displays the number of items on order.
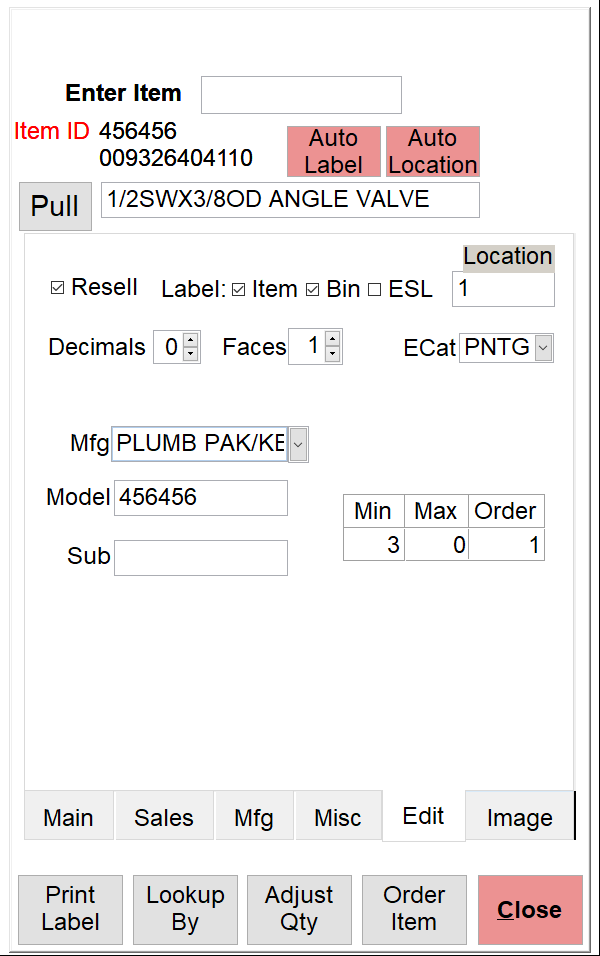
Inventory - Edit
If the current user has security rights to edit inventory, selecting the Edit tab will allow the user to modify the indicated values:
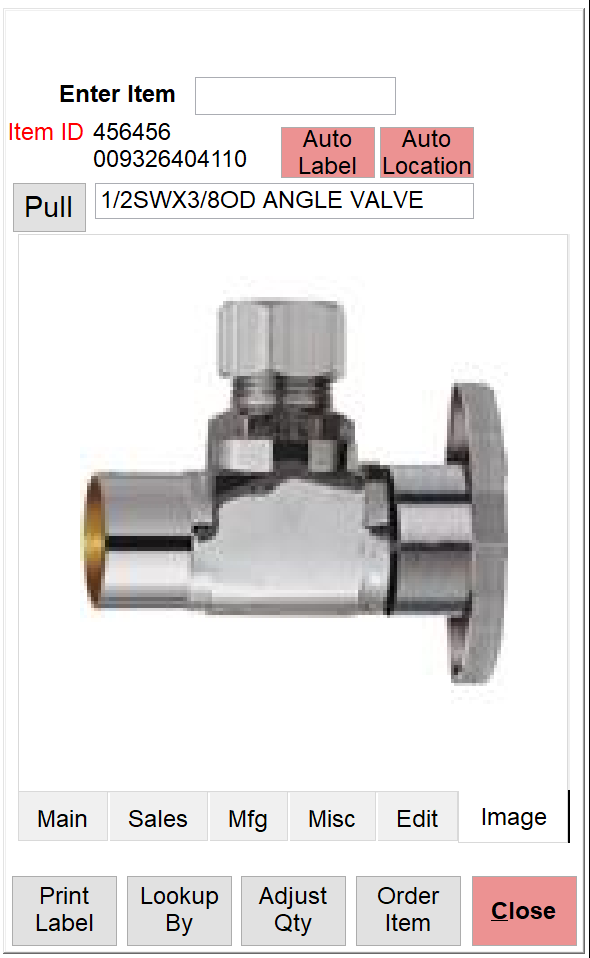
Inventory - Image
The Image tab will display (if there is one selected) the image for the selected item. If you click on the image, the image will enlarge. To get back to the tab, click close.
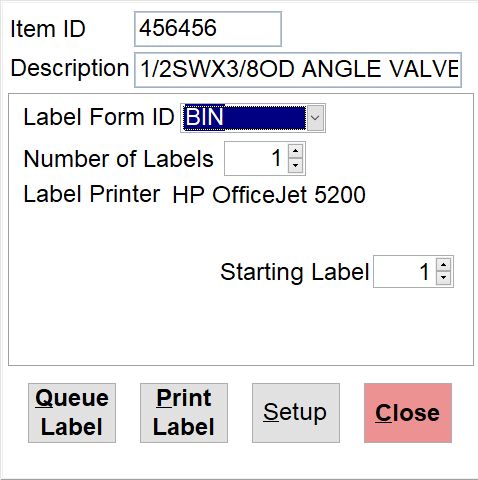
Inventory - Print Labels
The wireless user can print label formats that have been created from the desktop TransActPOS application. After selecting the Print Label button, indicate the Label Form ID, Number of Labels, and Label Printer. The printer can be changed by selecting the Setup button and choosing the appropriate printer.
Selecting Queue Label will post the label to the printer, but wait until you have finished with other labels. This is simply a time saver where all labels will be printed at once.
Starting Label allows you to select which label you want to start printing on.
Select Print Label to generate the indicated label(s).
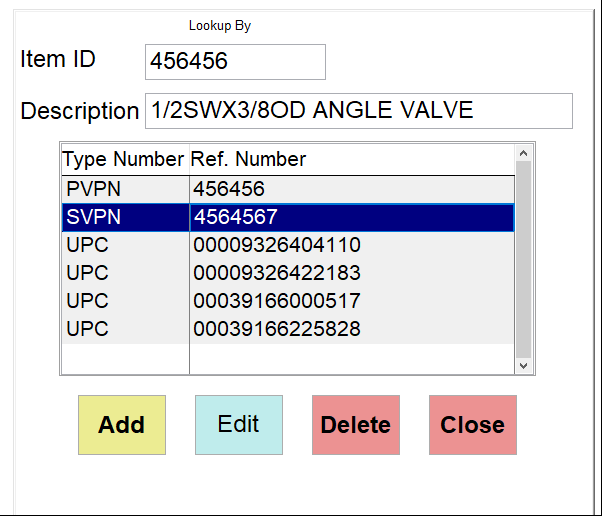
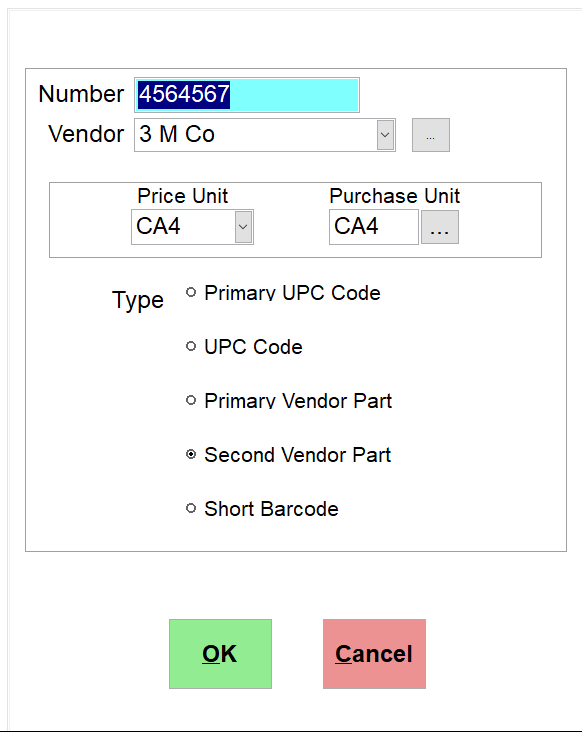
Inventory - Lookup By
The inventory system will allow multiple references to a single inventory item. The Lookup By screen allows the user to add additional part numbers to the system, thus creating a very powerful lookup tool. Review the Lookup By features outlined within desktop Lookup By.
Identical to the desktop program, the user may indicate the type of code being added, edited or deleted to the system.
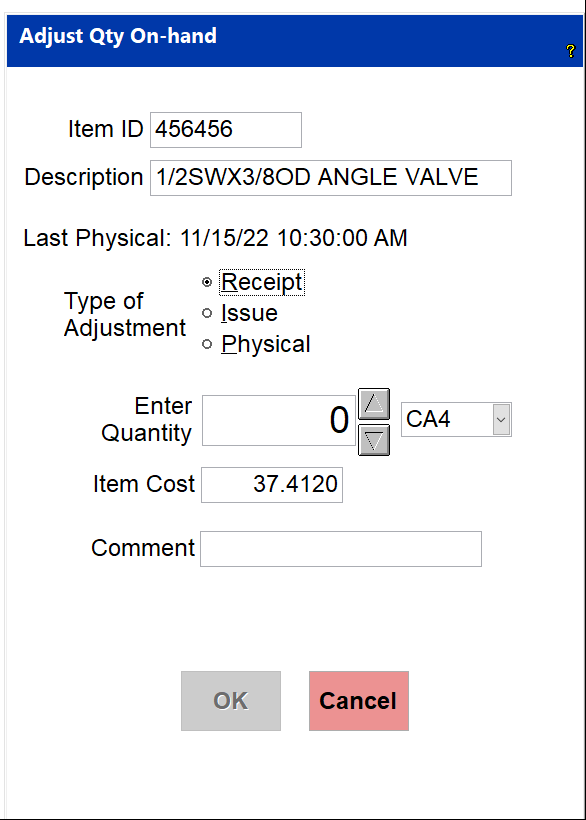
Inventory - Adjust Quantity
The Adjust Quantity feature allows the user to alter the on-hand level of the current item by an inventory receipt, inventory issue, or physical count. You can also change the Item Cost and add a Comment.
Inventory - Order Item
The TransActPOS Wireless Order Item on the Inventory page allows users to create "Pre-Purchase Orders" in the coverage area. Pre-Purchase Orders are precursors to standard purchase orders. This process allows a back office user to review the activity of orders generated on the floor while creating the purchase order.
Placing an item onto a purchase order is straight forward.
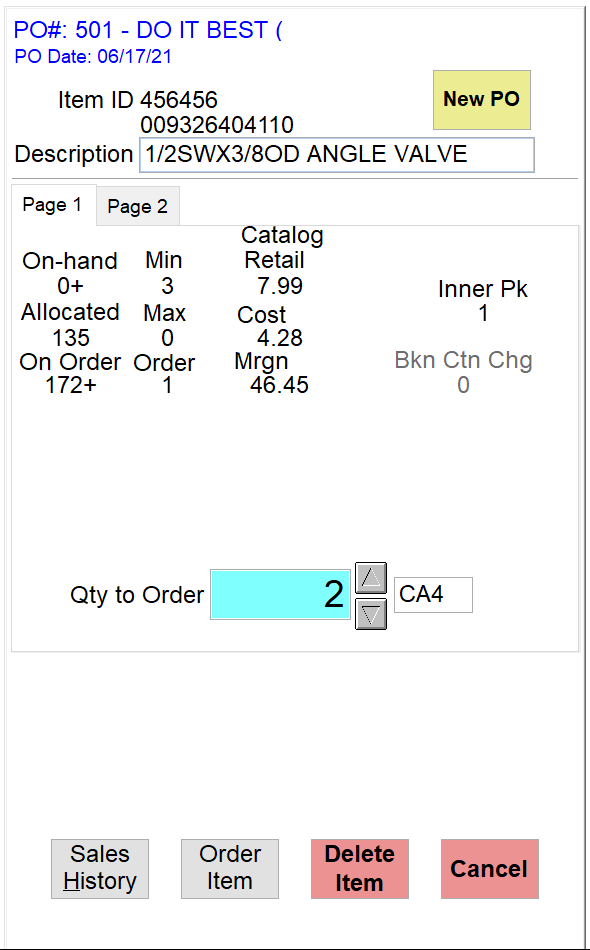
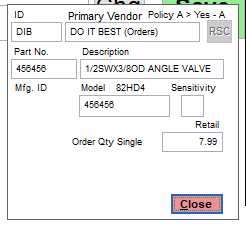
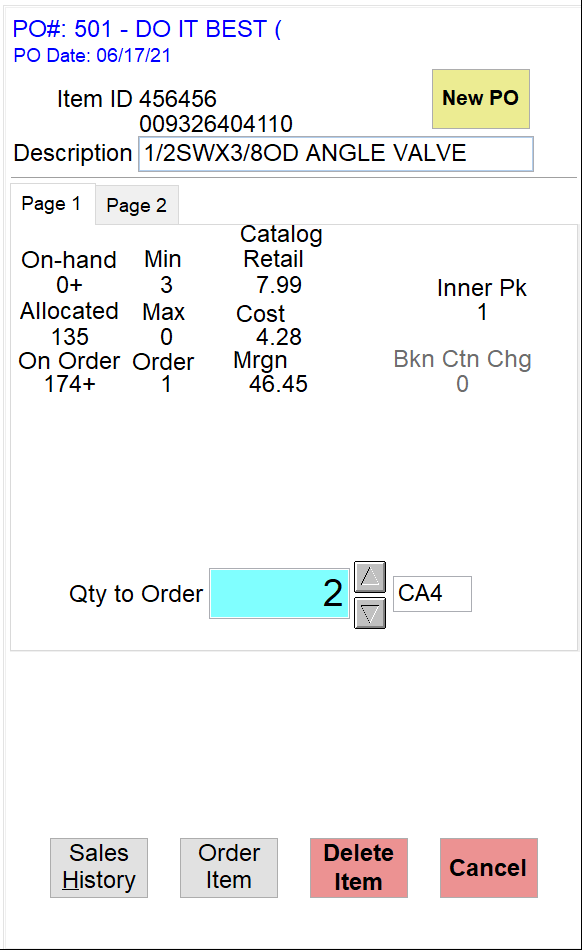
First, with the item presented on the Inventory screen, select the "Order Item" button. If the item has a PO already created, you will see a screen similar to the one below.
If the item is not on a Pre-PO or you wish to create a new Pre-PO, click New PO at the top. Choose the Qty to Order and click Order Item to place the item on a new Pre-PO.
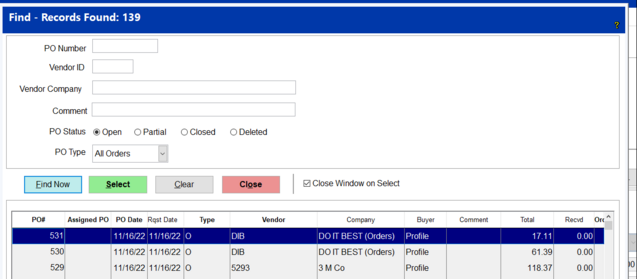
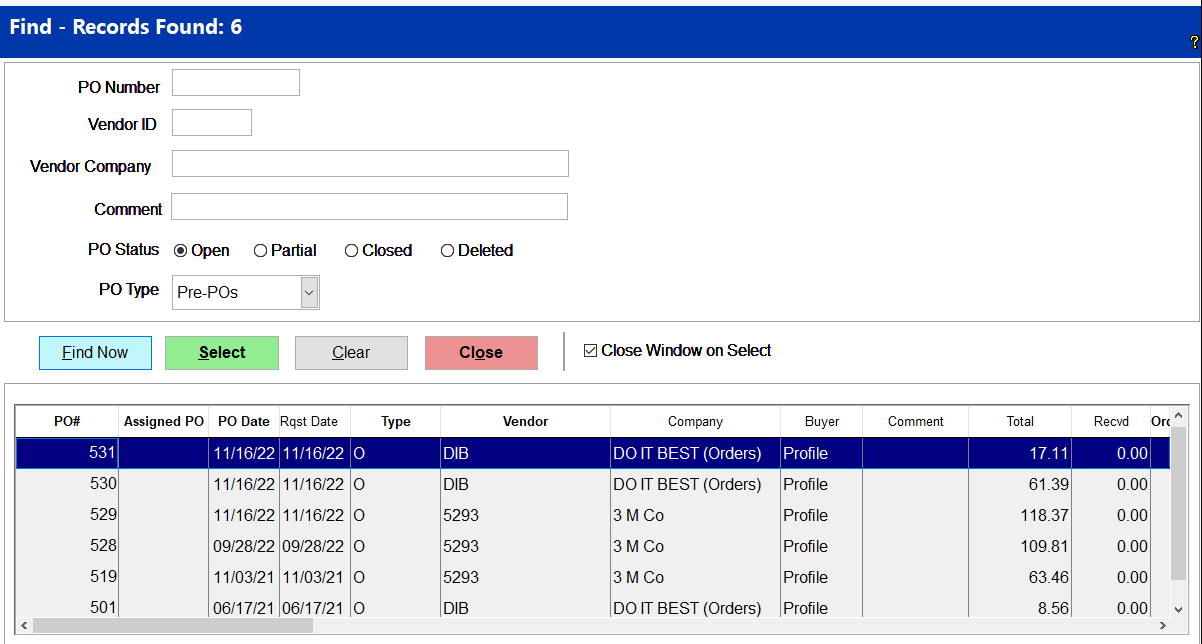
From the TransActPOS desktop application, the Purchase Order module will allow the user to modify the purchase order just created on the wireless unit. Using the Modify PO option of the PO module, you can search all POs created, either on the desktop or wireless device. In the example below, the user has filtered the search to "Pre-POs." This will show only the POs created on the wireless device.
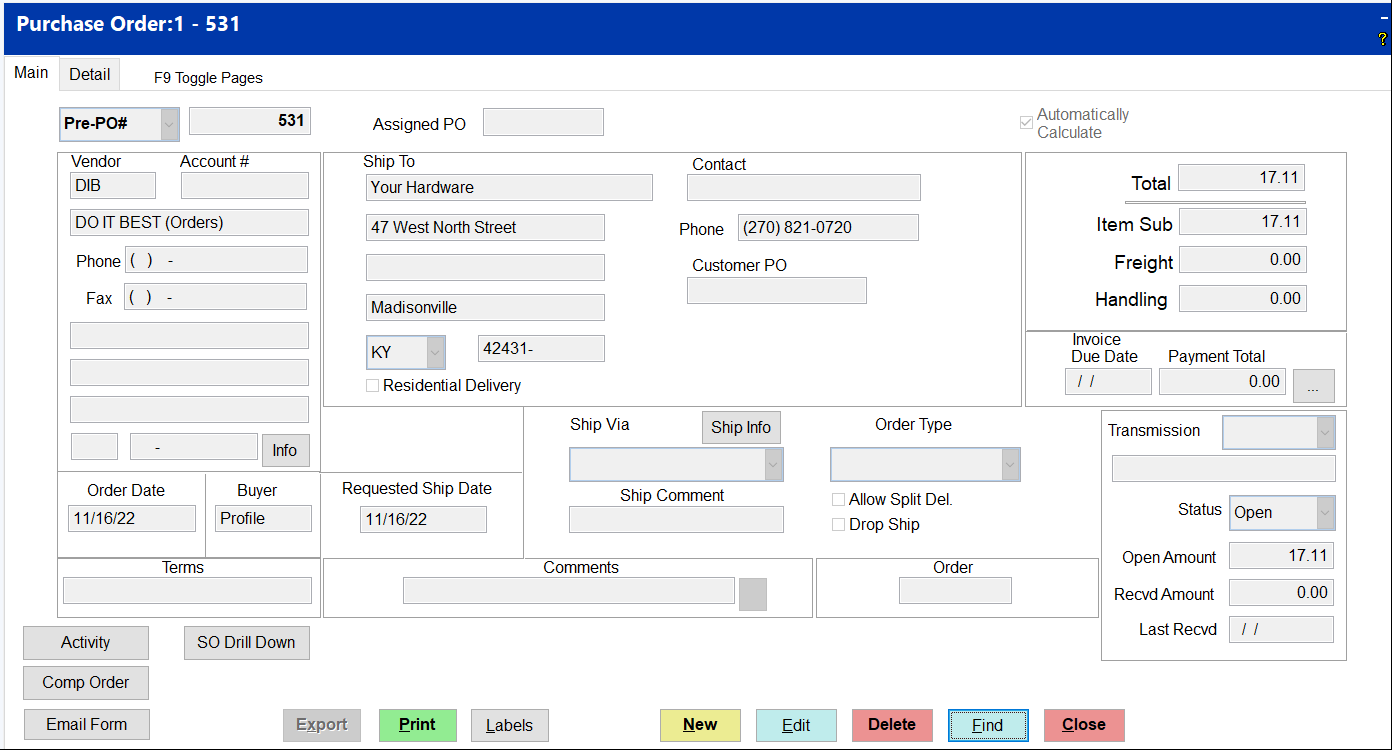
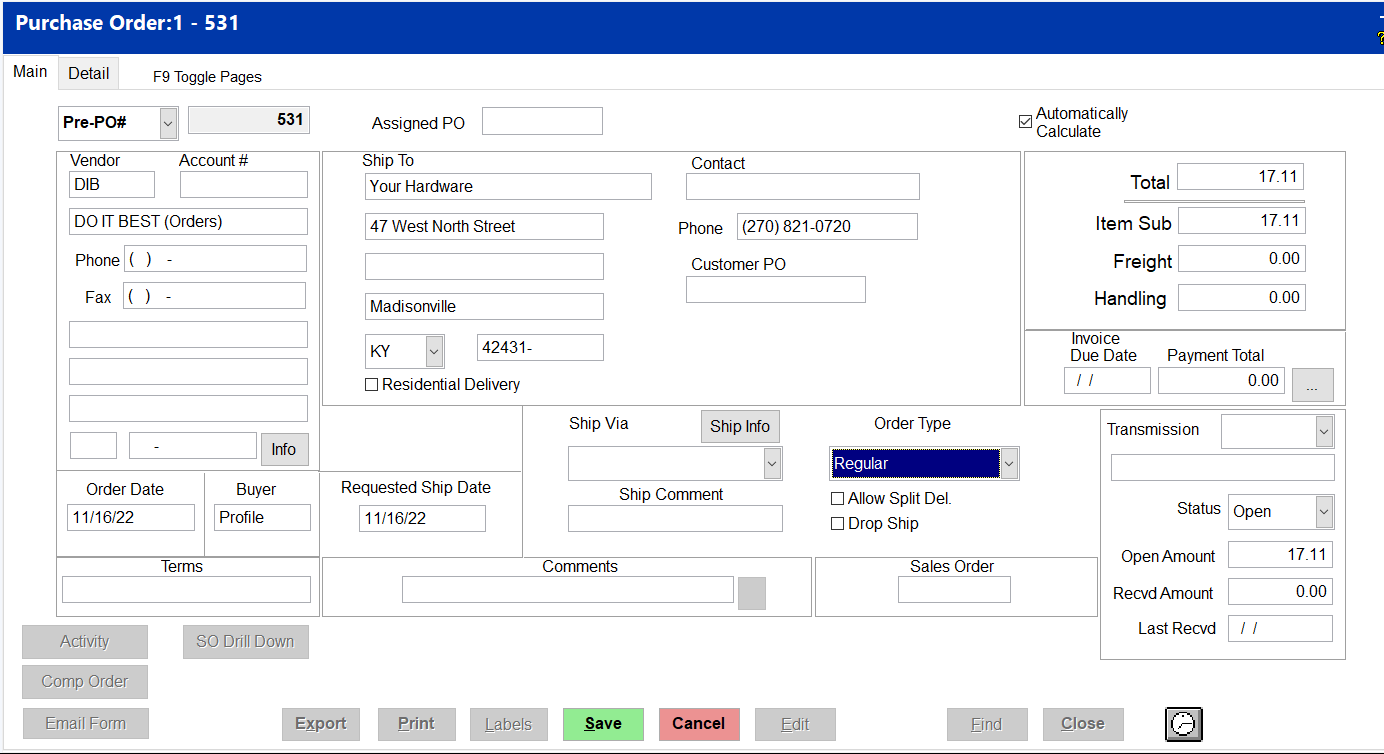
Select purchase order, the user is presented with the header information and then has the ability to review the details of the purchase order by selecting the Detail tab.
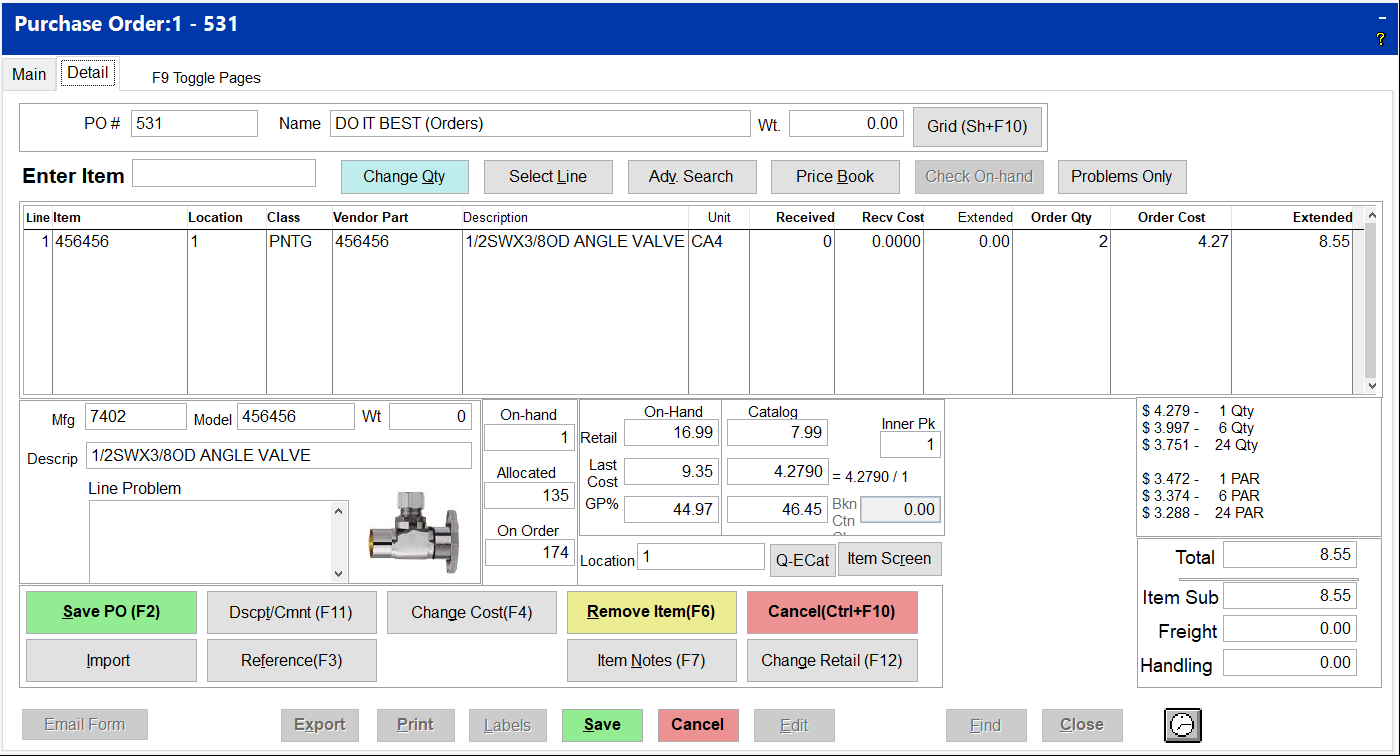
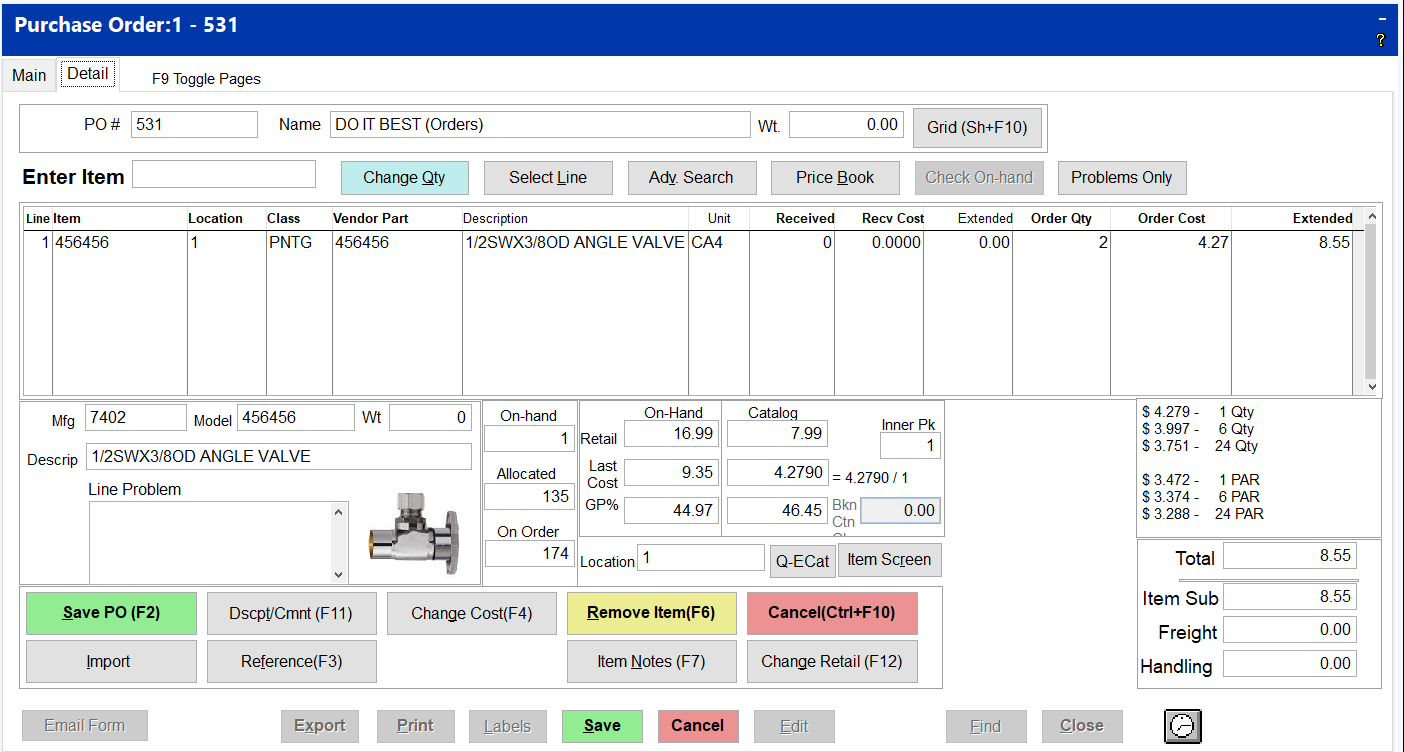
The Detail tab displays the single item ordered within the example above during the use of the hand held device.
With the purchase order created, the user may now process the purchase order as required, using Email, Export, or Print. Further modification of the purchase order may also be processed prior to completing the order.
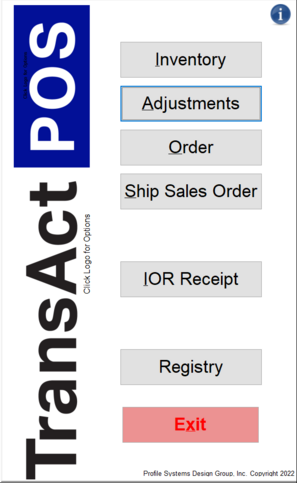
Wireless Inventory Adjustments
Selecting Inventory Adjustment will allow the changing of physical inventory, receipt of inventory, and the issuing of inventory using the wireless device.
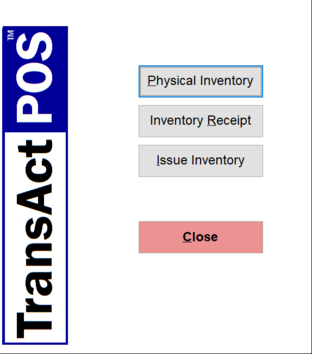
Physical Inventory
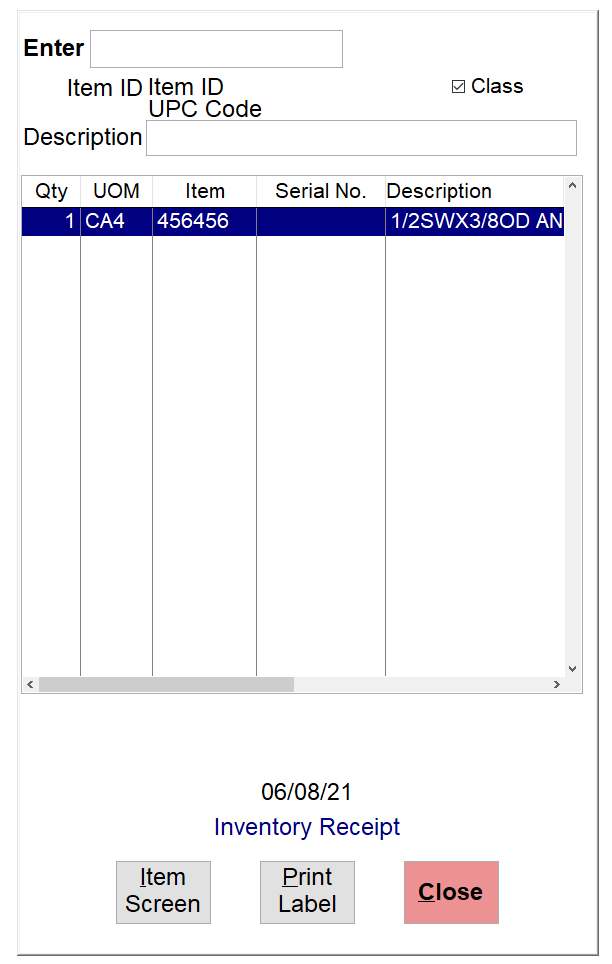
Inventory Receipt
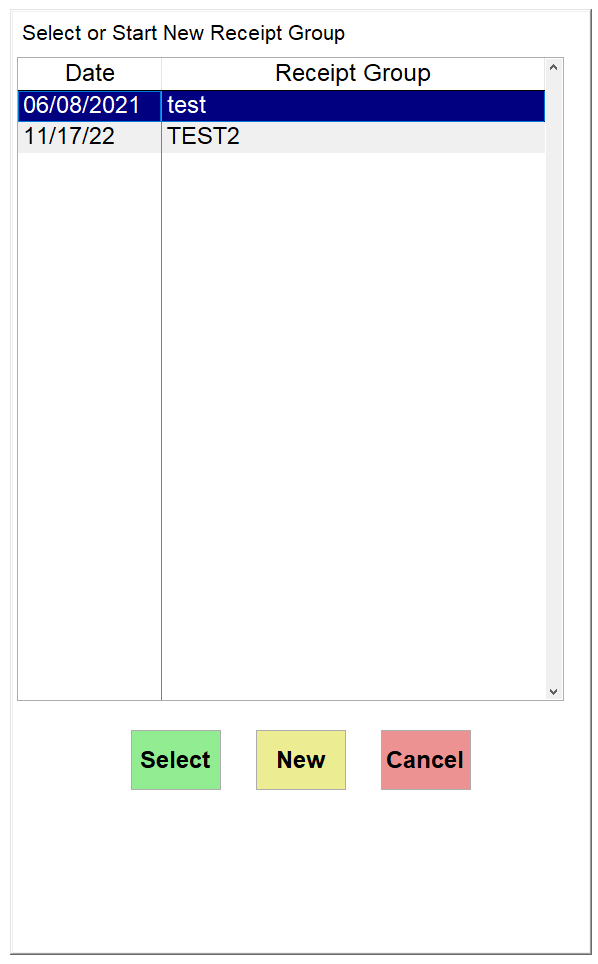
Select a Receipt Group to record the changes to the physical inventory or Click on the New button to create a new group.
If a new Receipt Group is to be created, enter a name appropriate to the items being received. Click on the Save button to continue.
Enter or scan the item numbers of the appropriate items.
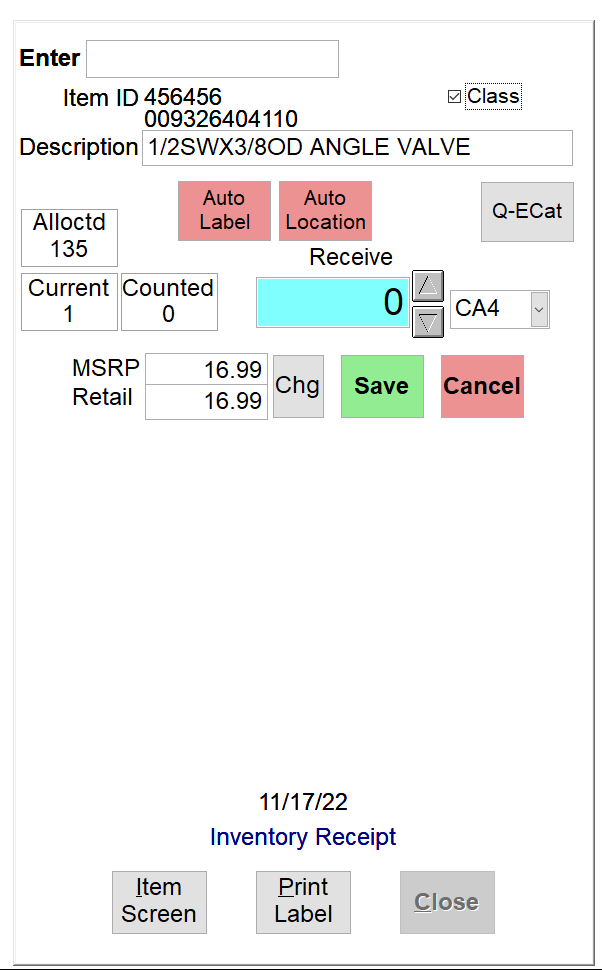
Enter the On-hand information for the item by typing it in or by clicking the up and down arrows to select the appropriate number. Change the price of the item by clicking on the Chg button. Change and/or print the labels.
Auto Label
Auto Print
Q-ECat
The Q-ECat will query the electronic catalog for detailed information in the selected item.
Chg
To change the MSRP and/or the Retail Price of an item while using the hand held device, select the Chg button to access the edit screen. Enter the desired MSRP and Retail price of the item and select Save to post the modification to the system. You can also check the No Mass Price option to disable mass pricing for the selected item and/or check the No Discounts option to disable any discounts, be it customer based or coupon based.
Item Screen
Print Label
Class
The Class box, when checked, will add the class of a new item to the detail of the item when the Auto-Add function is on.
Inventory Adjustment Issue Inventory
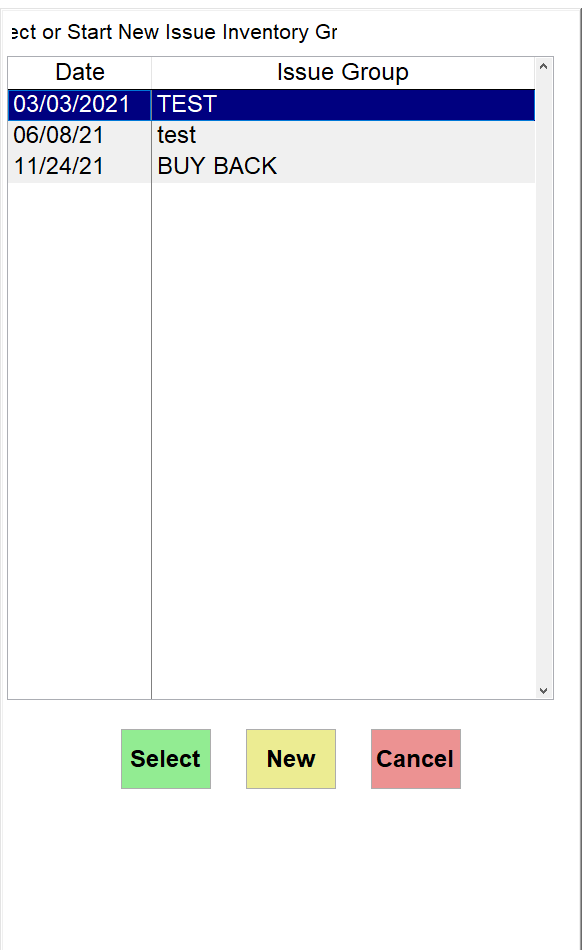
Select an Issue Inventory group or click on the New button to create a new group. If a new group is to be created, enter an appropriate name for the group and select Save.
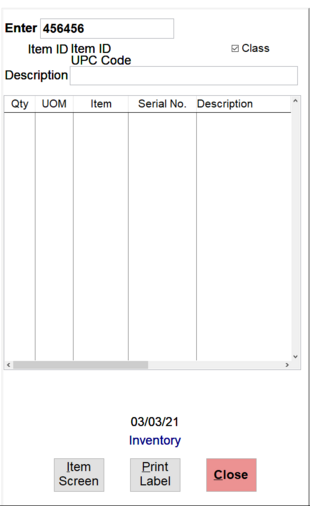
Enter or scan the item number of the item being issued.
Enter the number of items being issued for the item by clicking on the up and down arrows until the appropriate number is selected. Change the price of the item by clicking on the Chg button. Change and/or print the labels.
Auto Label
Auto Print
Q-ECat
The Q-ECat will query the electronic catalog for detailed information in the selected item.
Chg
To change the MSRP and/or the Retail Price of an item while using the hand held device, select the Chg button to access the edit screen. Enter the desired MSRP and Retail price of the item and select Save to post the modification to the system. You can also check the No Mass Price option to disable mass pricing for the selected item and/or check the No Discounts option to disable any discounts, be it customer based or coupon based.
Item Screen
Print Label
Class
The Class box, when checked, will add the class of a new item to the detail of the item when the Auto-Add function is on.
Order
The TransActPOS Wireless Order Tab allows users to create "Pre-Purchase Orders" in the coverage area. Pre-Purchase Orders are precursors to standard purchase orders. This process allows a back office user to review the activity of orders generated on the floor while creating the purchase order.
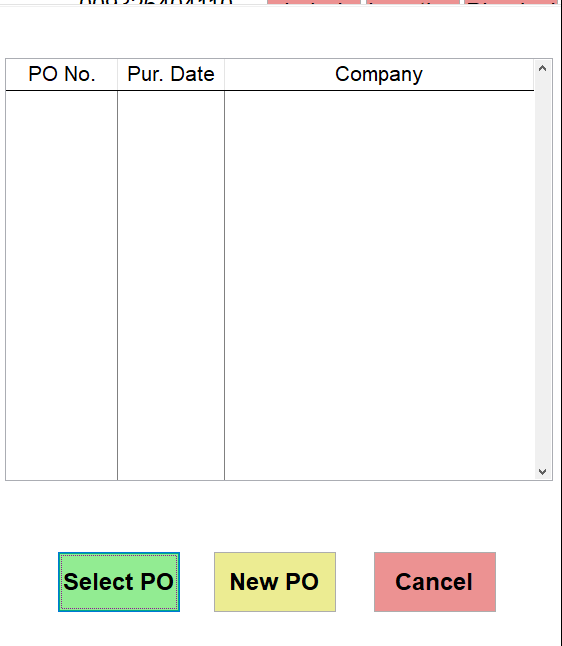
Scan or Type in Item number, select the “Order” button. If the item has a PO already created, you will see a screen similar to the one below.
If the item is not on a Pre-PO or you wish to create a new Pre-PO, click New PO.
Choose the Qty to Order and click Order Item. If you need to review the sales history for the item click on the Sales History button.
From the TransActPOS desktop application, the Purchase Order module will allow the user to modify the purchase order just created on the wireless unit. Using the Modify PO option of the PO module, you can search all POs created, either on the desktop or wireless device. In the example below, the user has filtered the search to "Pre-POs." This will show only the POs created on the wireless device.
Selecting purchase order 531, the user is presented with the header information and then has the ability to review the details of the purchase order by selecting the Detail tab.
The Detail tab displays the single item ordered within the example above during the use of the hand held device.
With the purchase order created, the user may now process the purchase order as required, using Email, Export, or Print. Further modification of the purchase order may also be processed prior to completing the order. Please refer to 05-010-1 Purchase Order Training #1 for full descriptions and processes of PO’s.