07-030-1 Rental Training #1 - System Configuration
Overview
Similar in design to the point-of-sale screens, the rental module is also configurable. Some stores prefer to get the scheduled time before selecting the rental item, while others will address the scheduled time after the rental item is selected. The point is that each business is unique in the process used during the sales process. TransActPOS can help address this issue with the flexible configuration found within the System > Company Setup module.
Company Setup/System Setup for Rental Calendar
Go to the Main menu of TransActPOS and click on System then Company Setup. Then click on Rental Manager Page 1.
Rental Management Page 1
In this section you will be filling in required information of your store’s working hours.
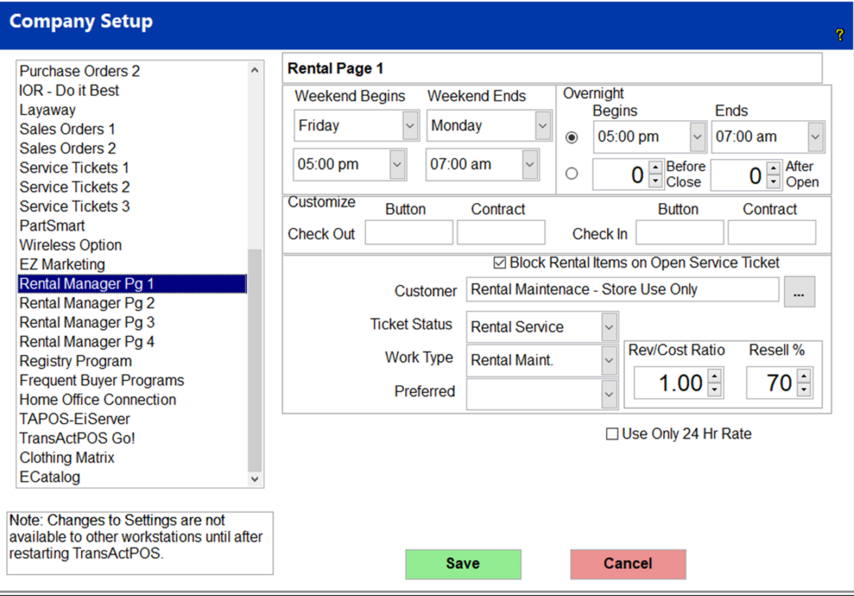
Weekend Begins - Weekend Ends
Fill in what day the Weekend Begins and Weekend Ends along with the Store’s weekend hours. This allows rental items to be rented over the weekend.
Overnight
Fiil in what time Overnight begins and ends.
-
If the store’s hours vary during the week, the overnight beginning and ending times can be controlled by entering the number of hours Before Close and After Open. Select the radio button to the left to activate this option.
Revenue to Cost Ratio and Reselling Percentage
The Revenue to Cost ratio setting will mark an item for resale once the setting is reached. The Revenue to Cost ratio report of an item is generated in the Options, Rental Reports, Item Analysis. The Resell percentage is the sale percentage price of an item’s cost that has reached its set Revenue to Cost ratio.
Only 24 Hour Rate
Checking the Use Only 24 Hr Rate will only use the 24 hour rate when items are rented.
Once everything is completed on this page click on Rental Manager Page 2.
Rental Management Page 2
This is a continuation of the Store Working Hours/Holiday Hours and other miscellaneous settings.
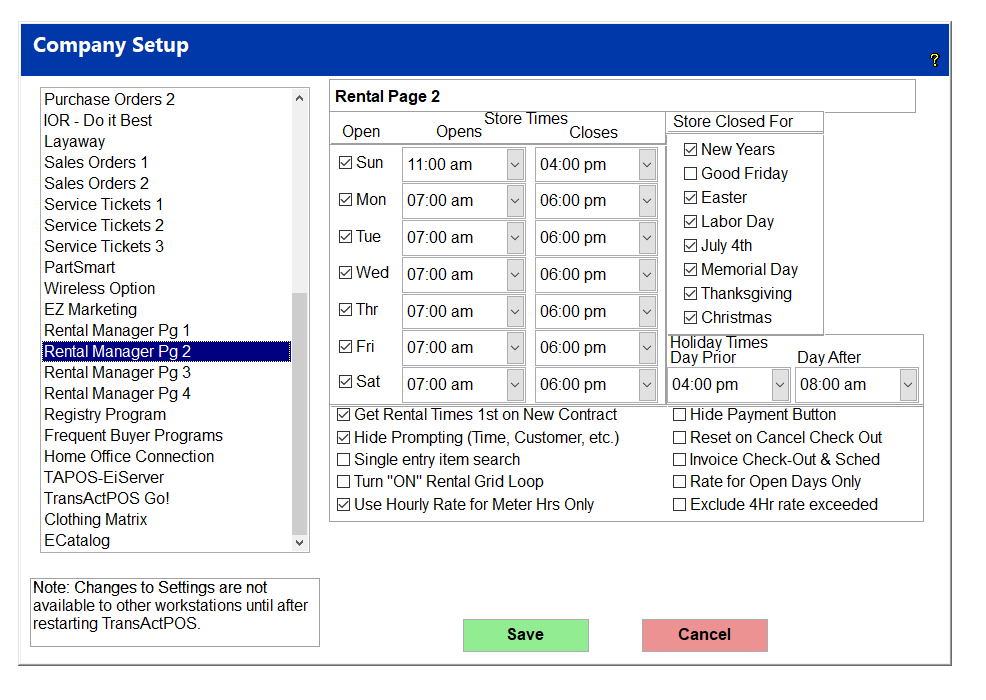
Store Times
Check all the days the store is open. Enter in the Stores open and closing times for each day the store is open.
Holiday Store is Closed
Check all the Holidays the store is closed.
Holiday Hours
Enter the store closing hour prior to a holiday and the opening store hour after a holiday. In the example above the Store will close at 4 PM on Christmas Eve and reopen 8 AM December 26th (the day after Christmas).
Get Rental Times First
Typically this option is checked so the system can confirm the availability of the selected rental item.
Rental Management Page 2
This is a continuation of the Store Working Hours/Holiday Hours and other miscellaneous settings.

Store Times
Check all the days the store is open. Enter in the Stores open and closing times for each day the store is open.
Holiday Store is Closed
Check all the Holidays the store is closed.
Holiday Hours
Enter the store closing hour prior to a holiday and the opening store hour after a holiday. In the example above the Store will close at 4 PM on Christmas Eve and reopen 8 AM December 26th (the day after Christmas).
Get Rental Times First
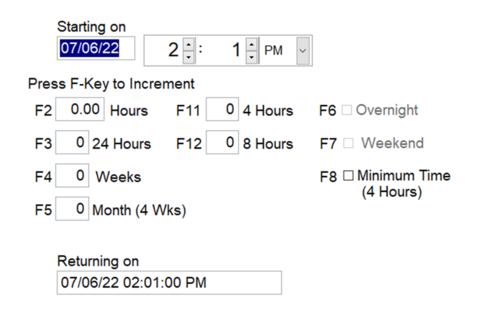
Checking the box Get Rental Times 1st on New Contract allows the Rental Time screen to be displayed before the information is entered into the contract (see below). Function Keys are provided for quick entry to increment rental times.
Hide Prompting
Checking the box Hide Prompting (Time Customer, etc) will reduce the number of prompts such as the Time prompt and the Customer prompt.
Single Entry Item
Checking the box Single entry item search allows Item number entry of rental items or merchandise on the rental screen or the merchandise screen.
Rental Grip Loop
Checking the box Turn “On” Rental Grid Loop allows the grid to be shown even after selecting an item from the grid to invoice into the rental screen. To end the loop, close the grid out. Unchecking this box will force you to select Grid again to enter another item from the grid.
Hourly Rate for Meter Hours
Checking the Use Hourly Rate for Meter Hrs Only allows only the hourly rate to be added for any additional meter hours used. If unchecked, the regular hourly rate schedule will apply regardless of the meter hours used.
Hide Payment Button
Checking the Hide Payment button removes the payment button from the screen. Payments will then be taken from the invoice.
Reset on Cancel Check Out
Checking the Reset on Cancel Check Out will terminate the checking out payment process and reschedule the rental contract until payment is made. If the Reset on Cancel Check Out is not checked, on a cancel payment, the check out is completed with the payment to be made later.
Invoice Check-Out and Schedule
Checking the Invoice Check-Out & Sched allows the rental contract to be invoiced and times scheduled at the time of checking out.
Rate for Open Days
Checking Rate for Open Days Only, the system will only use open days for calculation of rent.
Exclude 4 Hour Rate Exceeded
Checking the Exclude 4Hr rate exceeded will allow the daily rate to be used any time the 4Hr rate is exceeded. If not checked, multiples of the 4 Hr rate will be used if the total is less than the daily rate.
Once everything is completed on this page click on Rental Manager Page 3
Rental Management Page 3
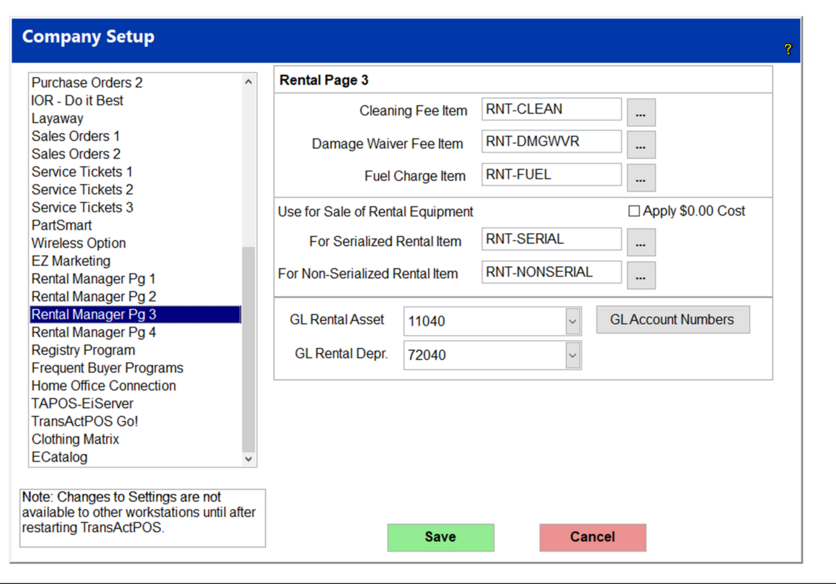
In this page you will be setting up fee items and Serialized and Non-Serialized Items used when you are selling rental equipment. You will also be putting your GL account numbers for Rental.
Cleaning Fee Item
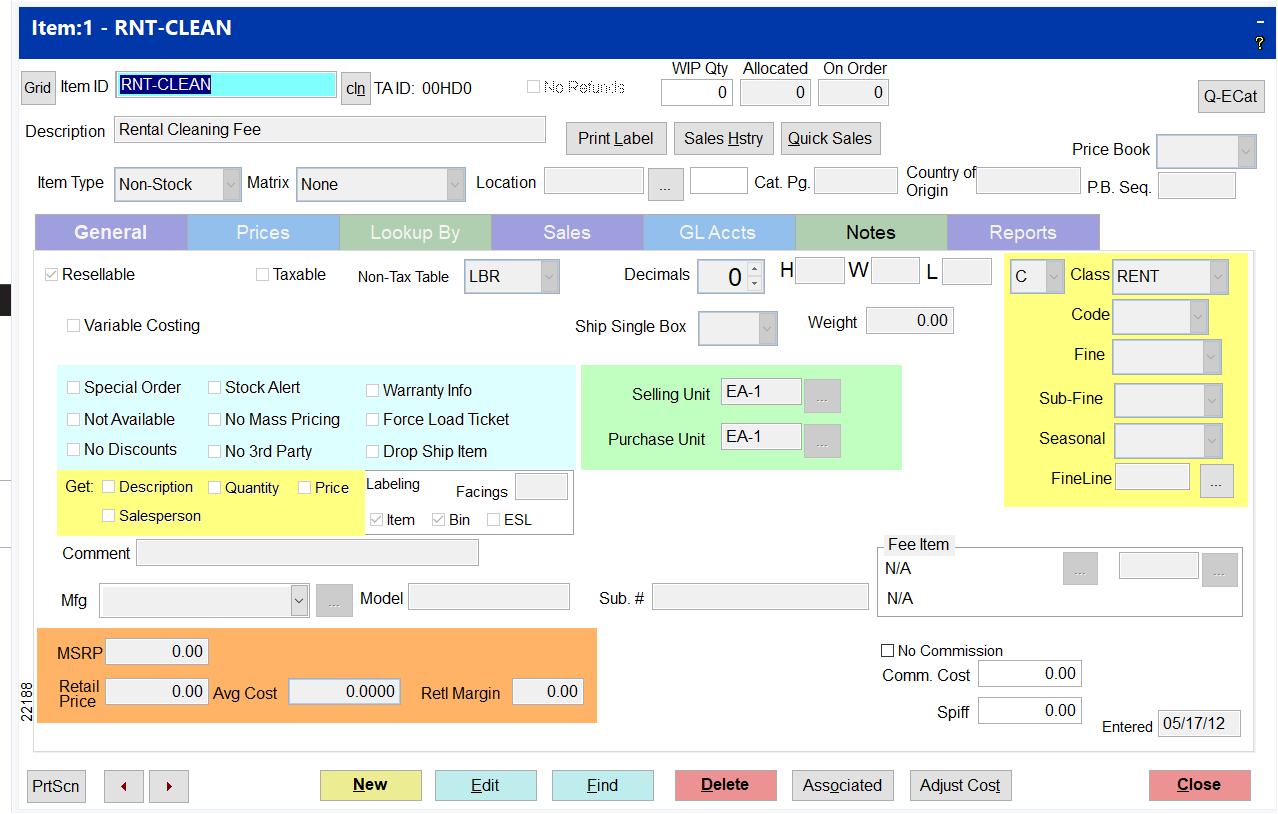
Cleaning Fee Item - Within the Inventory Control module, create a non-stock inventory item for cleaning fees. Once this item has been established, indicate the appropriate item number in the field provided. In this example the item number/name is RNT-CLEAN (see below)
Damage Waiver Fee Item
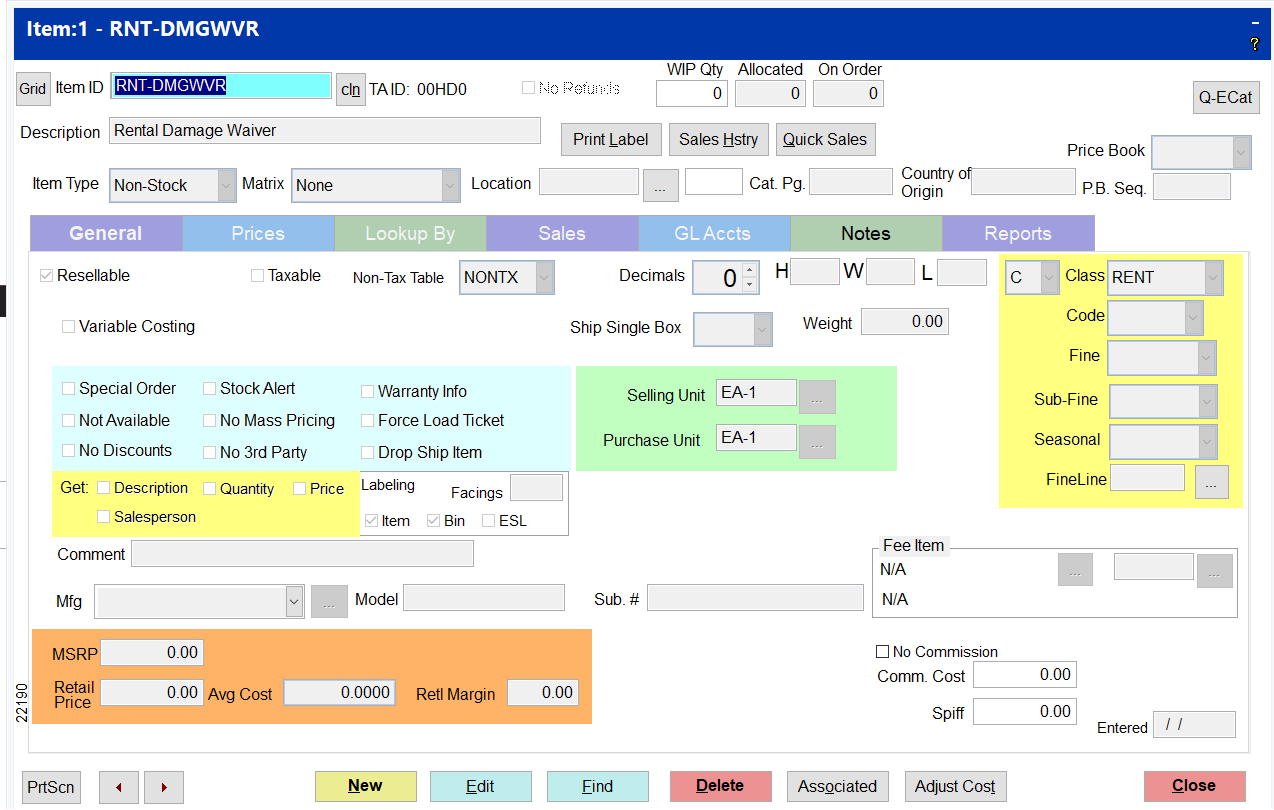
Damage Waiver Fee item - Within the Inventory Control module, create a non-stock inventory item for damage waiver fees. Once this item has been established, indicate the appropriate item number in the field provided. In this example the item number/name is RNT-DMGWVR (see below).
Fuel Charge Item
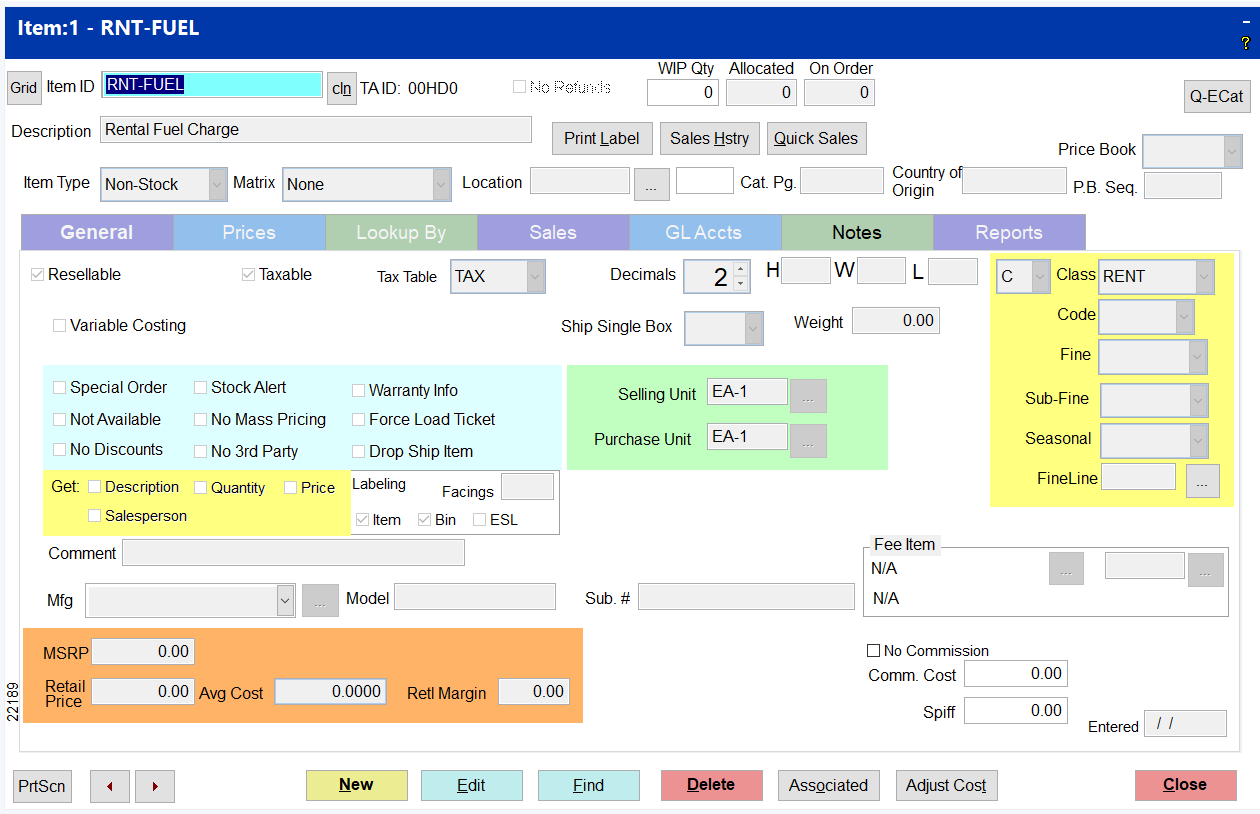
Fuel Charge Item - Within the Inventory Control module, create a non-stock inventory item for fuel charges. Once this item has been established, indicate the appropriate item number in the field provided. In this example the item number/name is RNT-FUEL (see below).
Serialized Rental Item
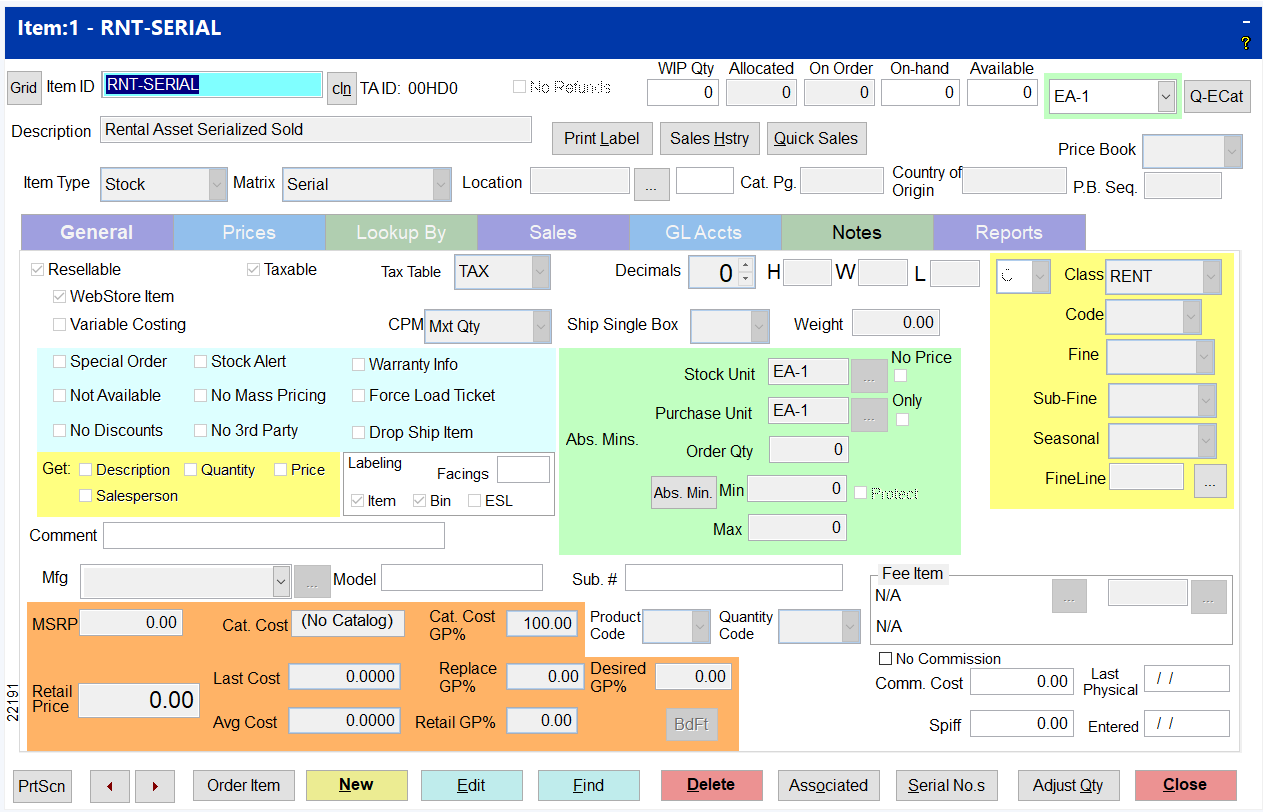
Within the Inventory Control module, create a stock inventory item for Serialized Rental Item selling a piece of rental equipment. Once this item has been established, indicate the appropriate item number in the field provided. In this example the item number/name is RNT-SERIAL (see below).
Non-Serialized Rental Item
For Non-Serialized Rental Item - Within the Inventory Control module, create a stock inventory item for Non-Serialized Rental Item for selling a piece or rental equipment. Once this item has been established, indicate the appropriate item number in the field provided. In this example the item number/name is RNT-NONSERIAL (see below).
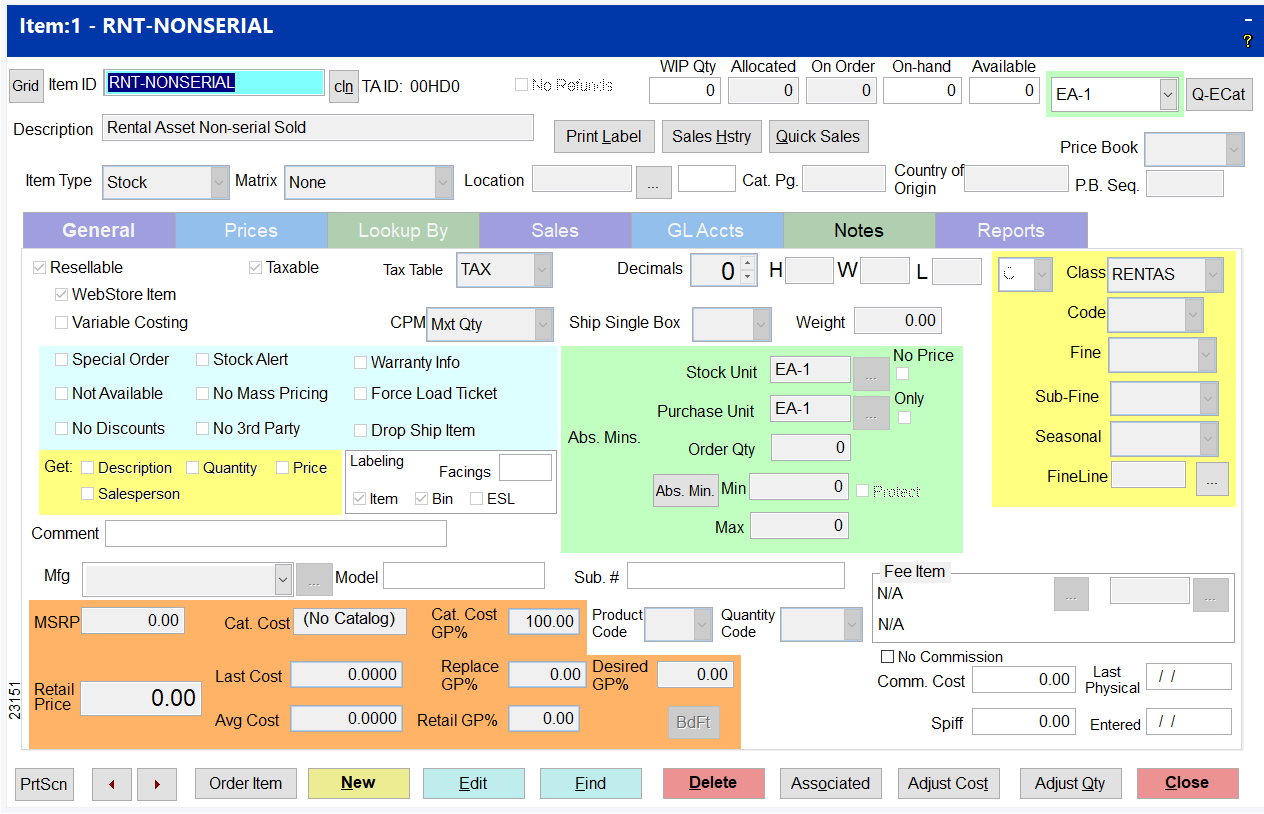
GL Account Numbers
If using GL fill in the GL Rental Asset with the GL account associated with Rental Asset and fill in the GL Rental Depr. with the GL account associated with GL Rental Depreciation.
Once everything is completed on this page click on Rental Manager Page 4
Rental Management Page 4
In this section you will be setting up what Rental Rates will be used.
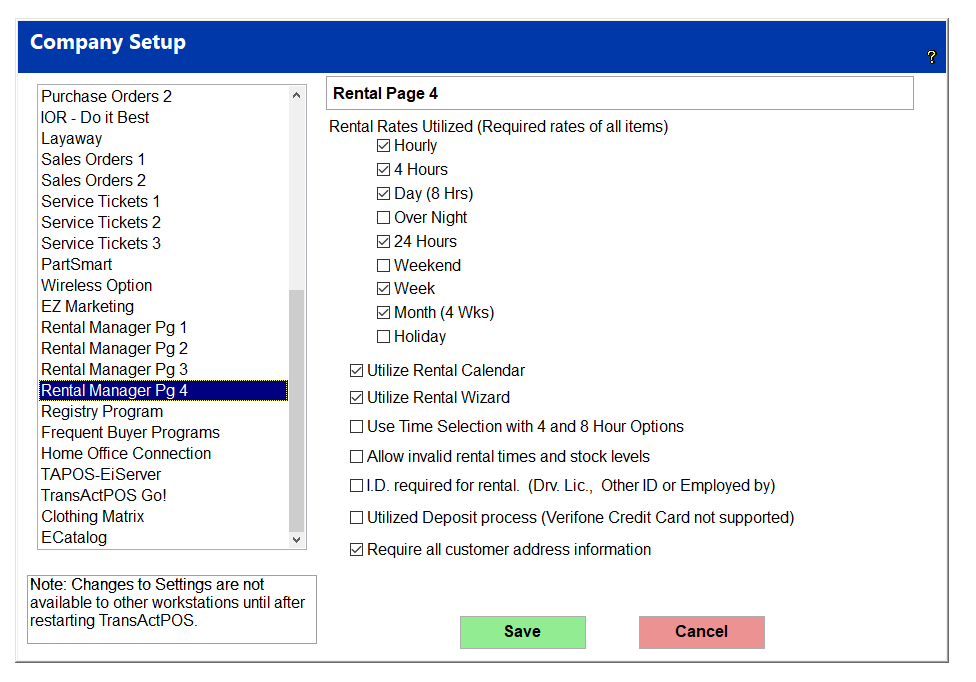
Rental Rates Utilized
Rental Rates Utilized (Required rates of all items) - Check the boxes for the rates your store will use. Any rates that have a check next to them here MUST have a value on every rental item for that rental rate.
Utilize Rental Calendar
Checking Utilize Rental Calendar will load the new rental calendar every time Rental is selected from the main menu. Normally this option is checked.
Utilized Rental Wizard
Checking Utilize Rental Wizard will allow the use of the rental wizard to create a rental reservation or contract. Normally this option is checked.
Use Time Selection with 4 and 8 Hour Options
Checking Use Time Selection with 4 and 8 Hour Options will allow you to only use the 4 and 8 Hour rental options. All other time periods will not be accessible.
Allow Invalid Rental Times and Stock Levels
Checking Allow invalid rental times and stock levels will allow you to have conflicts in rental times and stock levels of rental inventory.
I.D. Required for Rental
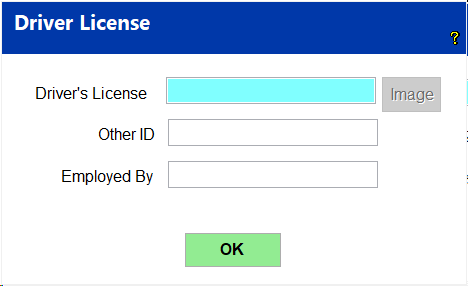
Checking I.D. required for rental (Drv. Lic, Other ID or Employed by) will require the rental customer to show/have correct identification at the time of rental. This includes a driver's license, other ID or employed by ID and a box will appear (see below) for you to enter the information.
Require All Customer Address Information
Checking Require all customer address information will require the customer’s address information to be completed.