Adding a New Customer
For more information on using the Customer Wizard, see the video 02-010-008 AR: Add Customer Wizard.
You can easily add a new customer to your AR records using the Customer Wizard. The Wizard is a series of screens that walk you through the fields in the customer file. You can click Save at any time to exit the Wizard and create a customer file with the information entered.
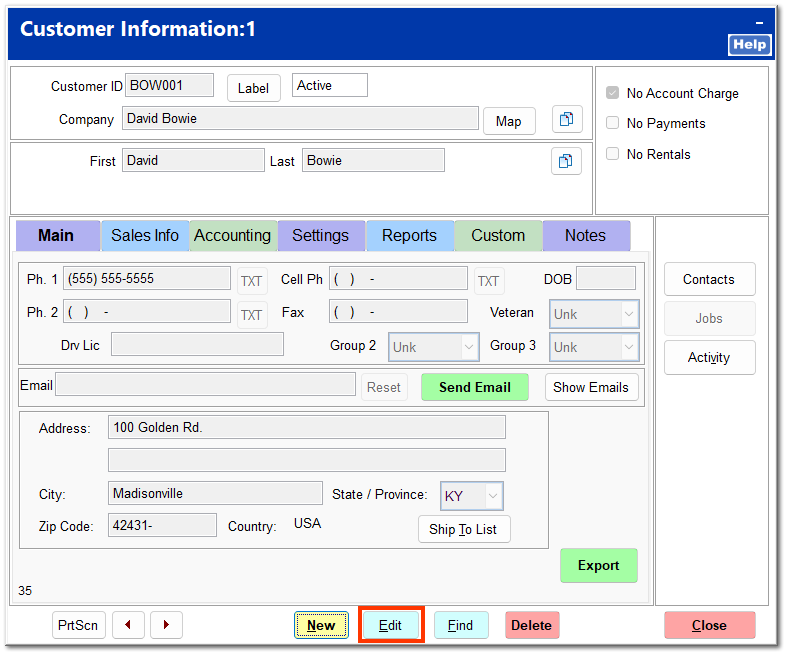
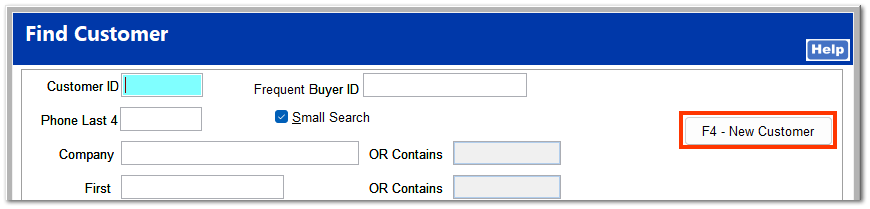
From AR | Customer File | Find Customer, click the F4 - New Customer button or press the F4 key.
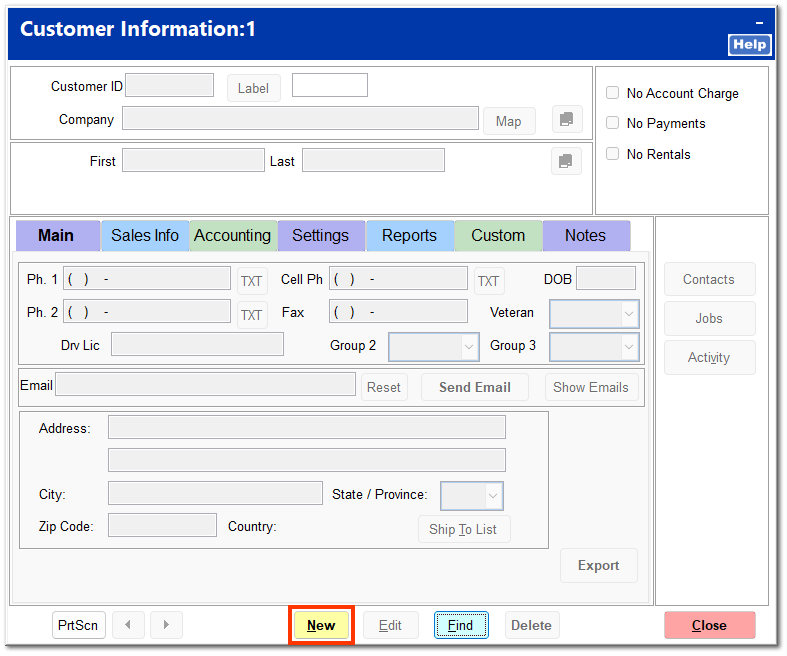
Alternatively, you can click New on the Customer File.
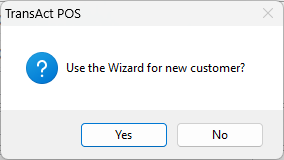
Upon clicking either of these buttons, you are prompted to use the Customer Wizard.
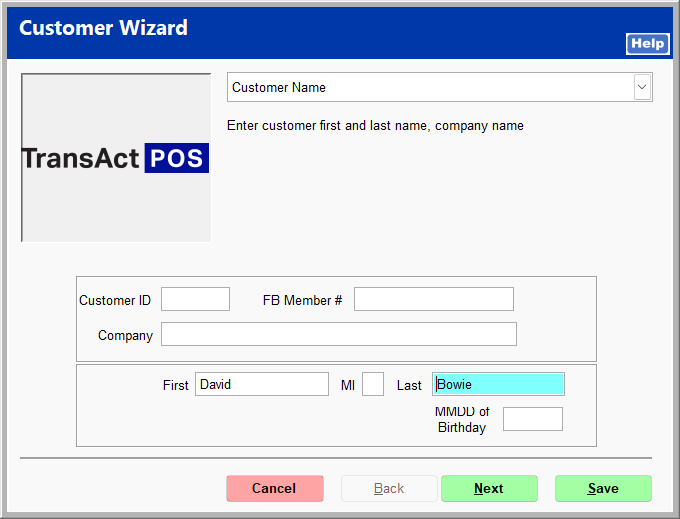
The Wizard opens with the Customer Name screen. Enter a customer ID according to your store's policy. If a customer ID is not entered, the system automatically creates one using the first three letters of the customer's last name, plus a numbering convention. If only a company name is entered with no customer name, the customer ID is created using the first three letters of the company name, plus a numbering convention.
You are required to enter either a first and last name for the customer or a company name. All other fields on this screen are optional. Click Next to continue.
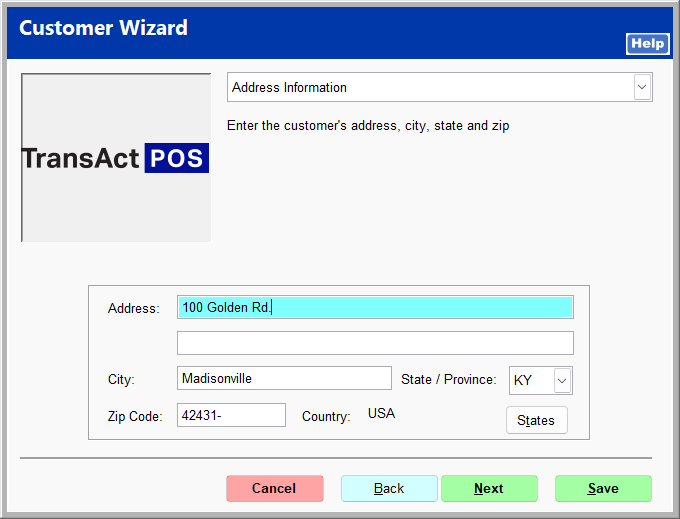
You may enter a billing address for the customer. All fields on this screen are optional. Click Next to continue.
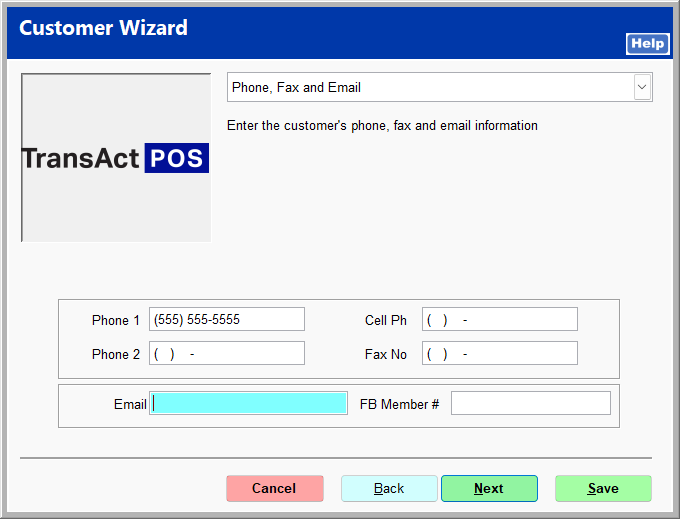
You may enter contact numbers and an email address for the customer. All fields on this screen are optional. Click Next to continue.
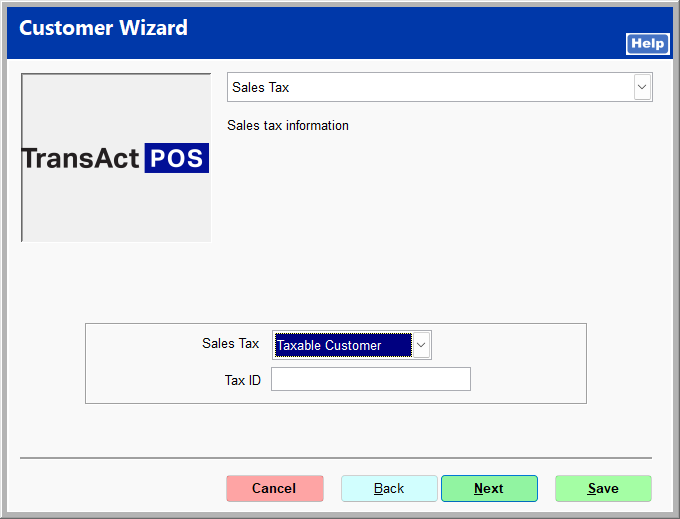
Choose the correct taxation for the customer from the dropdown menu. If the customer is non-taxed, a tax ID should be entered. Click Next to continue.
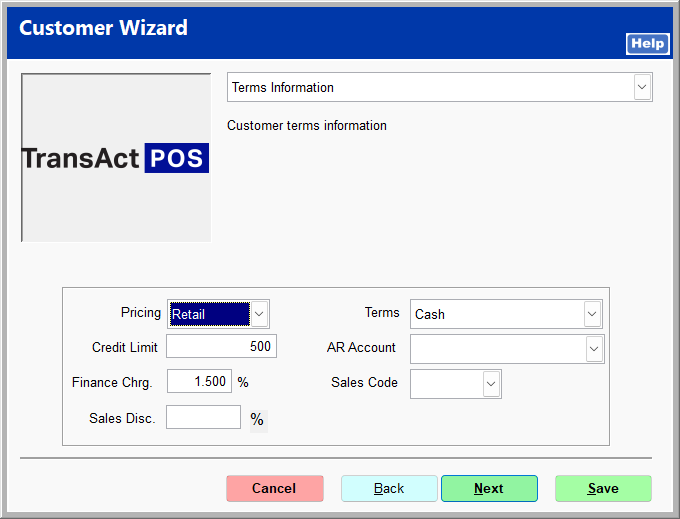
On the Terms Information screen, some fields are automatically entered using the default values in System | Company Setup | Accounts Receivable 1. You may use the defaults or enter terms specific to the customer. Click Next to continue.
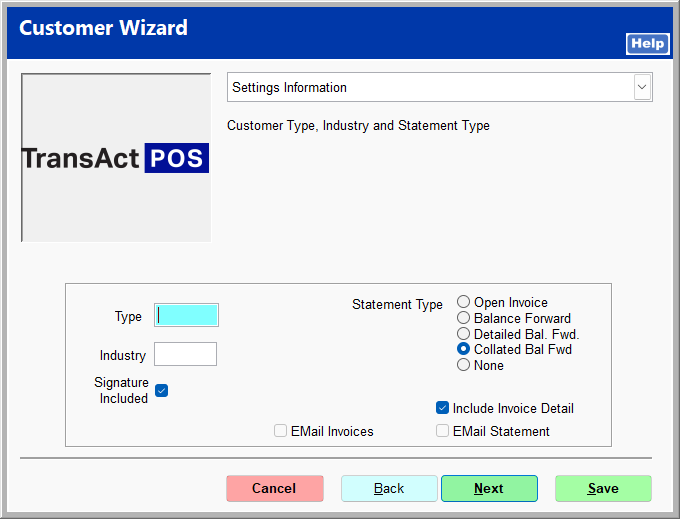
You may enter a type and industry for the customer. If your store captures electronic signatures, indicate whether the signature should be included on the statement. You can change the default statement type, include invoice details on statements, and indicate whether to email invoices and statements. Click Next to continue.
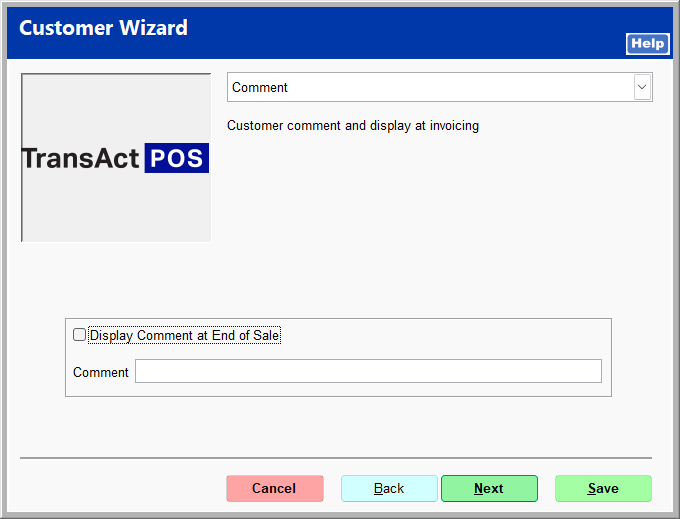
You may enter a customer comment for the clerk and check the box to display it at the end of the sales process. This is not required. Click Next to continue.
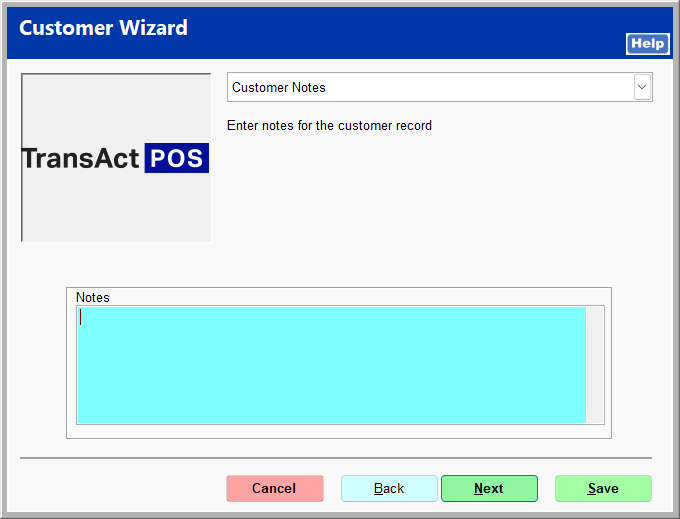
You may enter notes to document additional information regarding the customer. These are for internal use only and are not required.
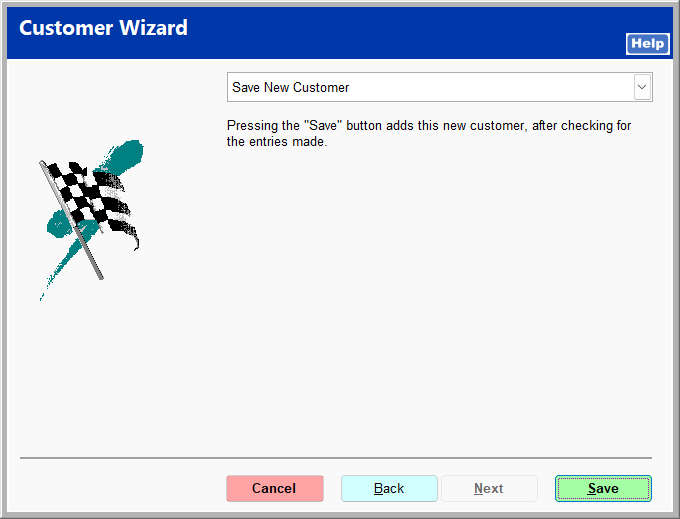
Click Save to complete the entry for the new customer. You can click Back to make changes on a previous page, or you can select the page from the dropdown menu.
The customer file is created with the information entered in the Wizard. Additional information may be entered by clicking Edit.