1, 2, 3, 4 of Statement Printing
The majority of statement printing can be done in four simple steps.
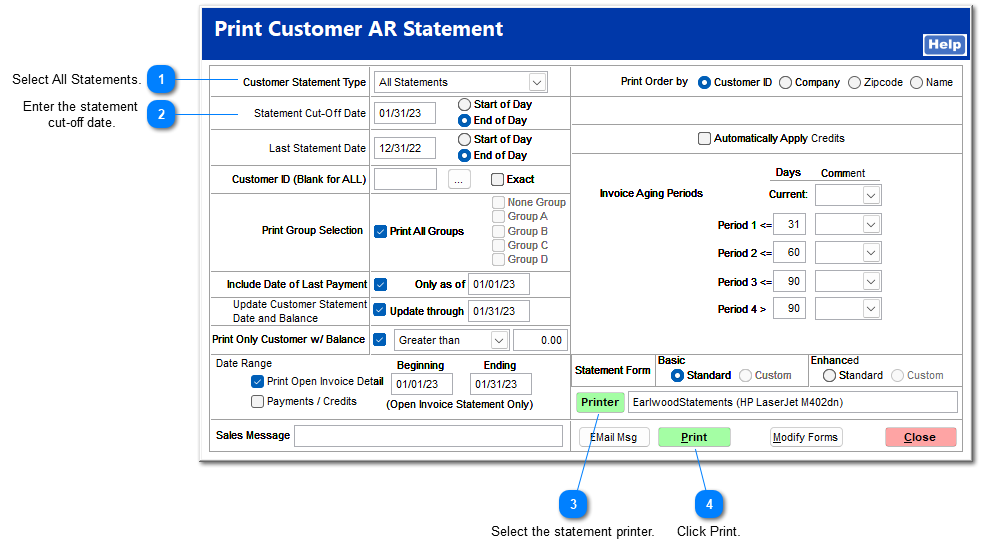
Select All Statements.Selecting All Statements prompts the system to print each customer's statement based upon the statement type selected in AR | Customer File | Settings.
|
Click Print.Upon clicking Print, the system prints or emails each customer's statement based upon the printing and email settings in AR | Customer File | Settings.
|