(c) Profile Systems Design Group, Inc. 2026 Build: 4.008.811 Help ID: 878
If you do not see the expected content,press CTRL + F5 to clear your Browser's cache.
Steps to using the Registry during POS
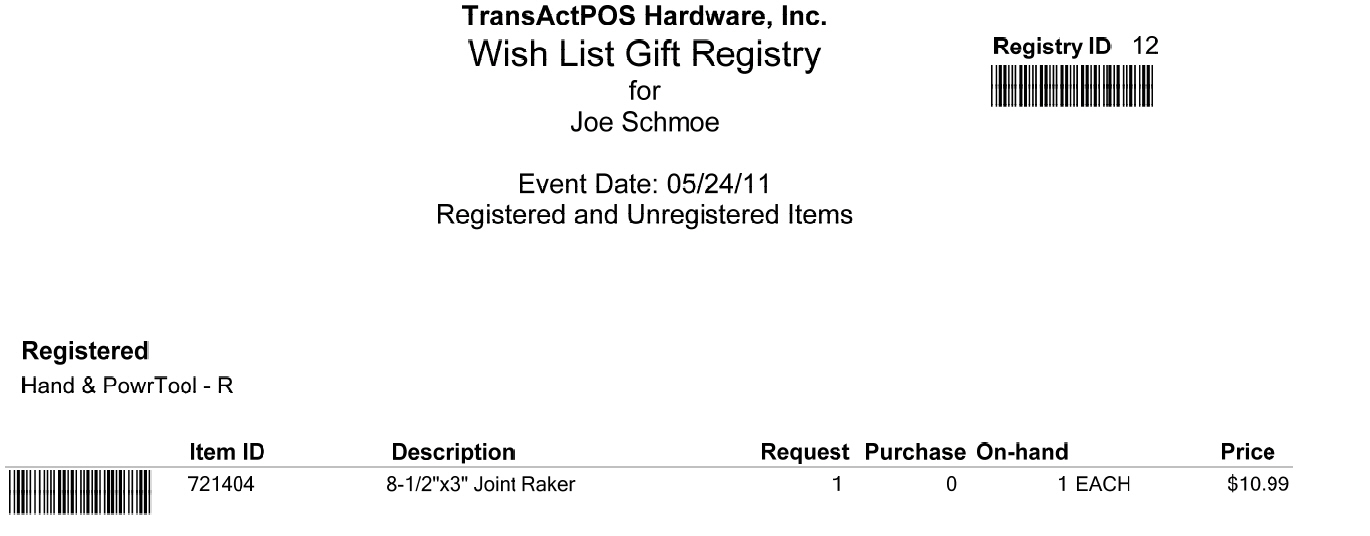
Scenario: A customer arrives at the store requesting the gift registry for the recipient. The clerk proceeds to Options | Gift Registry and locates the registrant by name and then selects the Print registry button to print a copy of the registry for the customer. The report below is then printed for the customer to the system's report printer. Prices may be omitted from the list as appropriate.
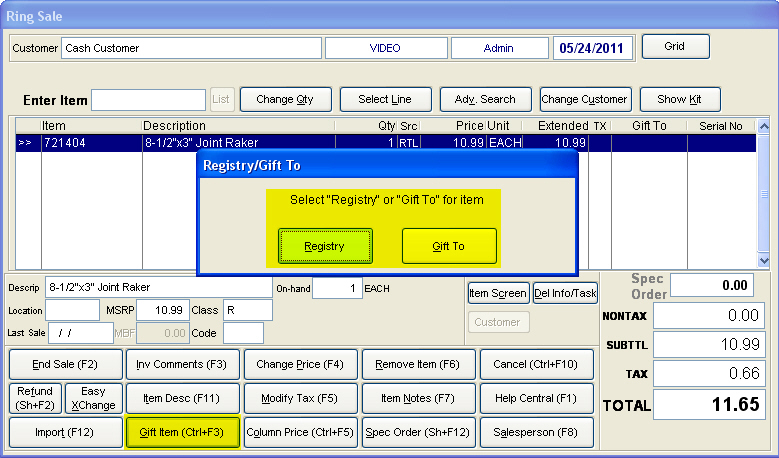
After the customer returns to the sales counter with their selected item(s) which may contain both gifts and individual purchases, the sales clerk will enter the POS | Ring Sale Screen. When the sales clerk enters an item that is within the customer's registry, the sales clerk must select the Gift Item (Ctrl + F3) option to indicate that the item is from a registry. The screen below is an example of the Registry/Gift To selection screen. Since this example is dealing with a registry item, select Registry to continue to the Gift Registry Selection Screen.
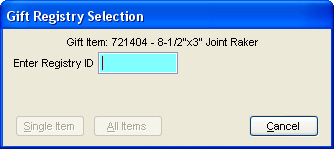
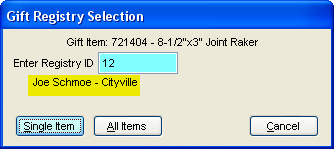
The sales clerk is requested to enter the Registry ID, which is located on the printed gift registry. The number may be scanned using the indicated barcode in the top right of the report or by simply entering the registry ID number. Upon entering the number, the system presents the registrant's header information for confirmation. Choosing the Single Item or All Items button will complete the process of relating the sale to the gift registry.
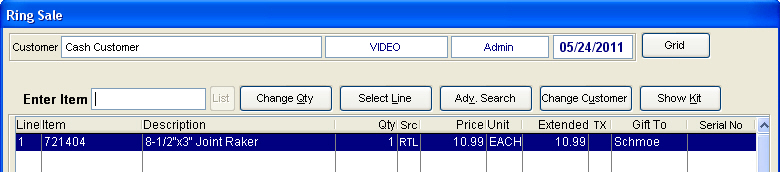
Upon returning to the Ring Sale screen, note that the selected registrant's last name is indicated within the "Gift To" column.