Exporting Peachtree Chart of Accounts
An easy way to update is to load the chart of accounts into TransActPOS, to export the chart of accounts from Peachtree, and then import into TransActPOS.
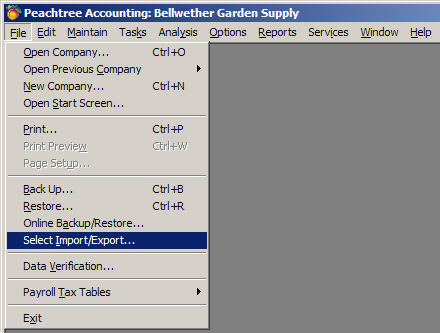
The first step to loading the Peachtree Chart of Accounts into TransActPOS is accomplished within the Import/Export feature located within the File Menu of Peachtree.
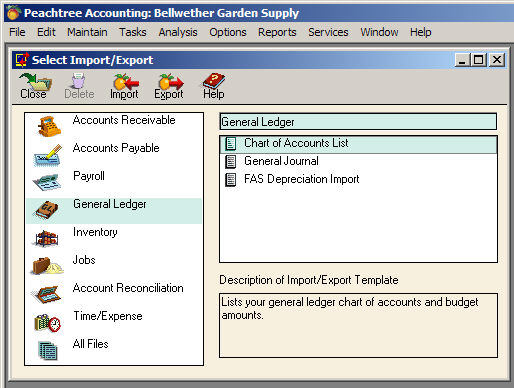
Next, select "General Ledger" within the left panel and "Chart of Accounts List" within the right panel. Next select the "Export" icon which appears just above the two panels just described.
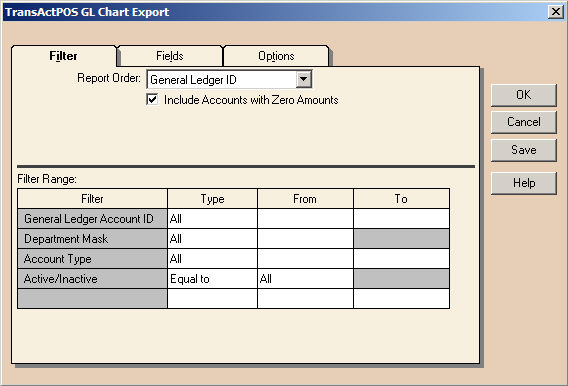
The next screen contains three tabs; Filter, Fields, and Options.
Within the Chart of Accounts List | Filter tab:
-
Within the "Report Order:" field; select "General Ledger ID".
-
Observe the "Include Accounts with Zero Amounts:" and make sure that it is checked.
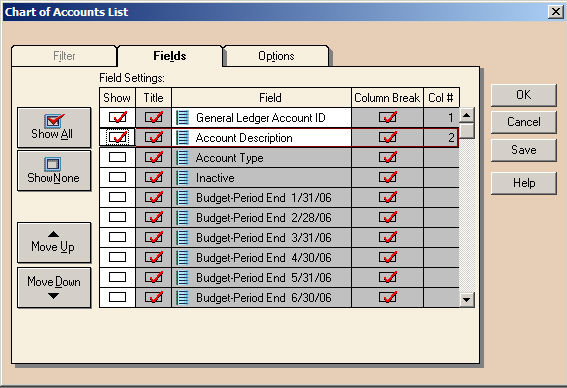
Within the Chart of Accounts List | Fields tab:
-
To easily configure the "Fields" tab, select "Show None" thus clearing all "Show" check marks.
-
Then individually check "Show" for the field of "General Ledger Account ID" and "Account Description".
Within the Chart of Accounts List | Options tab:
-
Within the Import/Export File: select the destination path for the resulting file export. In this example, the file has been placed within a "Peachtree" directory located within the TransActPOSServer directory. The Peachtree directory was manually created prior to start of this process. The important part is that you remember where the file is located when it comes time to import this information back into TransActPOS.
-
Within Export Options, the "Include Headings" should be checked.
-
Within Export File Exists, typically "Ask, then Overwrite" should be selected.

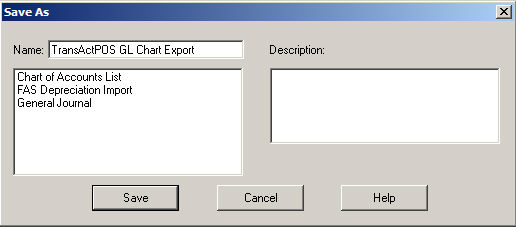
Selecting the "Save" button prompts the user to assign a Name to the current settings. In this example, "TransActPOS GL Chart Export" was used to designate the selected settings. Upon return to the Select Import/Export menu, this saved export name will be included within the General Ledger selection of settings thus making it easier to repeat the process from the saved settings.
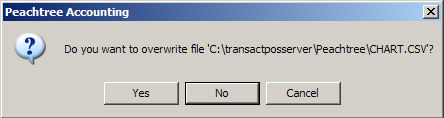
Selecting "OK" will create the specified export file containing the chart of accounts to the designated output directory. The following prompt may appear depending upon the system configuration indicated within the previous Options tab. Typically the response to this prompt will be "Yes" to overwrite the existing file.
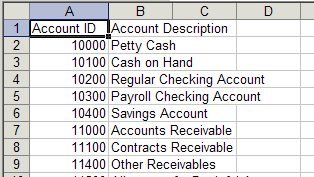
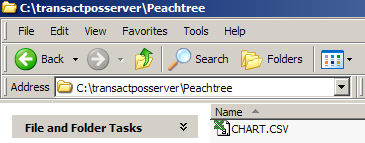
The resulting output file in this case is CHART.CSV located in the C:\TransActPOS\Peachtree directory. Your specific file location may vary depending upon your configuration.
The results of the export can be viewed within Microsoft Excel or Notepad. Upon opening the file, two columns of information should be viewable. You may want to review the chart listing to further understand the contents of the file prior to importing into TransActPOS.