Printing Customer Statements
Summary of Process
-
Review the Customer Aging Report for accuracy
-
Review printed statements
-
Stuff statements and mail
1) Review Customer Aging Report
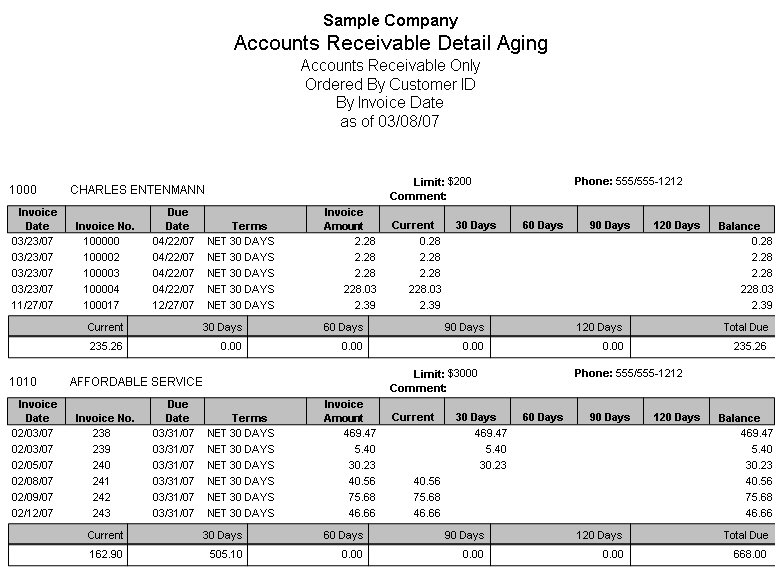
Checking the customer aging report, either directly on the screen preview or from the printed page, allows you to review the status of the customer accounts prior to creating finance charges and printing statements. Normally a quick review of the account listing will be enough to give you a good idea of how the accounts are doing.
The customer aging report is located in AR | Reports | Aging Report. Select between the detailed or summary report format during your review to fit your preference.
Detailed Customer Aging Report
Summarized Customer Aging Report

2) Create Customer Finance Charges
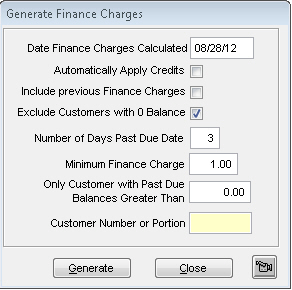
After reviewing the aging reports, select AR | Finance Charges to create the applicable finance charge as indicated by each customer's overdue invoices and specified finance charge rate.
-
The "Date Finance Charges Calculated" will be the last day of the billing month.
-
Automatically Apply Credits is normally blank
-
Include previous Finance Charges is normally blank
-
Exclude Customers with 0 Balance is normally checked
-
Number of Days Past Due Date, typically 2 or 3 days which allows for customer who wait till the last minute to send in their payment
-
Minimum Finance Charge typically $1.00 - your individual company policy will mandate this selection
-
"Only Customer with Past Due Balances Greater Than" is normally set to zero.
Select "Generate" to review the results of the settings.
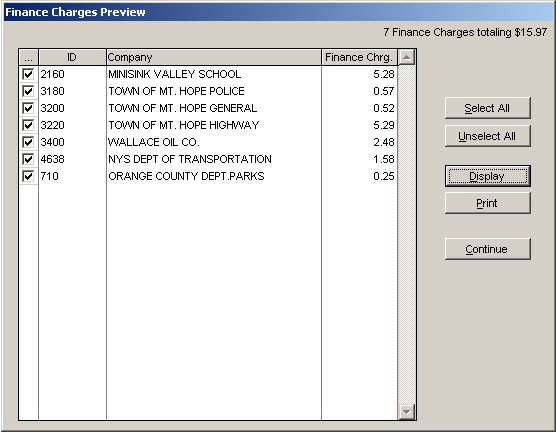
The system will present a "Finance Charges Preview" listing which represents the calculated finance charges.
-
If all charges are correct, simply select Continue to proceed with the creation of the indicated finance charges.
-
Un-checking the box to the left of the customer ID will eliminate the creation of the indicated finance charge when the continue button is selected.
-
If the individual finance charge is incorrect, go to the individual customer and edit the finance charge.
The following listing is based upon a $ 1.00 minimum finance charge.

The following listing is based upon a $ 0.00 minimum finance charge.
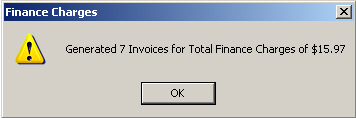
Once the Continue button is selected, the system presents a confirmation message prior to creating the finance charge invoices. Selecting "Yes" begins the creation process.
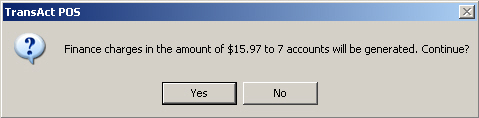
In this example, all 7 customers were selected for a total of $15.97 in finance charges. The printing of the resulting finance charge invoice is omitted from the process.
3) Print statements for each statement type group
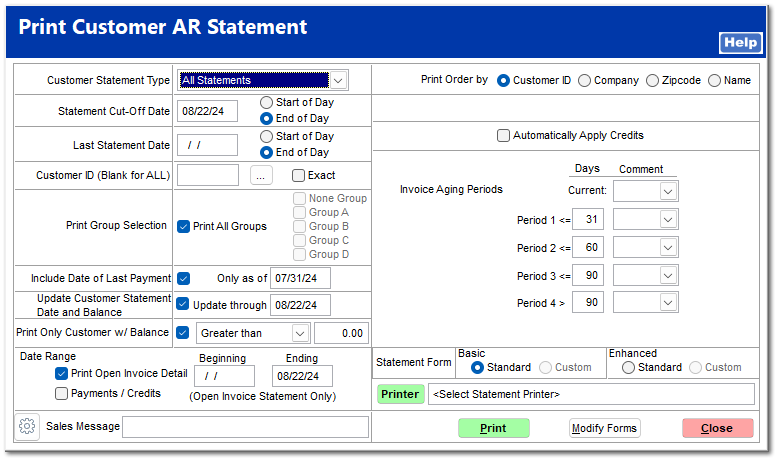
Selecting AR | Print Statement allows the user to print the selected Customer Statement Type.
Note: Customer statements are printed by selected statement types. So, if you have multiple statements types selected for your group of customers, you will need to print statements for each group. Typically, companies have selected a single statement type for their customers. The TransActPOS system will allow you to establish the default statement type within System | Company Setup | Accounts Receivable 1.
The typical settings for a Collated Balance Forward Statement are:
-
Statement Cut-off Date - last day of the reporting month
-
Include Date of Last Payment - first day of the reporting month
-
Update Customer Statement Date and Balance - the last day of the reporting month
Selecting "Print" the system will examine the selections and may prompt the user to respond to certain questions.