(c) Profile Systems Design Group, Inc. 2026 Build: 4.008.811 Help ID: 1489
If you do not see the expected content,press CTRL + F5 to clear your Browser's cache.
Environmental Fees
For stores in some states that sell cans of paint, there is a fee per paint can sold. The following document will aid you in setting up your TransActPOS system to handle this change.
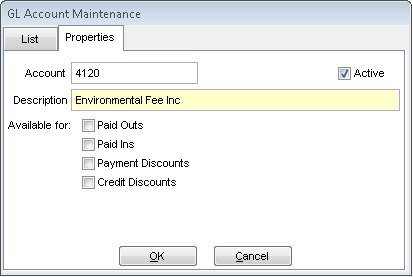
The first thing to do is to set up GL Accounts to handle these fees. Go to System | Support Files | GL Accounts and click New. From here, we need to create two separate accounts: one for income and one for expense. See the images below for how to set up each account.
Environmental Fee Income
Environmental Fee Expense
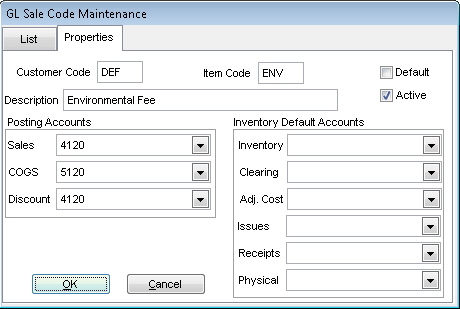
Once the GL Accounts are set up, we need to assign them within a GL Sales Code. Close out of the GL Account Maintenance window and click on GL Sales Codes. Click New and use the image below to aid in setting up the Environmental Fee Sales Code.
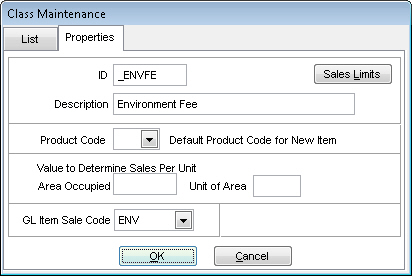
Once the Sales Code is created, click OK to save. Now, go back to the main menu of TAPOS. Go to IC | Support Files | Class to create a class for the Environmental Fee. Again, using the image below, set up the class. The key to setting this up properly is linking the class to the sales code created before.
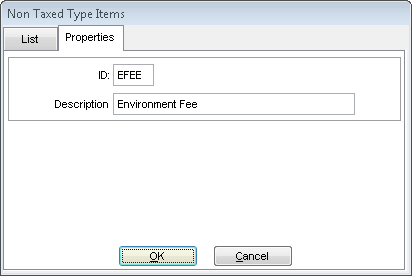
Next, go back to the main menu and go back to System | Support Files | Sales Tax Menu | Non-tax Types. Here, you will need to create a non-tax type for the environmental fee. See the image below for an example.
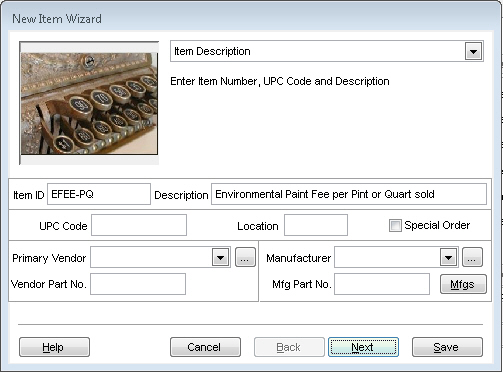
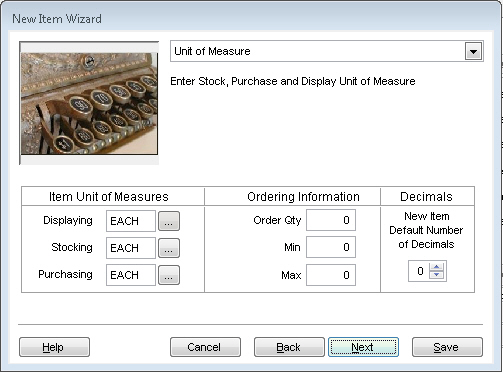
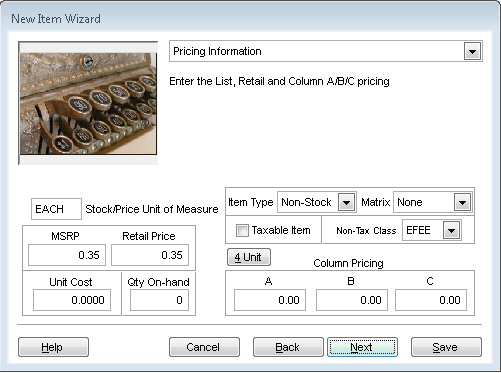
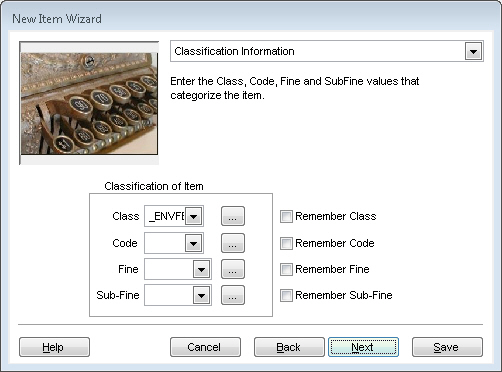
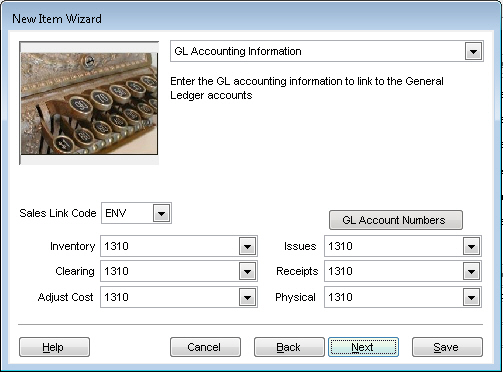
Lastly, we need to set up the Inventory item relating to the fee itself. Go back to the main menu and click on IC | Inventory File. From here, use the inventory add wizard to create the environmental fee item in your inventory. The screens below show each step in the process of setting up the item.
Important Note: In the screen below, make sure the item type is non-stock, you uncheck the taxable item, and assign it the non-tax class that you created earlier
Once you have finished creating the item, click Save to complete the process.