Updating and Printing Price Labels MultiStore
Updating prices and printing labels from one store to another.
This is a multi-step process:
-
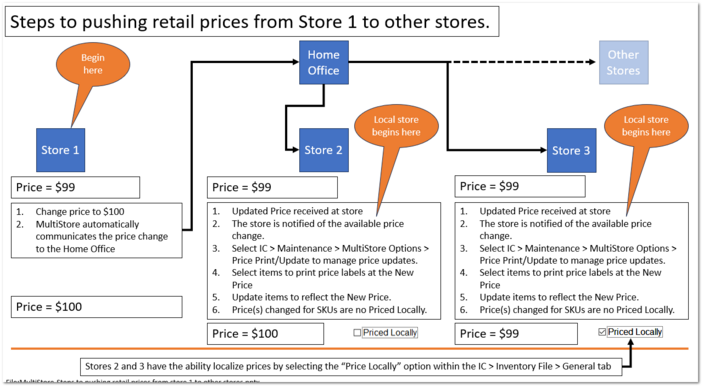
Store One updates the prices changes for selected items.
-
Prices changes are transmitted to the Home Office automatically redistributed to all stores.
-
At the other stores, for example Store Two, the new prices are accepted and then the price labels are printed and then placed on the product's BIN tags.
-
Once the labels are mounted, the prices are then updated prices within TransActPOS.
Steps 1 and 2 occur at the managing store.
Steps 3 and 4 occur at the receiving store and is the subject of the following detailed steps.
Applying prices at the receiving store.
Step 1
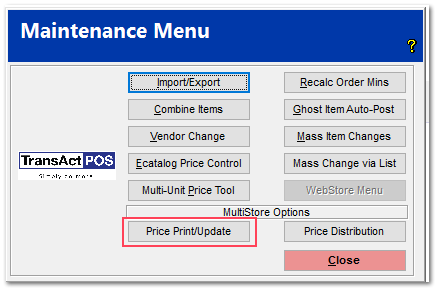
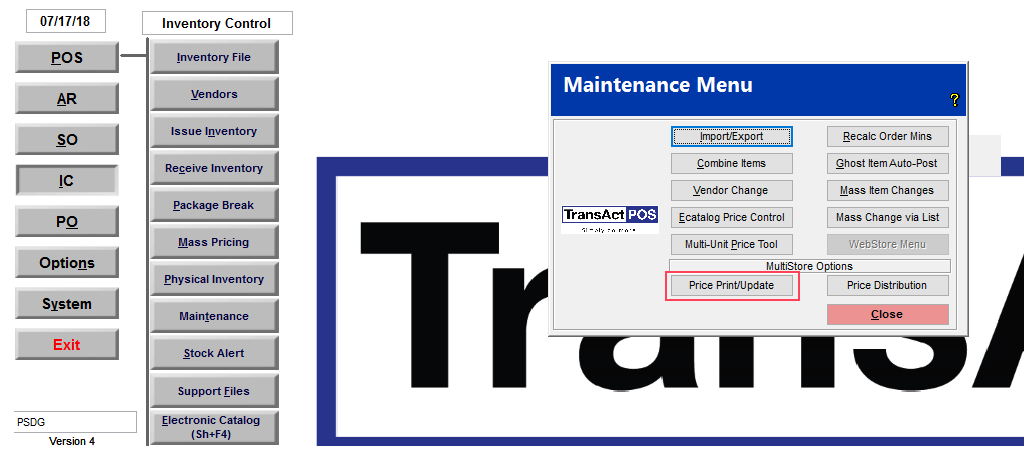
Go to IC | Maintenance.
On the left hand side under the MultiStore Options, click Price Print/Update.
Step 2
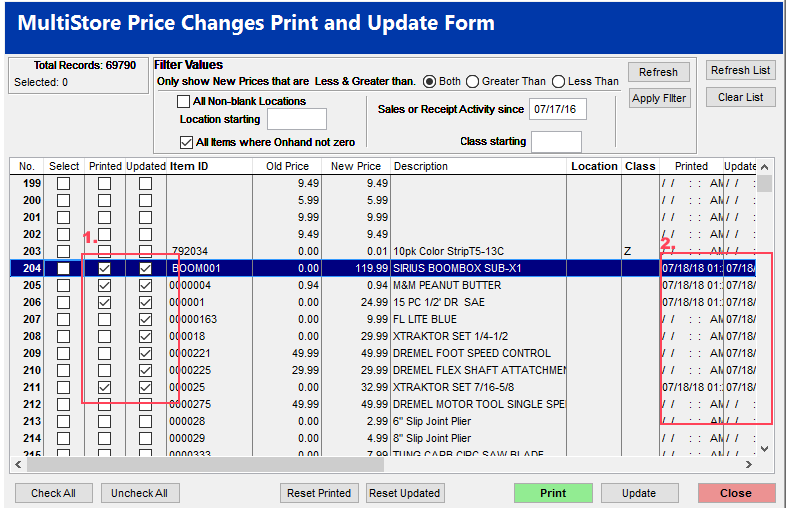
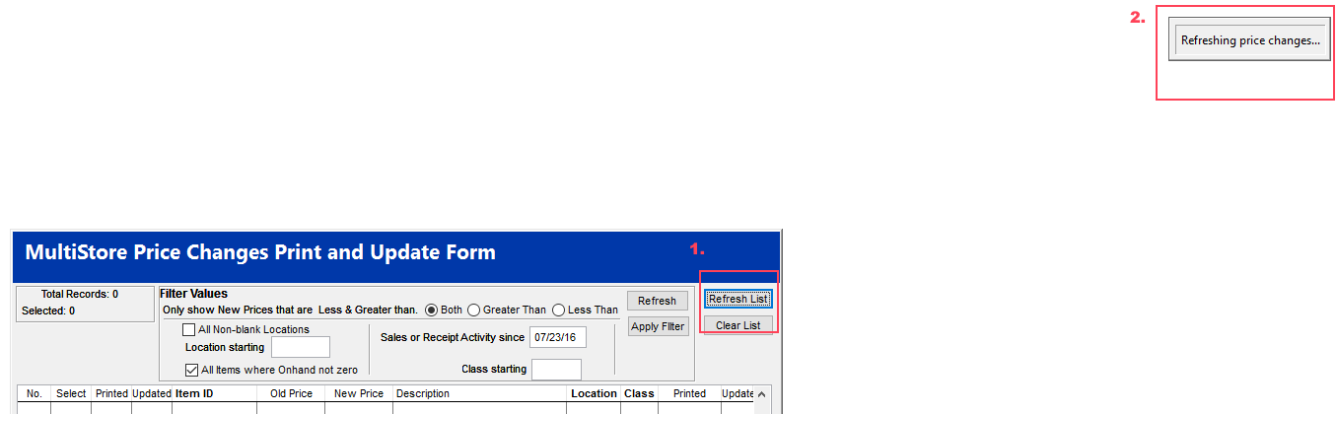
The MultiStore Price Change Print and Update Form opens. Click Refresh List in the upper right corner of the form. In the upper right hand corner of the screen, it should say Refreshing price changes…
Step 3
-
Check the items for which you wish to print labels or update price. After you select the items you would like, click Print or Update on the lower right hand side of the screen.
2. If a label has been printed or the price updated, a check appears in the respective box for that item.
3. If all items needed to be printed or updated, click Check All, and then Print or Update.
Step 4
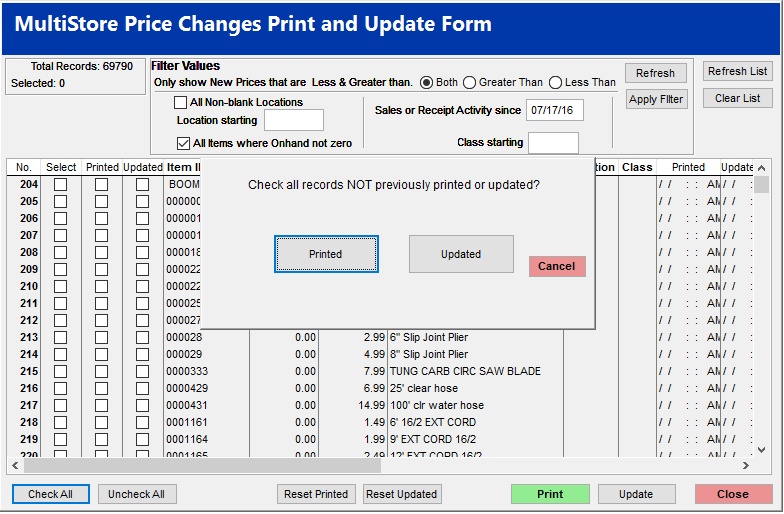
When Check All is clicked, a prompt is displayed asking if you wish to check records not previously printed or updated. Click Printed or Updated. After the selection is made the Print or Update button will need to be clicked.
It is recommended to print labels and place them first and then come back and update the prices.
|

Step 5
When Check All is clicked and Printed is selected, a prompt asking to Select All items or Only Items with on-hand quantity will appear. If All Items is selected, the system will print labels for All Items, if Only On-hand is selected, the system will only print items with an On-hand quantity or if the item is listed on a Purhase Order (including Return Purchase Orders).
Step 6
1. Notice the check mark for these items under Printed and Updated. These items have had labels printed and pricing updated.
2. Here the date and time that either the labels were printed or the price was updated will be displayed in the corresponding column.
If you need to reset printed and/or reset updated. You are able to by clicking the corresponding button. This will allow you to go in and choose your items again, reprint the labels, and update the price.
When you are completely done, make sure to clear list so that in the future you do not see the same items again.
Using Filter Values

After you initially run this program you can filter it down to only show New Prices that are Less & Greater than by either checking the Both, the Greater than, or the Less than, you can also choose to only see items that have had sales since a particular date, items within a certain location, or items within a certain class. Choose the filter that you would like and then click Apply filter in the filter values section.
Sales or Receipt Activity Since: this means that you will only see items that have been sold or received since that date that is in the box. Items that have not had any activity will not appear in the list. (you cannot see this date on the screen)
You can also view only items that currently have an on-hand value, however this is not necessarily needed because the next step allows you choose only on-hand values anyway.
Refresh and Apply Filter will both apply the filter.The Refresh button in the Filter Values section is different than the Refresh List button. Refresh List will refresh the entire list to bring in any new changes, the refresh button in filter values will apply filters.
|