(c) Profile Systems Design Group, Inc. 2026 Build: 4.008.811 Help ID: 1898
If you do not see the expected content,press CTRL + F5 to clear your Browser's cache.
04-010-6 Inventory Control - Mass Item Changes
Overview
In this document, we will examine the Mass Item Changes Utility. This tool allows you to select a large number of items and make changes to them all at once..
Opening the Mass Item Changes Screen
1. Click the IC Button
2. Click the Maintenance Button
3. Click the Mass Item Changes button
4. Enter your User ID
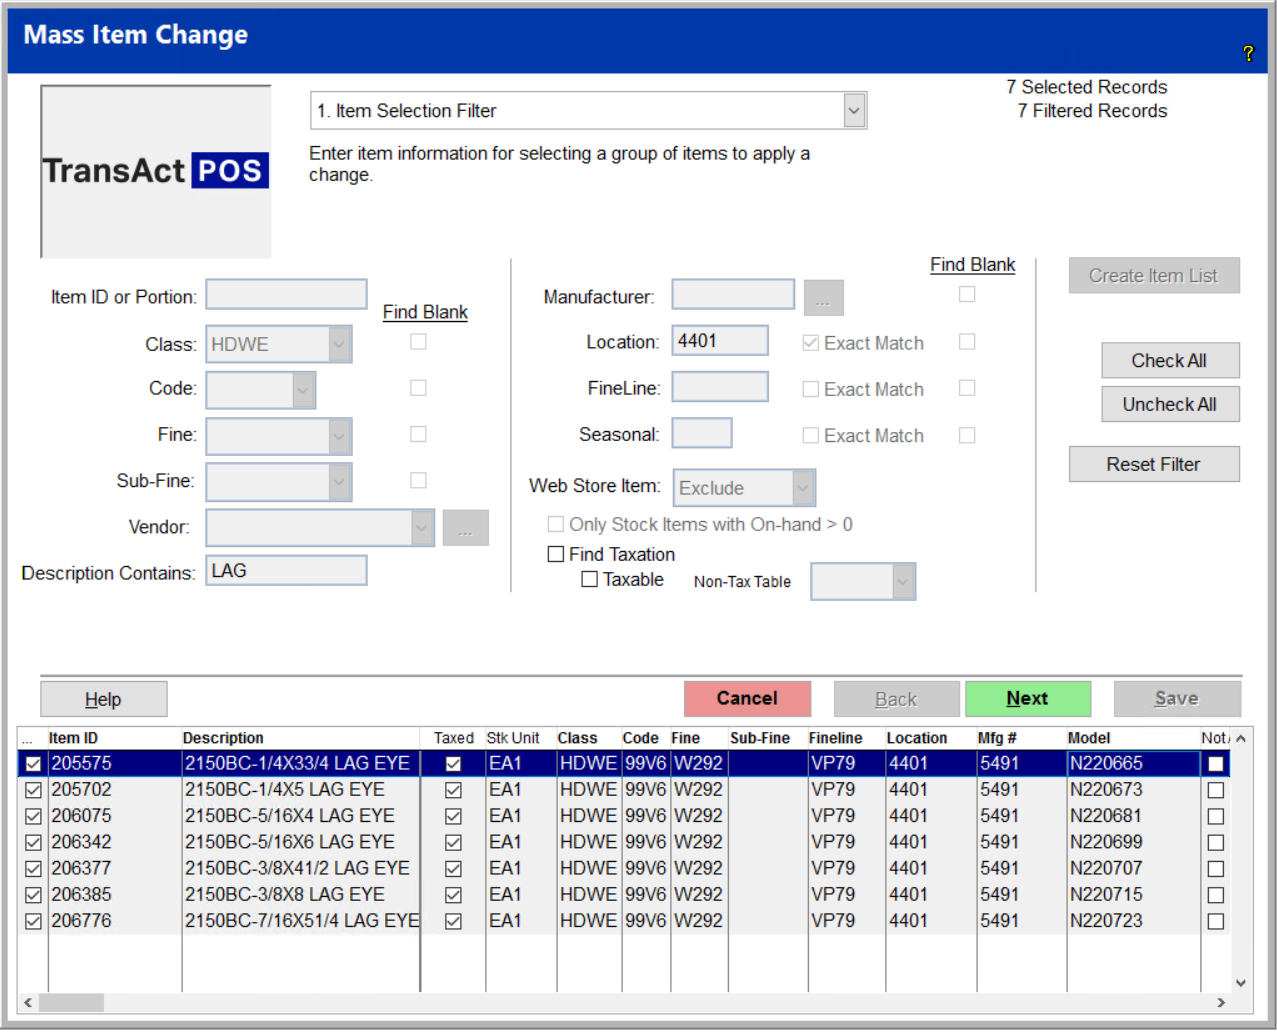
Step 1: Item Selection Filter
To begin a change, a list of the desired items that will be affected must be created, this is done by setting filters. Choosing a filter term in one field or multiple fields on this screen will allow you to narrow down the results to just the items you want to manipulate. In this example I found all the items containing “LAG” in their description that were both in the Hardware Class and in Location Code 4401.
The Find Blank checkbox can be used if the item you’re searching for does not have that property assigned to it. For example, if you want to find all the items that have not been assigned to a Class the Find Blank box can be ticked next to the Class filter. Once the desired filters are set, click the Apply Filter button to generate a list of results. Review the list of items to ensure that all the desired items are present and that no unwanted items have been included. To exclude a specific item from the list simply uncheck the checkbox in the first column of the results. Once you’re satisfied with the items you have selected, click the Next button to proceed.
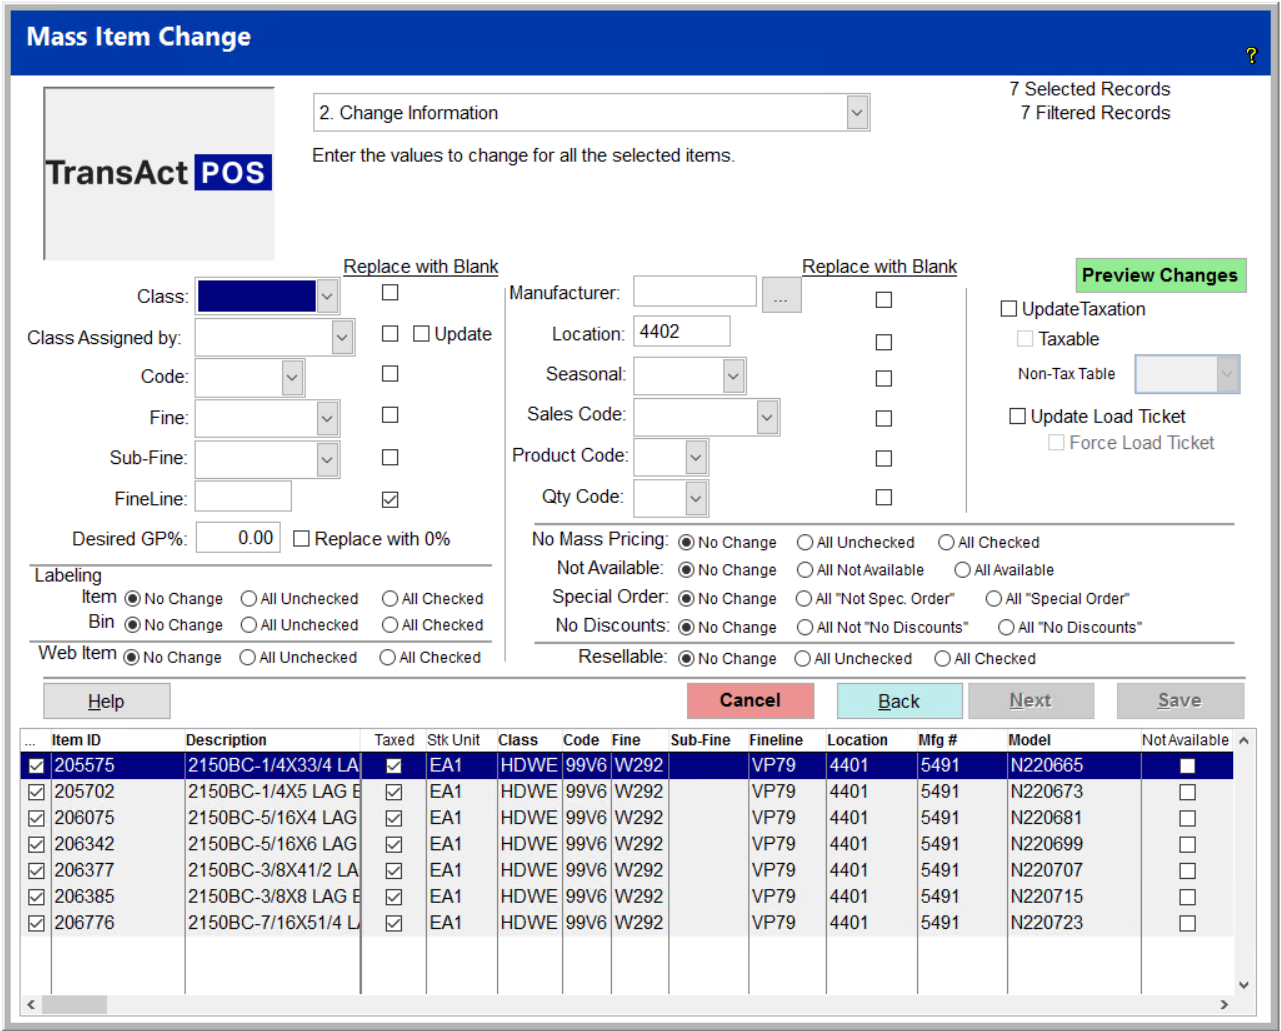
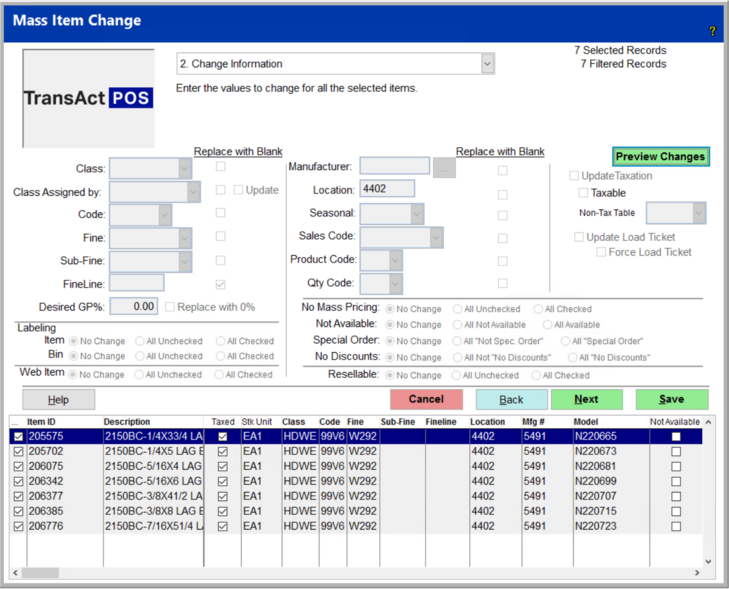
Step 2: Change Information
On the Change screen you are presented with all the item properties that can be changed, multiple properties can be changed at once. In this example I am changing the Location Code and clearing the FineLine by checking Replace with Blank.
Once the desired change has been defined click the Preview Changes button to preview how the items will appear if the current settings are applied.
Clicking the preview button does not actually change anything, the change is only made permanent after clicking the Save button. Click the Next button to proceed.
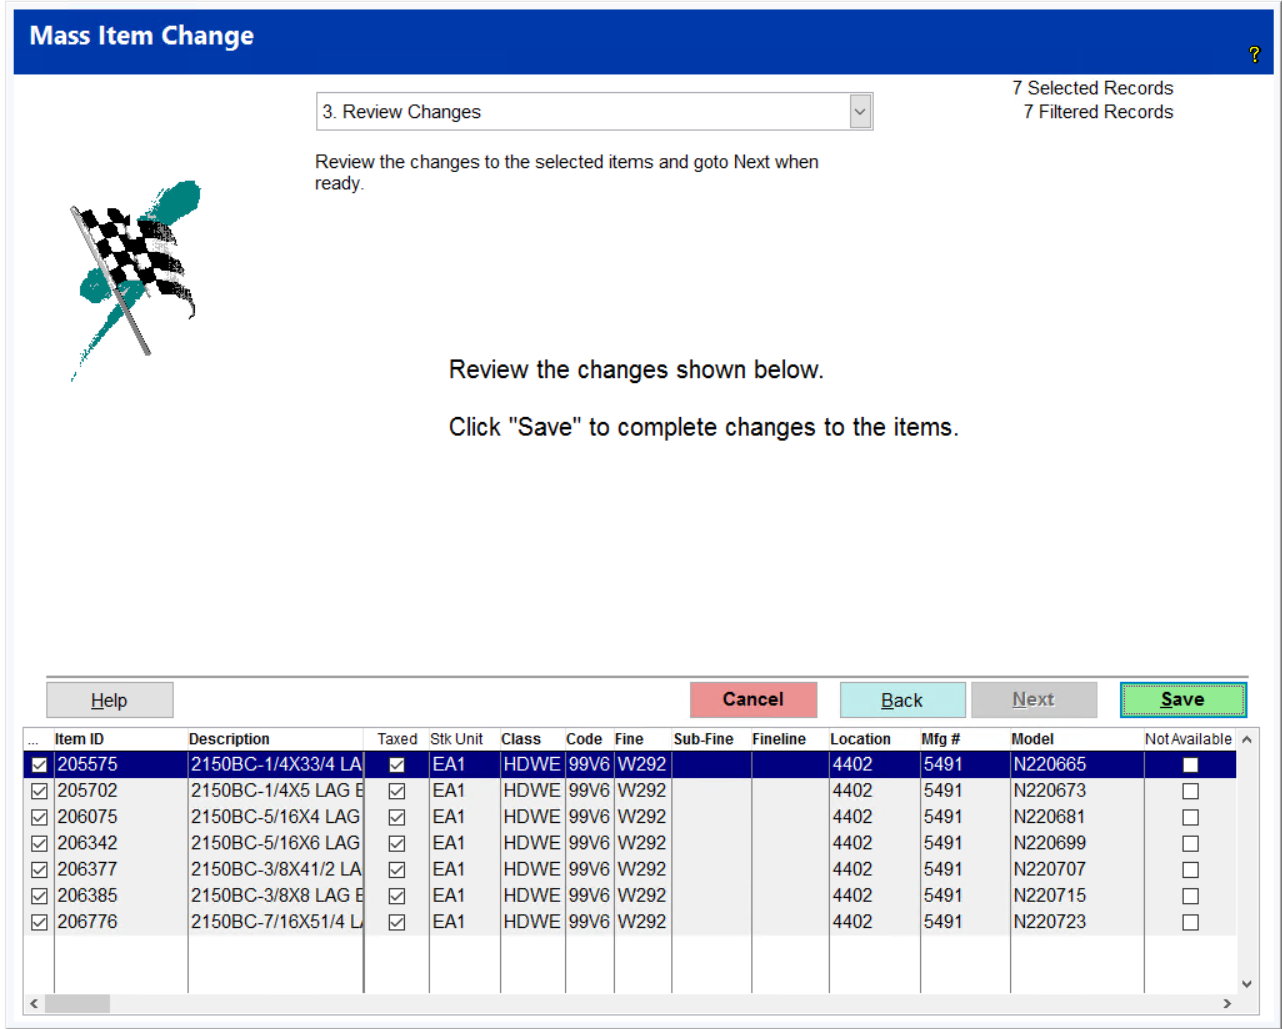
Step 3: Review Changes
The Review Changes screen gives you one more opportunity to see the changes that will be made before applying them to your inventory. Once you are satisfied with the changes that will be made, click the Save button to update the inventory file with the changes.