05-010-1 Purchase Order Training #1 - Core Processes
Overview
The Purchase Order module manages the ordering of replacement and new inventory items into the inventory control module. Purchase orders can be created with the wireless application by scanning and then entering the desired quantity. As with the recommended reorder report, the system creates an editable purchase order for the selected vendor.
Definition
Purchase Order: a document created by a purchaser/buyer committing to pay the vendor/seller for the purchase of specific products or services
Core Processes
To Create A Purchase Order
1. Click Purchase Order (PO)
2. Click Create Purchase Order (PO)
3. Find and Select Vendor
4. Click Detail Tab at top of screen
5. Add items
6. Save Purchase Order
Modify a Purchase Order
1. Click Purchase Order (PO)
2. Click Modify Purchase Order (PO)
3. Locate and Select Purchase order
4. Make changes under detail tab as needed
5. Click Save
Receive a Purchase Order
1. Click Purchase Order (PO)
2. Click Receive Purchase Order (PO)
3. Locate and select Purchase Order
4. Click Receive
5. Answer question - Do you want to receive in full
1. if yes, when done click save
2. if no, enter per line quantity received and change cost if needed, then click save
Purchase Order Training - Create/Modify
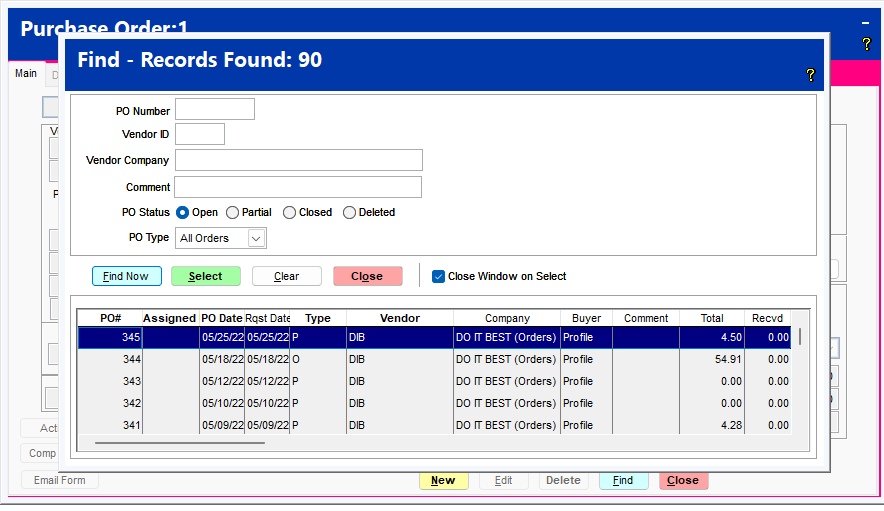
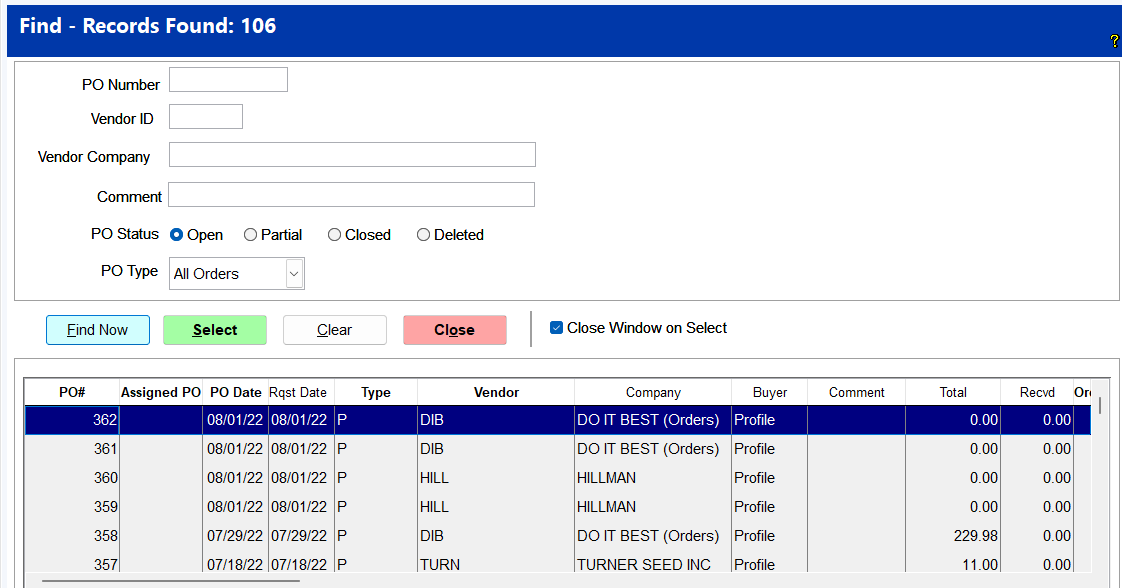
Take a look at the different fields in a Purchase Order. In order to find a purchase order, you want to go to PO, Modify Order. Notice there are a lot of ways to search for a particular purchase order (PO). You can search by PO Number, Vendor ID, Vendor Company or Comment. You can search for purchase orders based on the PO Status which are Open, Partial, Closed, or Deleted. You can also search for purchase orders based on the PO Types which include All Orders, POs Only, Returns, RFQs, or Pre-POs.
You can also find the Purchase Order in the lower part of the screen by scrolling down until you find it and then highlight it and press either the enter key or the select key.
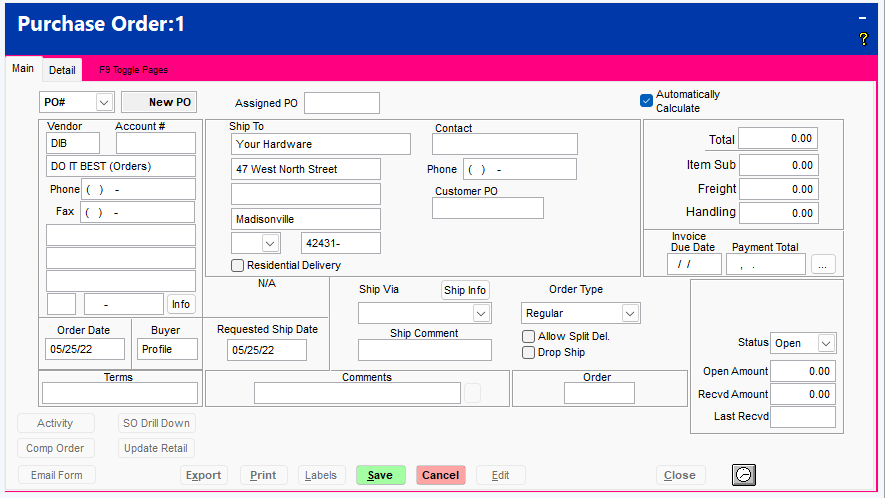
Purchase Order Training - Main Tab
If you look in the upper left hand corner, there are 2 tabs; Main and Detail. Notice that you can use the F9 key to toggle back and forth between the two tabs.
Let’s start with the Main Tab by clicking on the Edit button (only need to click the edit button if you are modifying an existing Purchase Order).
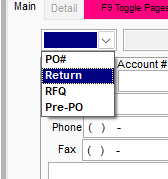
In the field that is showing the PO#, click the down arrow to view four types of Purchase Orders.
Different Types of Purchase Orders
1. PO# which identifies this as a Purchase Order and the type is “P”.
2. Claim# or Return type which refers to a Return PO and is identified as the type “R”. We talked about this type of purchase order when we were training on Refunds. Remember that if a refund item is not returned to inventory and it is a Policy A item that the system would look to see if there is a Return PO out there and add it to the PO if there is one out there…if there is not one out there, it will create a PO with the Claim# “R” type and then add that item to the PO.
3. Pre-PO# type. Remember that if you create a special order from the ring sale screen it creates a Pre-PO. If you create a PO from the wireless unit (CipherLab/TC20) it creates a Pre-PO and if a purchase order is created from the Service ticket a Pre-PO is created. Another thing to remember is that if you create a purchase order for your electronic vendor (Do It Best, True Value, Orgill, United Hardware) that if it is in a Pre-PO status, the purchase order will NOT show up in the communications box to send. You also cannot receive a purchase order that is in a Pre-PO status.
4. The Final type or status is the RFQ. This stands for Request for Quote. This is a special kind of purchase order. If you are needing to get a quote from the vendor for certain items. You can create an RFQ, send it to the vendor, and then when it comes back, when the Quote is turned into a Sales Order the RFQ changes into a Purchase Order.
Purchase Order Number Creation
Upon creation of any type of purchase order, the TransActPOS system assigns the next available purchase order number. The user may use the Assigned PO field to create an alpha-numeric purchase order number. For example, SPRG-2024.
Vendor Area/Left hand side of Main tab
In the vendor area, the vendor information is shown and that comes directly from the vendor file. The order date is actually the date that the purchase order was created and the buyer shows who created the purchase order. The payment terms come from the Vendor file and can be modified when creating the purchase order.
Ship to
You’ll see the ship to information. By default this ship to information is based on the company information found in the Company setup. You can modify this information if it is going for example to a different address or it is being drop-shipped. You can also indicate if it is going to be going to a residential address versus a business address by checking the Residential Delivery Box. The contact field is the customer contact person. Notice that there is a field known as the Request Date. This field indicates to the vendor the required date of items within the purchase order.
Ship Via/Order Type
The Ship Via field indicates the shipping method for the current order and is a very important field if drop shipping or delivering to a different business or customer (residential delivery for example). This field is also very important if you are ordering from a different warehouse. You want to make sure that you are filling in the proper shipping method. I have known stores that have ignored this and their items have been shipped to them by overnight air…the most expensive way to ship and they did not notice this when creating or finalizing the purchase order. If a purchase order is being shipped directly from a distributor to a customer’s site, then the Drop Ship field should be checked. The system will then prompt for the customer’s drop ship address from the list of customers in AR, Customer File and change the Ship To information to the selected customer.
The Order type options will vary depending on who your electronic vendor is…(ex. Do It Best, True Value, Orgill, United Hardware)…you may have regular (DIB), Warehouse Order(True Value, Orgill)…if you are ordering from another warehouse and your electronic vendor is Do It Best, then you would use the MBR RSC option. You just want to make sure that you apply the appropriate order type to a purchase order as required.
The Ship Comment field is used to add additional purchase order information such as contract number of reference number of the order.
The Comment field can include a short comment and this is the field that will display a previous Purchase Order number if there is a partial receipt and receiving decided to put the backordered items onto a new purchase order. For DIB Market Orders, the DIB assigned PO number will be found in the comment field.
If we move to the upper right hand side of the Main Tab, you can check the Automatically Calculate check box. This will automatically recalculate the purchase order total when a new item is added on the detail tab.
The Total field shows the total value of the items, freight, and handling. The Item Sub field contains the total of the inventory items. The Freight field contains the freight of the current purchase order and the handling charges should be entered into the Handling field.
The Invoice Due Date is an area for you to notate when the invoice is due to the vendor. The Payment Total area allows you to see the amount of payments that have been paid towards an invoice. TransActPOS does not do Accounts Payable so this information will need to be entered by the store only if they want to see this information on the purchase order. Payments can be recorded by clicking on the box with the 3 dots to the right of the Payment total. This displays the list of payments for this purchase order. Click the New button to enter a new payment. Then for each payment, you want to enter the Check Date, Check No. and the Check Amount.
The area just below that shows the Transmission shows 3 different statuses. They are Open, Submitted and Manually.
1. Open indicates that the purchase order has not been sent yet.
2. Submitted along with the date and time will be filled in once the purchase order has been sent.
3. If you are emailing, faxing or calling in your purchase order, then you want to change the transmission to Manual and you can enter the date and time sent in the comment field.
The Status of the purchase order will show either open, closed or voided.
Open Amount of the purchase order will show the dollar amount that has not been received yet.
Received Amount shows the dollar amount of the purchase order that has been received.
Last Recvd is the date on which the last inventory receipt was processed.
The Comp Order button will compare the landed cost of items and the on hand quantity (for only vendors DIB, True Value, Orgill and Emery Jensen) in the warehouse from two vendors if there is an e-catalog for each vendor and their SKU or manufacturer numbers have been entered in the item’s look-up table. The person creating the purchase order can compare item costs and then decide which vendor to order from for that week. A new purchase order is created for the other vendor if the choice is made to get it from Vendor B instead of Vendor A.
You can email the purchase order or print the purchase order. You can also print labels for the items in the purchase orders. Item or Bin labels can be printed for the number Ordered, Received, or Requested.
Activities related to the purchase order can be documented for future reference and you can export the purchase order to a txt file that can be sent to the vendor that requests that to be done. The setup for the export is found under the specific vendor in the vendor file under the Setup tab.
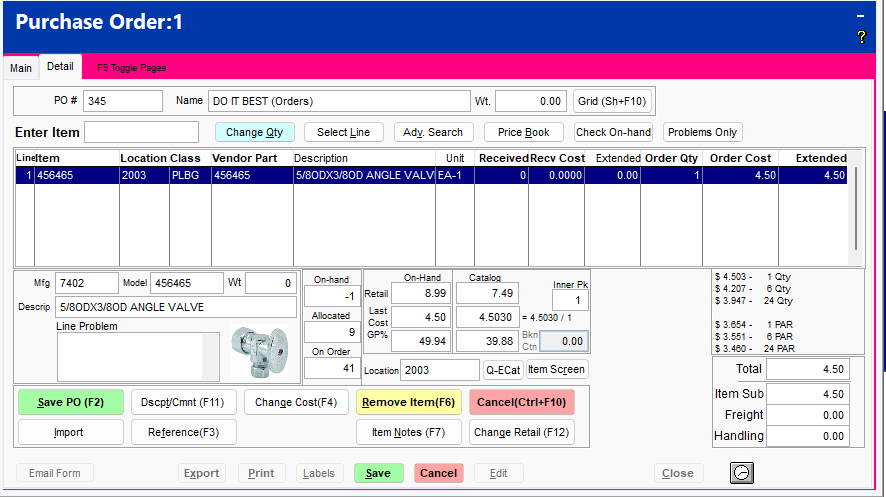
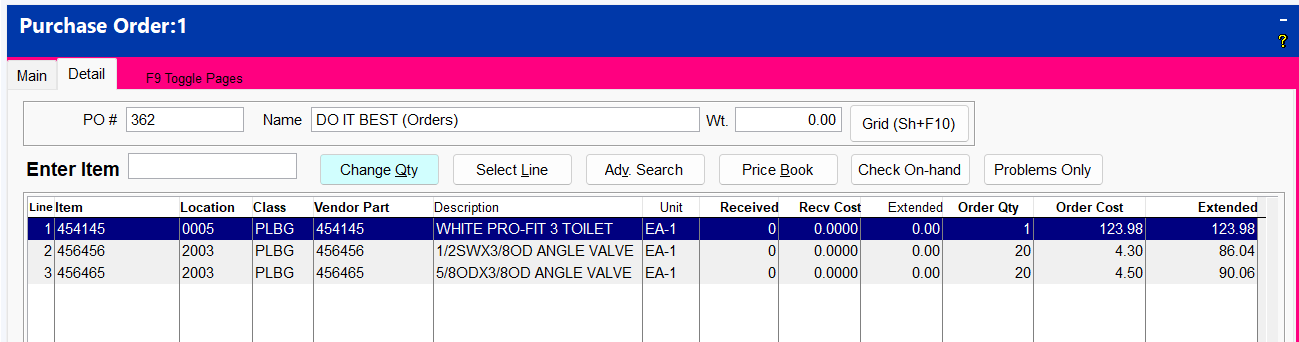
Purchase Order Training - Detail Tab
The detail tab allows for the entry of items for this purchase order.
Starting at the left top
PO number - this is the purchase order number.
Vendor Name - so you can easily tell what purchase order/vendor you are working with.
Notice that this looks very much like the ring sale screen. We won’t go into the full detail, but I will mention them.
Enter Item field - there are multiple ways to enter the item into this field, just like in the Ring Sale screen it includes scanning the item, typing in the UPC or the item id, or by using the grid. Depending on the company set up, a *pop-up may display on the screen allowing you to enter your quantity and change your cost at one time.
Change Qty - same methods as the ring sale screen for changing quantity. These methods include scanning the item based on the number that you want to order if you have the item in your hand, using the change qty button, or using the *(number you have) and enter button.
Select Line and Adv. Search - these are the same as the Ring Sale Screen.
Line number - what line the item is on within the Purchase Order.
Item ID - the item id for the inventory item.
Location - where the item is located within the store if the store has updated this information.
Class (dept.) - what the class is for the current item.
Vendor Part number - This may or may not be the same as the item ID. It is the part number the vendor uses to recognize their item. For instance a DIB item will have their own Vendor Part Number but if you have the same item through Midwest Fastener there will be a separate id or Vendor Part number for Midwest.
Description - This is the description of the item on the Purchase Order.
UOM or Unit of Measure - This is the current UOM for what you are ordering. Some items have multiple UOM’s and the one of the PO is the Unit you are ordering.
Received - If a purchase order has previously been received you will see in this column the amount of that item that was received.
Recv Cost - This is the cost of the items that were received. The Order cost and Received Cost may not be the same. Remember this is what you are paying the vendor for those items vs. the retail which is what the customer is going to pay you for those items.
Extended -This is the Received Extended cost which is equal to qty received * cost.
Order Qty - This is the quantity of items ordered. The received qty may be different from the ordered qty.
Order Cost - This is the cost of the items at the time you were ordering them. This cost could change.
Extended - This column is for the Order Cost Extended which is equal to qty ordered * cost.
Lower Left hand area
Mfg. and Model - this is the manufacturer and model number of the item. It will only have something in this area if they are in the inventory file.
Description - this is the description of the item as listed within the inventory file.
Line Problem box - If there is a problem with an item, you can highlight the item and see what the problem with that item is. You will also see that when there is a problem with an item it will be highlighted in a flesh or orangish color.
Center Area
On-hand qty - the current On-hand qty of the item that is highlighted.
Allocated - is the number of items that are already on either a sales order, layaway, or service ticket.
On order - indicates the number that is on a current purchase order.
Retail - the current retail price of the item (retail is the price the customer is paying the store). There are two retail prices listed, one is the current retail in the store and the other one is the catalog retail.
Last cost - this is the cost of the item the last time it was received. The catalog cost is also listed here.
GP % - this is the gross profit percentage for current inventory pricing as well as the catalog pricing.
Location - the current area of the store that this item is located in as noted in the inventory file.
Q-Ecat - Displays the item’s electronic catalog screen.
Item Screen - Displays the Inventory File screen for the item which can then be modified and updated if needed.
Lower Right hand area
Total - This displays the grand total of the purchase order including the extended item cost, freight and handling charges.
Item sub - this relates to the total of the extended cost of items found within the purchase order details screen.
Freight - the freight charge is entered directly here. Once you enter the value for the freight, see that the Total field automatically updates.
Handling - this is where the handling cost of the current order will be entered. Just like freight, notice that the Total field automatically updates.
Save - this will complete the entry process and prepare the PO to be sent to the appropriate vendor by email, electric download (ex. DIB, TV, Orgill or United Hardware), Fax, Mail or Export.
Labels - this is where ability to print Item or Bin labels for either the number ordered, received or requested items.
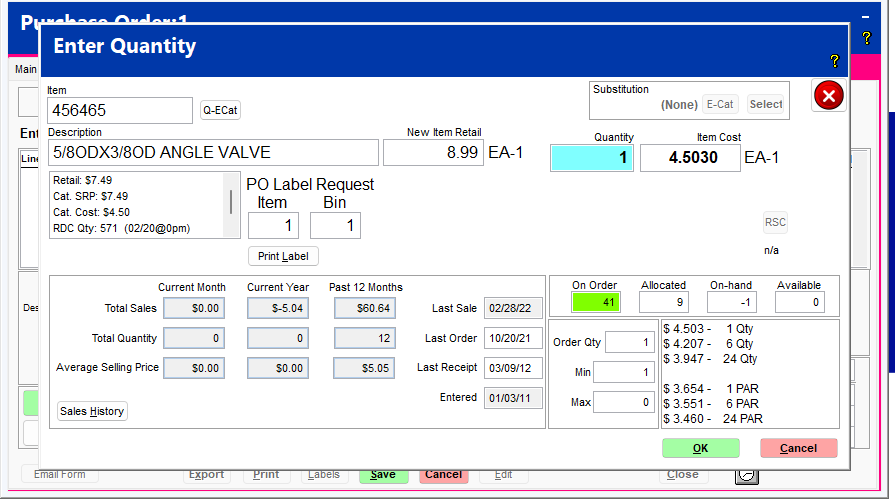
Purchase Order Pop Up
On the purchase order pop up is most of the same information that can be seen within the purchase order itself.
The pop up also gives sales information as well as the last time the item was sold, ordered, and received. The date the item was entered into inventory is also available on this screen.
To the far lower right is a table of what the cost is per quantity ordered if the vendor offers this and it is in the catalog. Image listed above is for Do It Best so there are multiple cost options. Notice the cost if you order 1, 6, or 24. As well as PAR pricing.
Creating a Purchase Order
You will click on the Purchase Order (PO) module, and then click Create PO.
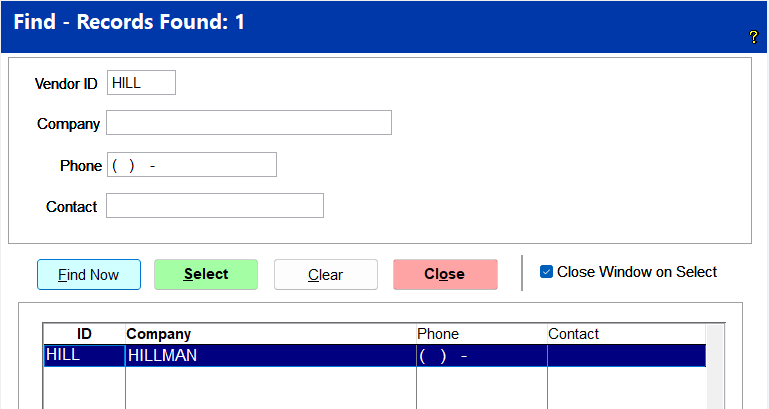
After clicking Create PO, log in and then you will need to choose a vendor. Put in the correct information in the search area and then select the correct vendor.
The purchase order main tab is now available on your screen, you can click the detail to add the items for the purchase order.
Modifying a Purchase Order
Click on the Modify PO option on the main screen under the PO module. Log in and Locate the purchase order that needs to be modified.
There will be a list that is auto populated of all the open purchase orders in the system, simply scroll through the list and find the one that needs to be modified, or search for the correct one using the fields at the top of the screen and clicking find now.
Importing into a Purchase Order
From Spreadsheet
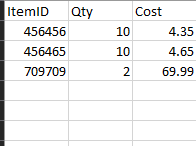
TransActPOS allows you to import into a purchase order a CSV or XLS spreadsheet. The basic format should be only 3 columns that consist of ItemID, Qty, and Cost. If there are any other columns or the columns are in a different order the import will not work.
Create your Purchase Order as you normally would, selecting your vendor. Go to the detail tab, and in the lower left hand corner there is an Import Button. After you click import a screen will pop up, prompting you to choose between a Sales Order import or a Spreadsheet import, make sure to choose the spreadsheet option.
Once you have chosen your file and imported it you will see that items begin to populate within your purchase order.
With the import feature you now can import Hillman invoices into the purchase order to create your purchase order and quickly receive into your inventory.
Sales Orders
Sales Orders can easily be imported into a purchase order as well. Instead of choosing Spreadsheet you would click on the Sales Order button.
A box will populate asking you to choose the sales order. Make sure you check the box to the left of the sales order you would like to import.
Once you choose the sales order you will then be prompted to choose the items for the import. Make sure you check the boxes to the left of the items you would like to import.
Once you have selected the sales order and the items, notice that the items will automatically populate on the purchase order much like the spreadsheet does.
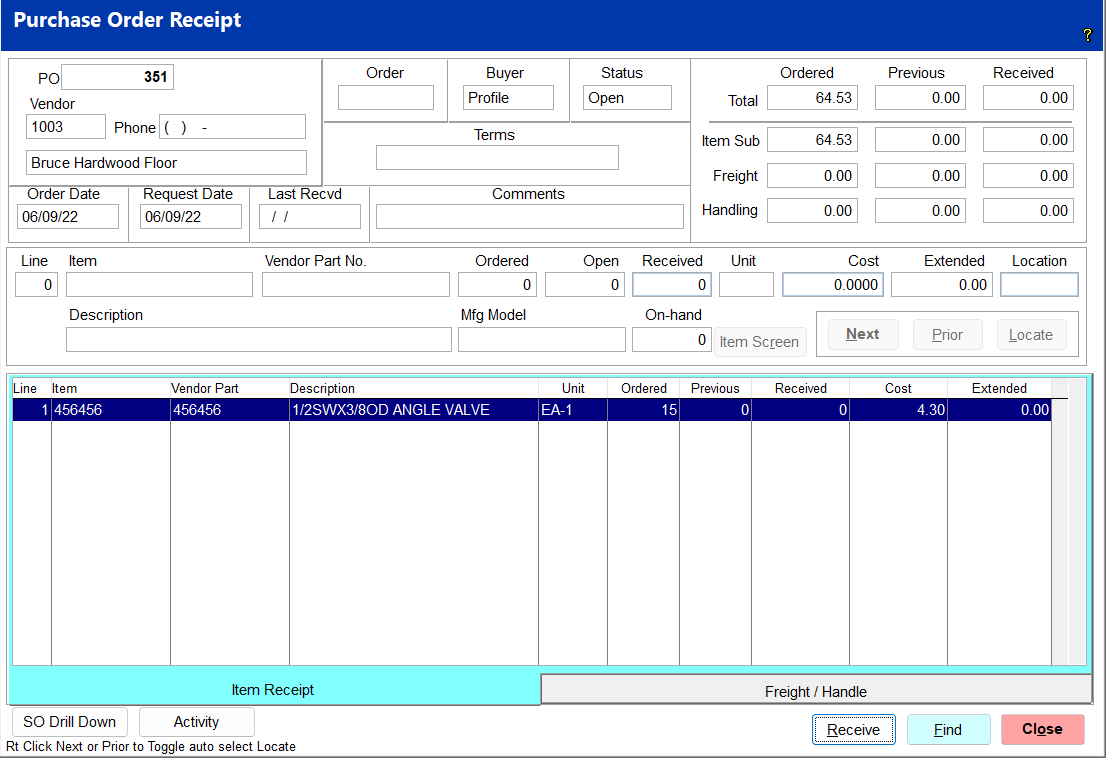
Receiving a Purchase Order
Purchase Orders Can be received in full or by individual lines.
To receive a purchase order you will need to click the PO module on the main tab and then click on the Receive PO button. Log in and then locate the Purchase order.
The Find PO box will open, this is the same as the Modify PO. There will be a list that is auto populated of all the open purchase orders in the system, simply scroll through the list and find the one that needs to be received, or search for the correct one using the fields at the top of the screen and clicking find now. Highlight the PO you need and click select.
After selecting the correct PO. You will be taken to the Purchase Order Receipt screen.
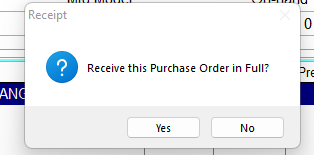
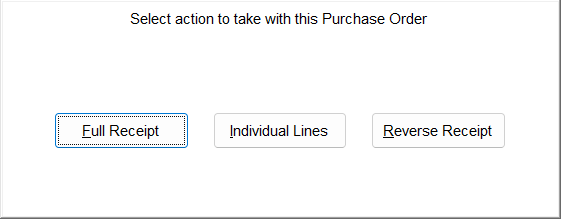
On the lower right side of the screen there is a Receive button. Once you are ready to receive the PO, click this button and answer the following question.
If you are receiving the PO in full you can click yes, if you want to receive individual lines click no.
Receiving a Purchase Order In Full
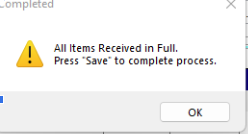
If you click yes to receive the purchase order in full, it will change the qty received to the qty ordered on all items on the po and then you will just click save to continue.
Receiving a Purchase Order by Individual Lines
When asked if you want to receive the Purchase Order in full, if you say No it will allow you to receive each line individually.
Enter your Received quantity in and then tab to the Cost box and update the cost if needed. Once that is done, click the next button and it will take you to the next line. You can also click the Locate button to search for a particular item in the list.
When you are done click the save button and the system will save the quantities received.
Reversing Receipt of a Purchase Order
If you receive a purchase order incorrectly, there is an option to reverse the receipt. The purchase order will need to be open in order to reverse it. If you have received it in full, you will need to modify the purchase order and change the status on the right side of the main tab back to open. Next go to Receive PO and find that purchase order. When you click the receive button, you will be asked if you want to Receive in full, Receive individual lines or Reverse the receipt.
Once the PO is reversed, it will tell you that All items were Received in Full and you should notice negatives next to the items at the time.
Creating an Order using the Handheld (Wireless Device)
1. On the Main Menu on the wireless device, Select the Order button
2. Enter the Item number
3. Enter the Quantity that you need to order
4. Click the Order button
If a Pre-PO is already created in the system it will automatically add to the existing order, if there is not a Pre-Po in the system it will create a new one for the primary vendor on the item. If you have multiple Pre-PO’s open it will ask you to select a PO. If you do not select a PO it will put it on the oldest Pre-PO.
Receiving a Purchase Order on the Handheld (Wireless Device)
1. Select IOR Receipt - if there is more than one file, you will receive each file separately
2. Select the correct vendor (if more than one option)
3. Highlight correct invoice and then Select
4. Begin Scanning items
5. You can change the quantity received if need be but it should come in at how ever many were ordered.
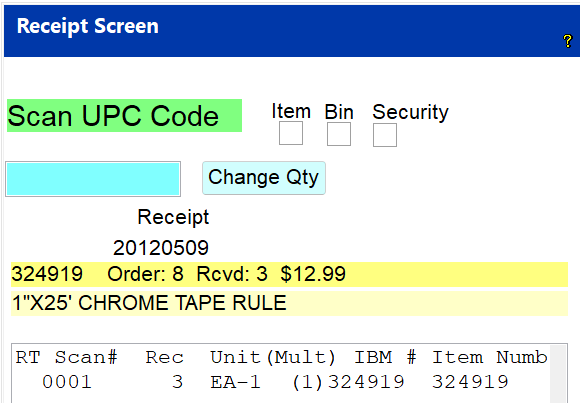
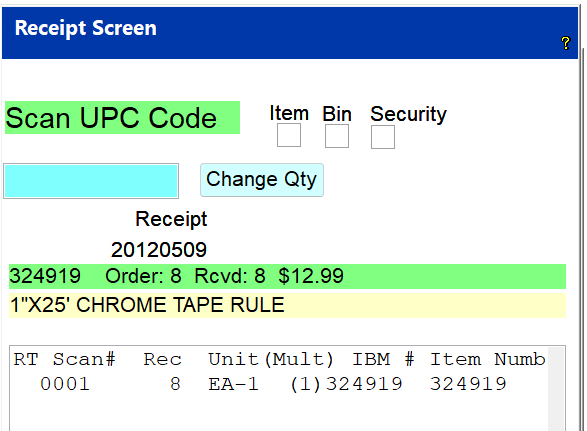
There is a setting under Company Setup - IOR - Post qty ordered on MRI item receipt, when this is checked it will automatically receive the amount that is ordered but you can change that by clicking the Change Qty button. If you change the quantity the item information will be yellow letting you know that you are not receiving the amount ordered. If it is green it means you have received the amount that was ordered. With the setting on, when you scan an item it will automatically make the qty under the Rec column the qty that was ordered.
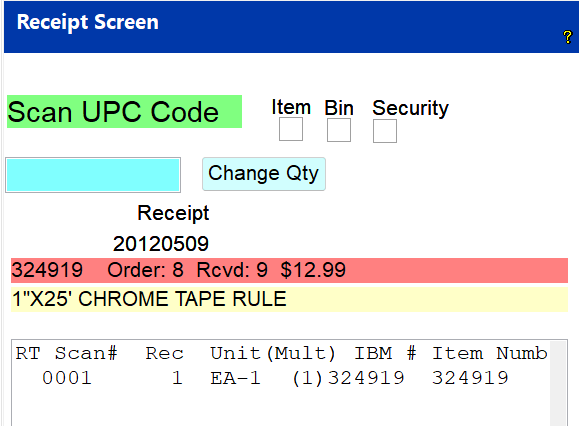
If the setting is not checked under the company setup, you can scan an item and it will display in red as the image below shows. Notice that the qty under the Rec column is 1.
6. When all items have been scanned, click the Finished button.
7. Select Yes to Release scanned quantity records to inventory.
Creating an Order using the Reorder Report
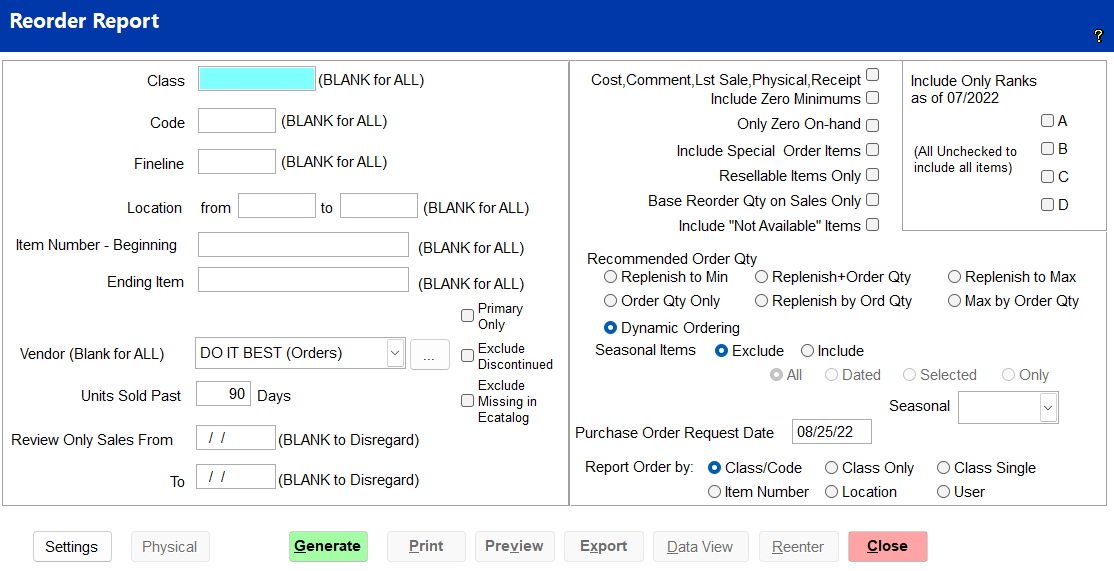
The Reorder report will allow you to view various items based on report filters for reordering purposes. The fields/filters within this report are detailed below. NOTE: For an item to get on the Reorder Report, the on hand quantity must fall below the min except for the reorder method that is based on the sales.
From within the IC | Reports | Reorders, also PO | Reports | Reorders
Set filters as needed:
Class
The value entered here will limit the report to the specified class. If you leave it blank, it will report on all classes.
Code
The value entered here will limit the report to a specified code. If you leave it blank, it will report on all codes.
Location
The values entered in this range will limit the report to a range of locations (or set location if the same value is entered in both fields). If you leave both fields blank, it will report on all locations.
Item Number - Beginning
The value entered here will be the first item number (in a range) to be reported on in the report. If this (and the ending item number) is left blank, the report will show all items matching the other entered filters.
Ending Item
The value entered here will be the last item (in a range) to be reported on in the report. If this (and the beginning item number) is left blank, the report will show all items matching the other entered filters.
Vendor
In this drop down, you can choose the vendor to report on. If you leave it blank, it will report on all vendors in your system. The button next to this drop down menu will bring up a find window. The Primary Only check box will make the report show only the primary vendor on the report.
Units Sold Past
This field will display the average of items sold per day in the past so many days (if 90 is entered, the average of items sold in the last 90 days).
Review Only Sales From/To
This date range will only review sales from the range entered. If left blank, the report will disregard any date range.
Cost,Comment,Last Sale,Physical,Receipt
Checking this option will display the Cost, Comment, Last Sale, Physical,and Receipts on the report.
Include Zero Minimums
Checking this option will display items with zero minimums.
Only Zero On-Hand
Checking this option will display only items with an on-hand of zero.
Include Special Order Items
Checking this option will display items that are considered special order items (check box within the Inventory File).
Resellable Items Only
Checking this option will only display resellable items (another checkbox within the Inventory File).
Base Reorder Qty on Sales Only
Checking this option will only base the reorder quantity in the report on sales of the item(s).
Include "Not Available" Items
Checking this option will include items that are marked "not available."
Include Only Ranks as of MM/YYYY
These boxes allow you to only include certain ranks (A,B,C, or D) as of the given month and year. With all boxes unchecked, the report will include all items.
Recommended Order Qty
There are many options to choose from here. The option chosen is the quantity listed on the report as the recommended order quantity. The options are as follows:
-
Replenish to Min -this option indicates that the recommended quantity to order will replenish to the quantity in the min field.
-
Replenish+Order Qty - this option indicates that the recommended quantity to order will replenish to the min plus the amount in the Order Qty field.
-
Replenish to Max - this option indicates that the recommended quantity to order will replenish to the quantity in the max field.
-
Order Qty Only - this option indicates that the recommended quantity to order will replenish to the quantity in the Order Qty field
-
Replenish by Order Qty - this option indicates that the recommended quantity to order will replenish to the min by the amount in the Order Qty field.
-
Max by Order Qty - this option indicates that the recommended quantity to order will replenish to the max quantity by the amount in the Order Qty field.
-
Dynamic Ordering - this option will give a recommended order quantity based on what is in the order qty field, the min field and the max field and is determined as follows:
-
If the item only indicates a minimum value, the system will calculate the quantity based upon the difference between the current on-hand and the minimum
-
If the item has a minimum AND an order quantity, the system will fulfill to the minimum based upon the order quantity indicated, which could exceed the stated minimum quantity not to exceed Maximum qty if it is set to a non zero amount.
-
If the item has a maximum indicated, the system will fulfill it to the maximum by single units.
-
If the item has a maximum indicated AND an order quantity, the system will fulfill to the maximum by the indicated order quantity
-
If the item has an F-Pack indicator within the electronic catalog, the F-Pack quantity will control the order quantity multiple
Seasonal Items
This option will allow you to exclude or include seasonal items. If you select Include, new options will open up.
-
All - Every seasonal item specified in your system will be included
-
Dated - Seasonal items within the date range for the report will be included (click here to learn how to assign a date to a season)
-
Selected - Choosing this option enables the Seasonal drop down menu; you can only select one season to be included with the other reorder items
-
Only - Choosing this option also enables the Seasonal drop down menu, but the reorder report will only have items from that specific season
Purchase Order Request Date
The date entered in this field is the date you request for the purchase order (for reordering).
Report Order by
The option selected here will order/sort the report by the selected option. These options are Class/Code, Class Only, Item Number, Location, or User.
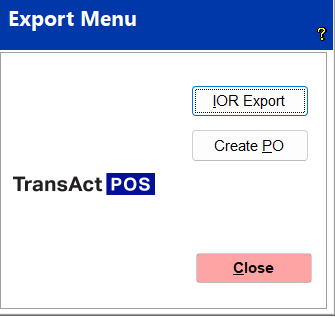
Export
Once you are happy with the generated reorder report, you can select Export to open up the Export Menu.
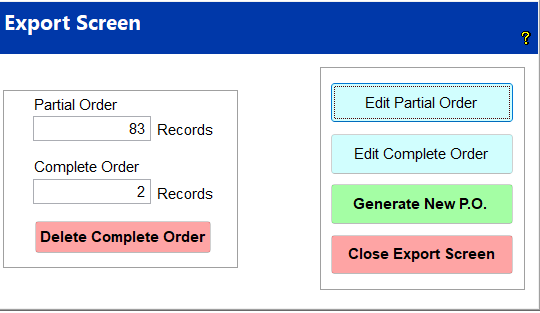
Clicking IOR Export will allow you to modify the order (as shown below).
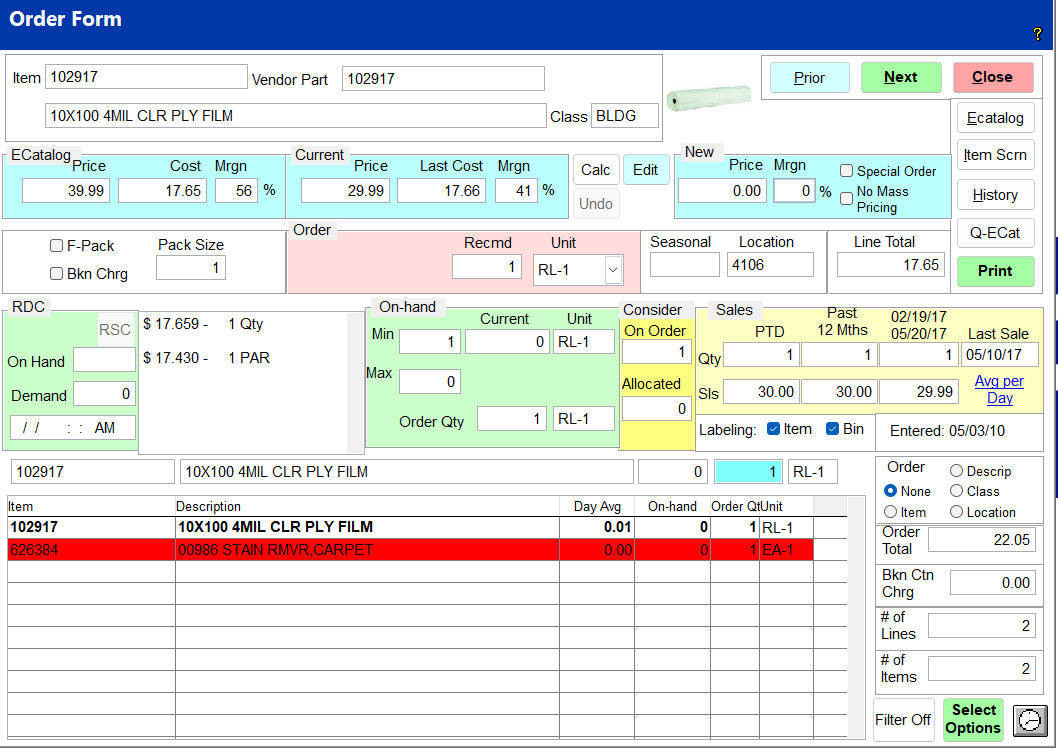
After clicking Edit Partial Order or Edit Complete Order:
On this screen you can go item by item and adjust the order quantity.
The following screen buttons are available:
-
Prior - Display the previous item in the reorder report list
-
Next - Display the next item in the reorder report list
-
Close - Exit the editing of the reorder report
-
Retrieve - Retrieve a previously saved order
-
Save - Save the currently displayed order
-
ECatalog - Display the ECatalog screen for the currently selected item
-
Item Scrn - Display the Inventory screen for the currently selected item
-
History - Display the sales history for the currently selected item
-
Q-ECat - Display the short ECatalog screen for the currently selected item
-
Print - Print the labels for the items on the reorder report
The Pricing may be changed using the Calc, Edit, and Undo buttons.
An item's On-hand Min, Max, and Order Qty can be changed from the Order Form Screen.
The Current On-hand number can be changed from the Item Screen if needed. (Note: Any changes to the inventory file from the Order Form will not be made until another item in the list is selected)
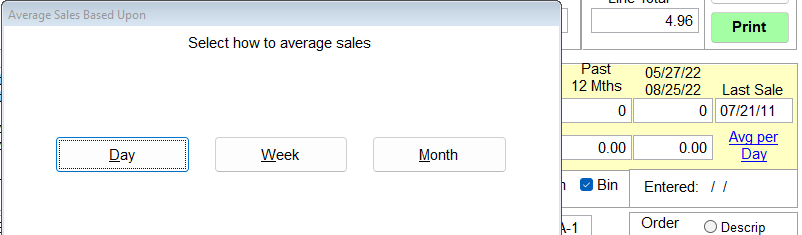
The Avg per Day option allows the Day Avg column on the item list to be changed to Avg per Week or Avg per Month.
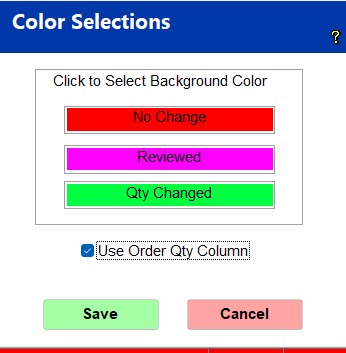
The Select Options button allows for the background color of an item to be changed to display the item's status as having No Change, Reviewed, or Qty Changed.
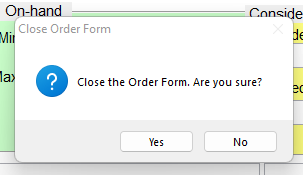
Once satisfied with the quantities and other changes made, Select the Close button. On the resulting Close Order Form pop up screen, Select YES.
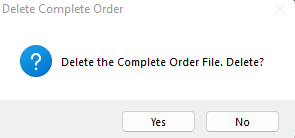
After Selecting Yes, another pop up will appear asking to Save the Complete Order, Selected Yes and then Select Generate New P.O. After Selecting Generate New P.O. another pop up will appear asking to Delete the Complete Order File. Delete? Click Yes if done editing the complete order. It will confirm that it is ok to delete the file. Select Yes. Select Close Export Screen, then close the reorder report screen.
Go to Modify PO to locate the purchase order that was created.
Selecting Create PO will automatically create a PO from the given report data. The PO can still be modified by going to PO | Modify PO.