07-010-1 IOR Training - Do It Best
Overview
The application Inventory Order and Receipt module (IOR) manages multiple aspects of the vendor merchant relationship, from maintaining the associated electronic catalog to downloading invoices and sales promotions.
The enhanced communication with the following vendors provides a competitive advantage for your store. Options like one button receipt of truck invoices or a scanned procedure confirming each line allow you to control how you decide to process your orders. With the ability to order products, track backorders, update prices, and receive orders, you save time and money.
TransActPOS is a Level 1 POS Vendor and provides a fully compliant communications module supporting your relationship with Do it Best. Scheduled events automatically update your system based upon the most current information from Do it Best in the following areas.
-
-
-
-
-
-
-
-
-
-
Uploading purchase orders
-
Uploading store sales information
-
Promotion Order Confirmation
-
Drop Ship Order Confirmation
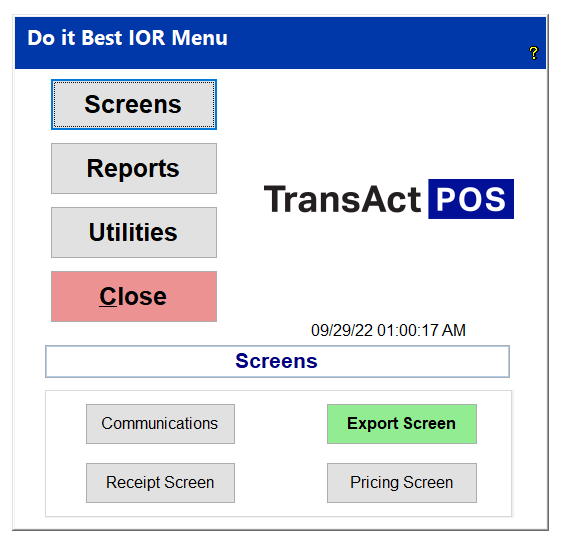
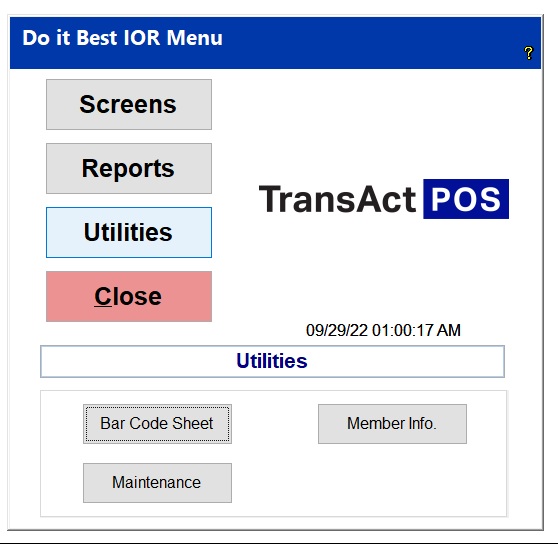
Do It Best Screens
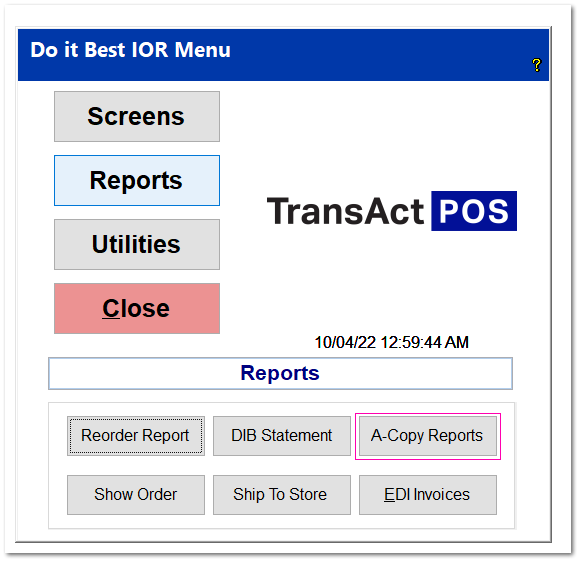
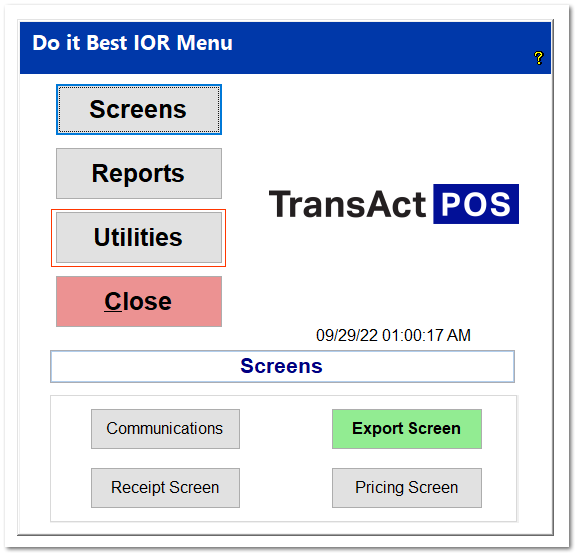
From the Do it Best IOR menu, select the Screens, Reports, or Utilities options. The Screens option has four selections:
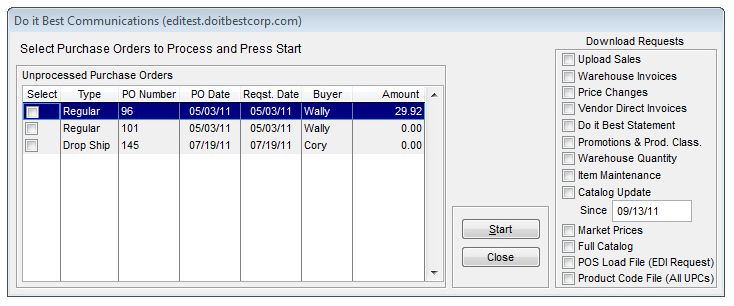
Do It Best Communications
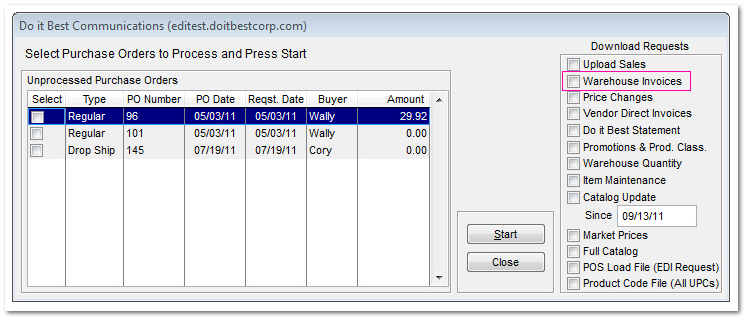
The communications portion of the Do it Best interface allows the user to transmit purchase orders. Select the appropriate invoices from the list by checking the boxes on the left column. Additional Download Requests options on the right are available to gather data from inventory maintenance.
Upload Sales
Sales data will be uploaded to Do it Best for use within the Do it Best Dashboard.
Warehouse Invoices
All invoices from the Do it Best warehouse will be downloaded.
Price Changes
Any item price changes will be downloaded.
Vendor Direct Invoices
Only invoices directly from Do it Best will be downloaded.
Do it Best Statement
The current Do it Best statement will be downloaded.
Promotions & Prod. Class.
All promotions and product classes will be downloaded.
Warehouse Quantity
The quantity of selected items in the Do it Best warehouse will be downloaded.
Item Maintenance
Any changes in item information will be downloaded and updated in the inventory file.
Catalog Update
Any changes from the indicated date for the online catalog will be downloaded.
Market Prices
Do it Best market prices will be downloaded for all of the selected items within the current Market Bulletin Promo file.
Full Catalog
All of the Do it Best catalog will be downloaded.
POS Load File (EDI Request)
This will download the POS Load File. It requires a request to the EDI department at Do it Best.
Best Rewards Customer
This sends Best Rewards customer information to Do it Best based on whatever date is entered
Product Code File (All UPC’s)
This will give you the ability to pull in past UPC codes into the inventory for looking up items by older UPC codes.
Drop Ship Confirmation
There are two new files available from Do it Best that allow the store to receive order information. Both of these files are new types of Purchase Orders.
1. Drop Ship Confirmation - information for a vendor downloaded from Do it Best into a purchase order appears as a Drop Ship PO type. Items that appear on the dropship file that are not indicated as a Do it Best item and not found in inventory are presented with the available information entered into the Item Wizard for the user to add the item to inventory.
Promo Order Confirmation
2. Promo Order Confirmation - information about items that are on a promotional order. This information is not to be used to receive inventory, but is only a confirmation of the order.
How to Process
The process is the same for both of the new file types.
1. Select Options from the Main Menu then the IOR Menu.
2. Select Communications from the Do it Best IOR Menu
3. Check the Warehouse Invoices checkbox and
4. Select the Start button. The selection can be combined with other selections.
5. The download and upload process starts. If either of the files are available at Do it Best they are downloaded along with the Warehouse Invoices and automatically processed. Items that are in the inventory are presented to the user to add via the Item Wizard.
Locating Purchase Order
1. Click the PO Button on the Main Menu
2. Click the Modify PO Button
3. Select the PO Type of either Promo Confirm or Drop Ship Confirm
4. Click the Find Now button. You can also search for the PO by the PO Number you assigned during the placing of the order at Do it Best.
Do It Best Receipt Screen
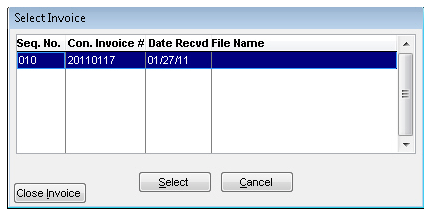
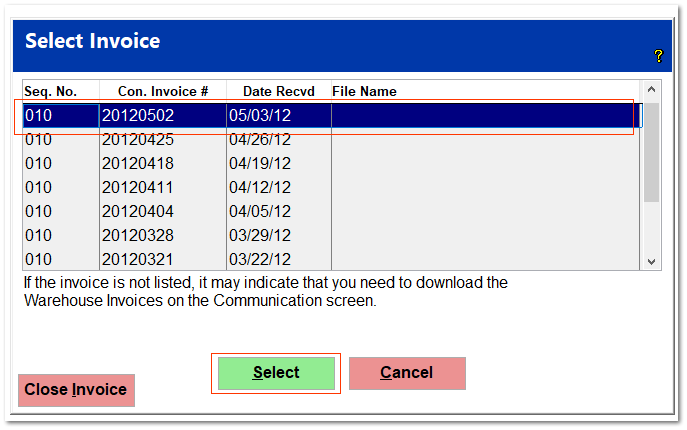
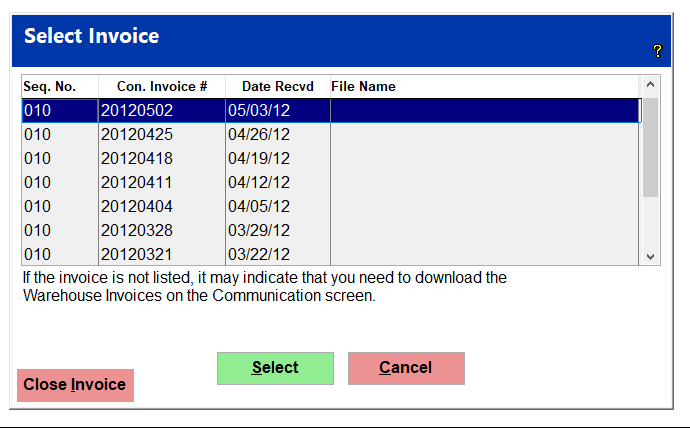
The Do it Best IOR Receipt screen allows the user to check received orders from Do it Best easily. The user selects one of the entries in the text box and then presses select to work with that set of Invoices. Each group is a file containing invoices that were submitted on the date that describes the group. The first four digits are the year, the next two are the month, and the last two are the day (The image below contains an order submitted on January 17, 2011).
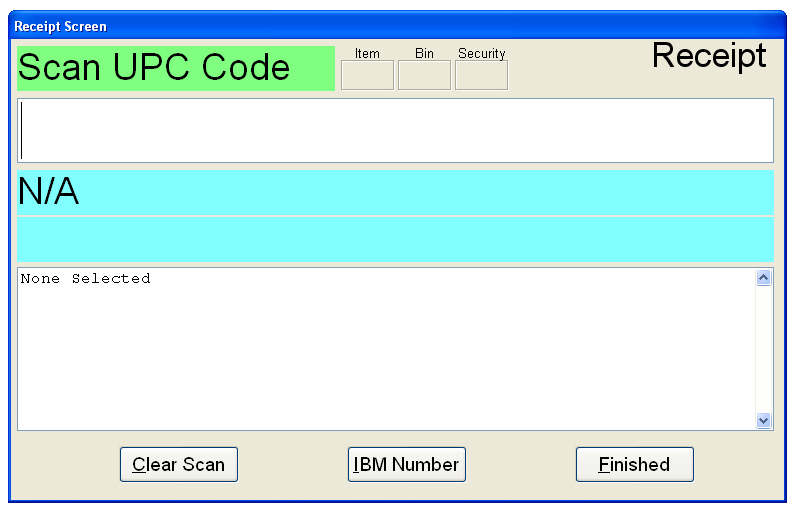
A list of the Invoices as well as a hard copy for them should accompany the shipment. The receipt screen, however, allows the user to scan the incoming order rather than recording the order by hand. Once the Invoices are selected, clicking the Select button opens the Receipt screen. The Receipt screen allows a user to scan received items from Invoices with either their UPC Code or IBM Number. As each item is scanned, it will appear in large text in the blue section as well as a line item in the listing.
• Item - This box will be checked if the selected item needs an Item label
• Bin - This box will be checked if the selected item needs a Bin label
• Security - This box will be checked if the item needs an anti-theft device placed on/in it
• Print Label (not shown) - You can now print labels on this screen by clicking this button
• Clear Scan - This clears the line item list box of all scanned items
• IBM Number - Clicking this button allows the user to scan an IBM Number instead of a UPC Code
• Finished - Clicking this button records the items scanned as received into inventory
How to Receive Order In Full/All Item Import
You may want to receive the order in full instead of scanning each individual item. This will definitely save you a lot of time.
Step I - Click on Communications
Step 2 - Check the box beside Warehouse Invoices and click Start.
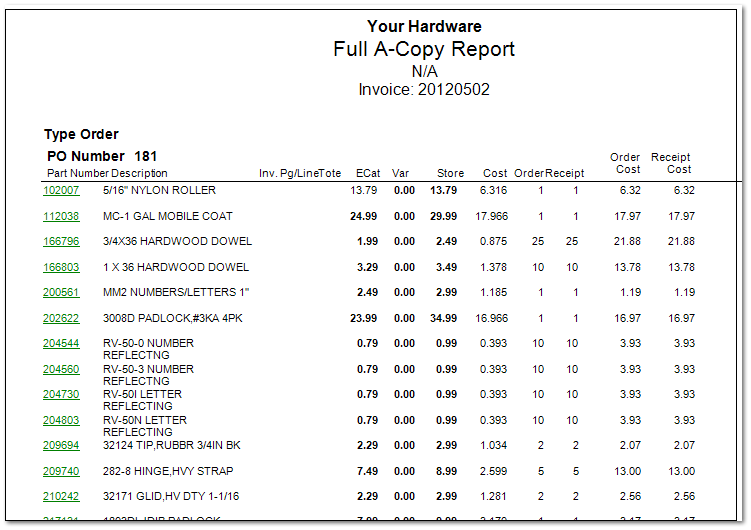
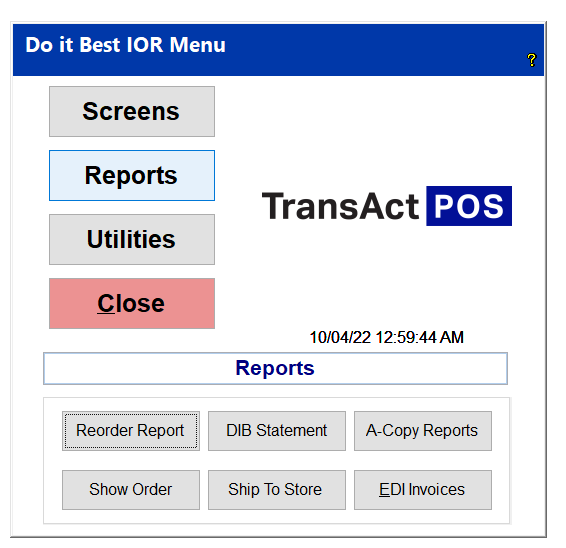
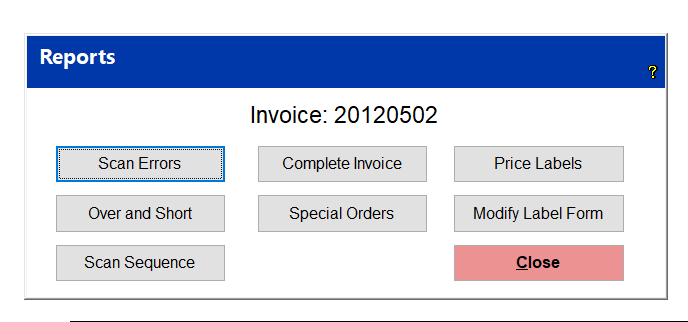
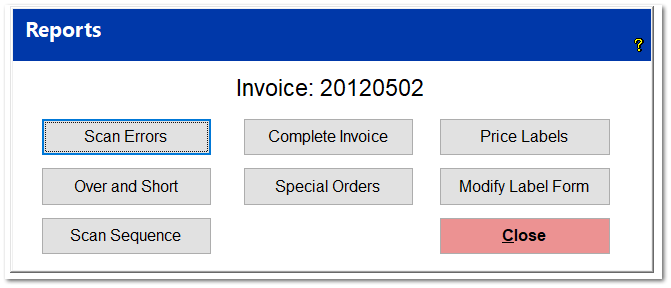
Step 3 - Click on Reports
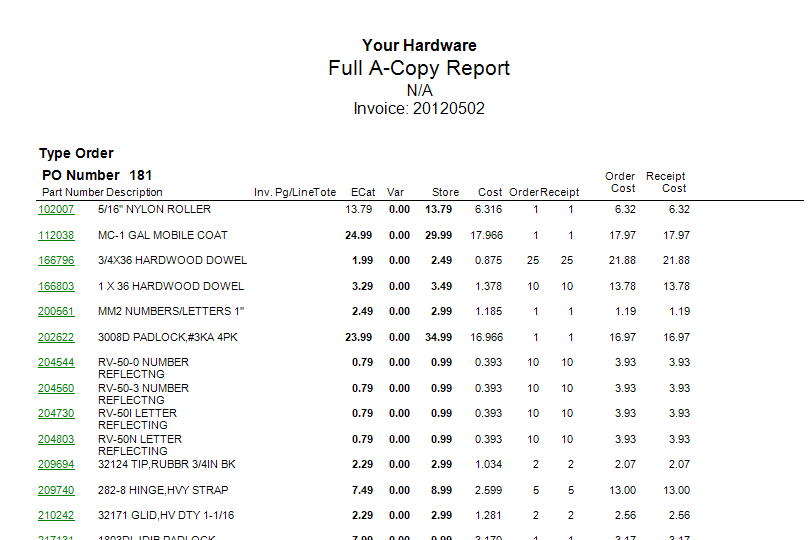
Step 4 - Click on A-Copy Reports
Step 5 - Select the invoice you just downloaded.
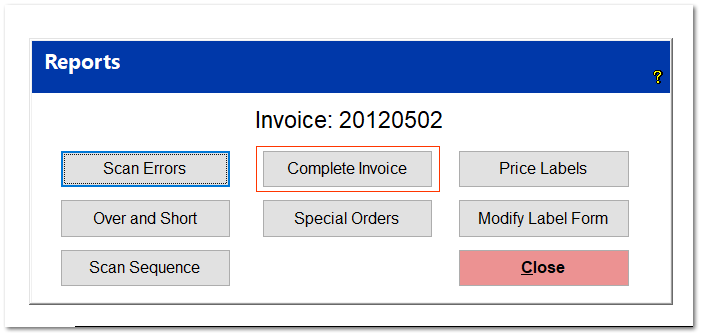
Step 6 - Click on Complete Invoice.
Step 7 - Click on Display.
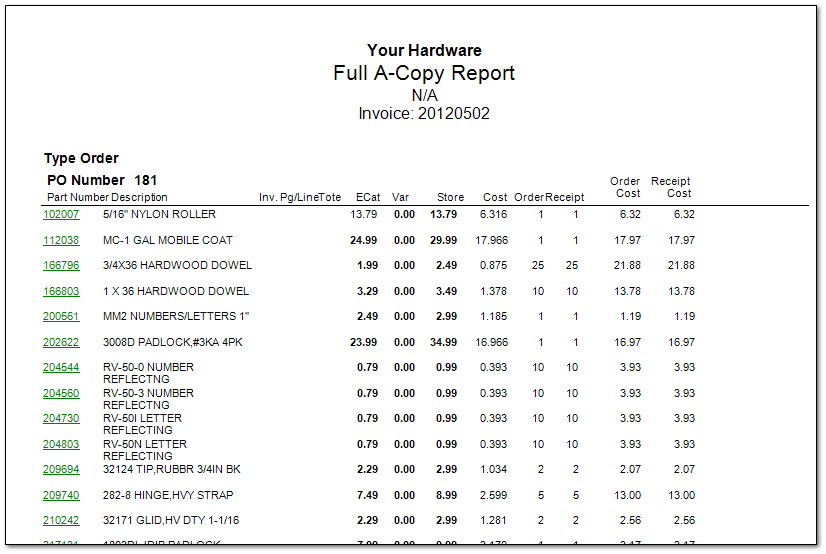
Look through the invoice to make sure the total is close to what you ordered. Look for any items that they were not able to send and possibly put on back order. Look for any items that have been discontinued. Look to see if they may have sent substitutes for something you ordered.
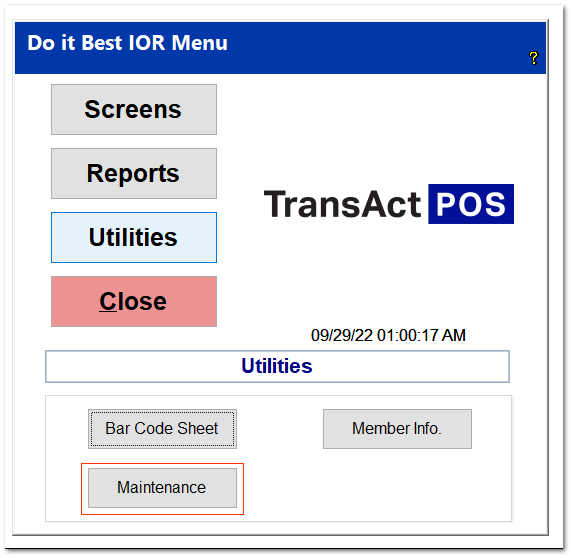
Step 8 - Click on Utilities.
Step 8 Click on Maintenance
Step 9 Click on All Item Import
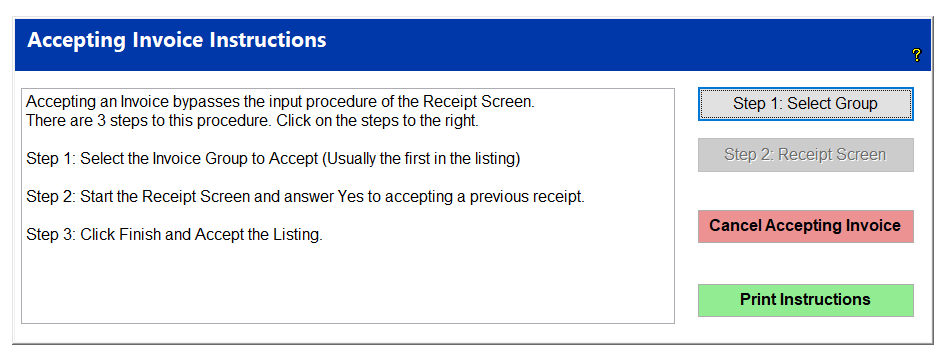
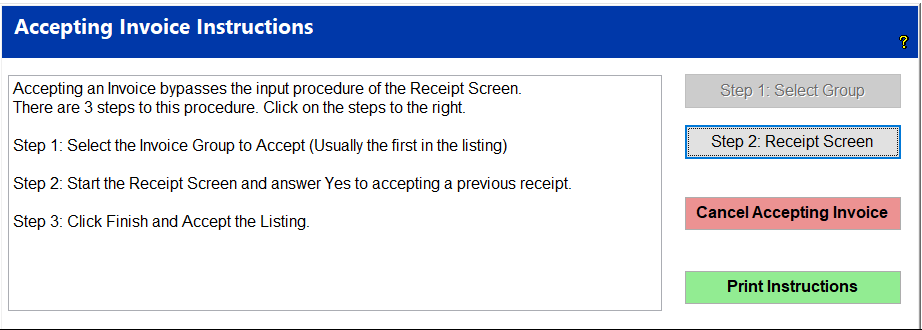
Now Follow the Steps in Accepting the Invoice:
Step I - Select the Invoice Group to Accept by clicking on Step I Select Group
The below screen will appear and you click on the invoice you want to receive.
Step 2 - To start the receipt screen - Click on Step 2.
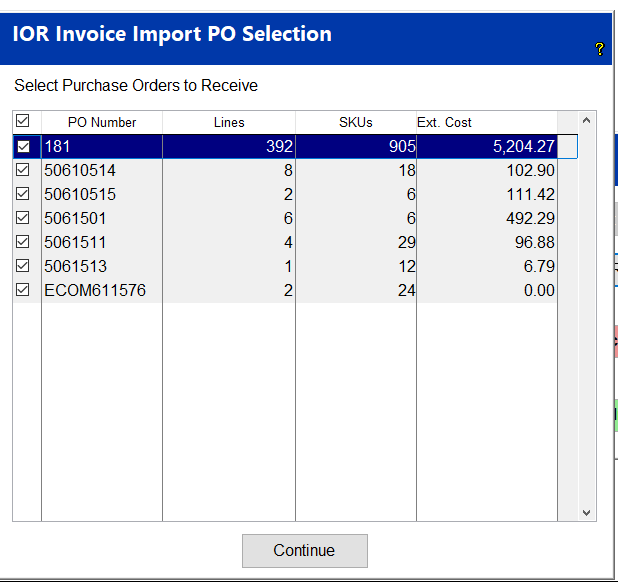
Click the Continue Button, leaving all of the PO’s checked.
TransActPOS will start receiving the items. Once finished click on the Finish button. Now all your inventory will be updated to the new on-hand quantities.
How To Receive An Order By Scanning Items
Step I - Click on Communications
Step 2 - Check the box beside Warehouse Invoices and click Start.
Step 3 - Click on Reports
Step 4 - Click on A-Copy Reports
Step 5 - Select the invoice you just downloaded
.
Step 6 - Click on Complete Invoice.
Step 7 - Click on Display.
Look through the invoice to make sure the total is what you ordered. Look for any items that they were not able to send and possibly put on back order. Look for any items that have been discontinued. Look to see if they may have sent substitutes for something you ordered.
Step 8 - Click on Receipt Screen
Step 9 - The screen below will be displayed. Click on the invoice you want to receive.
As each item is scanned, it will appear in large text in the blue section as well as a line item in the listing.
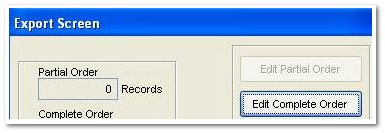
Do It Best Export Screen
The Do it Best IOR Export Screen allows a user to evaluate a Reorder Purchase Order before having it sent to Corporate. The process starts when the user runs a Do it Best reorder report on a certain segment of their inventory. Once complete, they then Export that report to IOR. The user can then go to the Do it Best IOR Export screen and select Edit Partial Order.
The Order Form will be populated with the partial reorder report they ran. If a user wanted to, they could run a reorder report on the entire store's inventory, but it might be easier to only do a portion of the inventory at a time.
The various text boxes in the form are representative of the line highlighted in the list box at the bottom. After editing the report the user can click the Close button and they will be asked if they wish to add the partial order to the complete order. The various fields on this screen are detailed as follows:
-
Price - The suggested Price for the item
-
Cost - The cost of the item
-
Margin - The profit margin of the item
-
F-Pack - Indicates if the item can only be purchased in packages of individual items
-
Bkn Charge - Indicates if there is a charge for a broken package
-
Pack Size - Indicates how many individual units are in a package
-
-
Vendor Part - The vendor part number for the item
-
Description - The item description
-
Order - The number being ordered
-
Recmd - The recommended number to be ordered
-
Unit - The unit of measure used in conjunction with the item
-
Seasonal - Shows if an item has been identified as a seasonal item
-
Order Cost - The total cost for the number of items ordered
-
On-Hand - Indicates what the minimum and maximum number of the item that can be on hand as well as what is currently on hand and what is on this order
-
Consider - This indicates how many of the item are already on order and how many are needed by customers
-
Sales - Gives a brief sales history of the item
-
Prior Button - Moves the focus to the previous item in the list
-
Next Button - Moves the focus to the next item in the list
-
Close Button - Closes the form and prompts the user to save the changes and forward the partial order to the full order
-
Item Screen Button - Opens the item screen concerning the item
-
Sales History Button - Opens the sales history screen concerning the item
-
The Edit Complete Order Button opens the Order Form and displays all items of previously accepted partial orders.
This allows the user to review the entire order one more time before sending it to Corporate. Once that is done, the user can select the Export Complete Order Button. This will create a purchase order which can be selected in the Do it Best IOR Communications screen and then prompt the user to delete the Complete Order file. Once it is deleted, the user can start the process over again from the beginning when it is time to run the next reorder report. Clicking the Close Export Screen Button returns the user to the Do it Best IOR Menu screen.