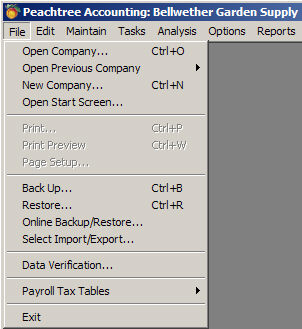
Configuration of Peachtree Import
Prior to using the General Ledger | General Journal import function within Peachtree, the import configuration must be created. If the import configuration is not correct, the process will not yield the desired results. Prior to importing postings into your system, make sure that a backup of the accounting system has been made.
To begin the import configuration process, select File | Select Import/Export from the within the Peachtree application.
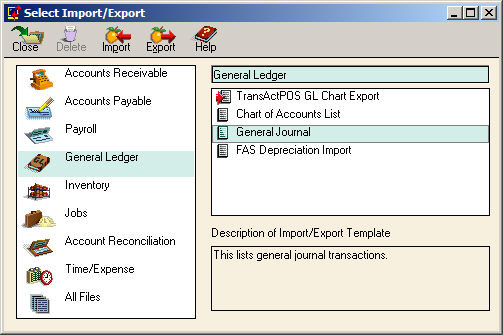
From within the Select Import/Export screen, select General Ledger | General Journal (located within the right panel of the screen). Next, select the Import icon located at the top of the current screen. Notice the "TransActPOS GL Chart Export" listing indicating the previously saved chart of accounts export setting.
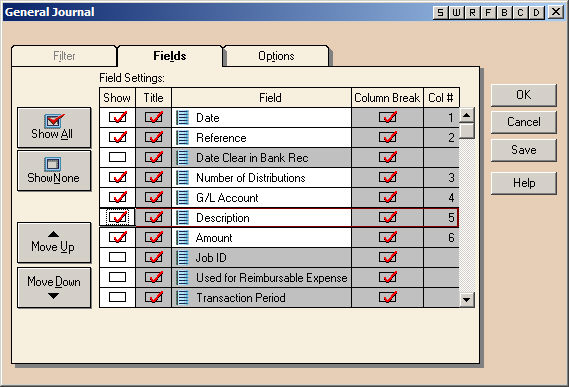
The General Journal screen will appear with Fields and Options tabs displayed. Make sure that the configuration matches the screen below. Utilize the Move Up and Move Down buttons to change the order of the field. Peachtree is sensitive to the order of the indicated file format, so it is important that order is exactly as shown.
Changing the Import Default File
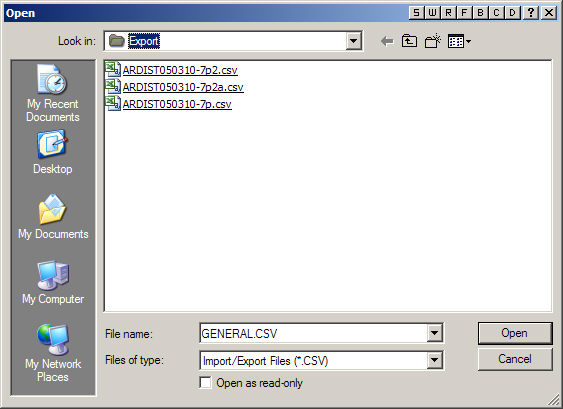
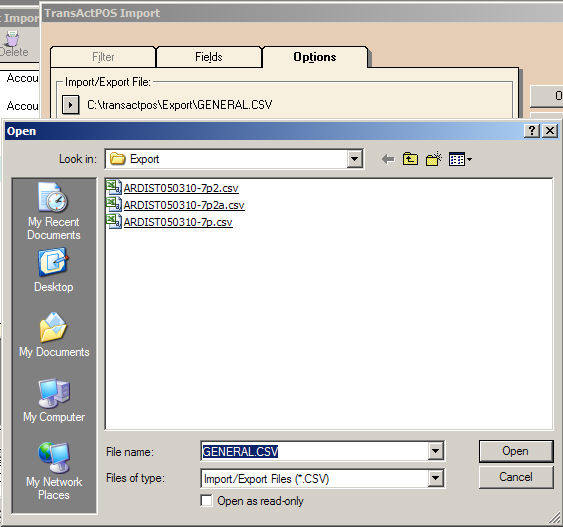
The default file path indicated for the import file can be altered by selecting the Pick List button located the left of the path name.
Upon selecting the Pick List, the contents of the directory are displayed, allowing the user to select a different file or directory.
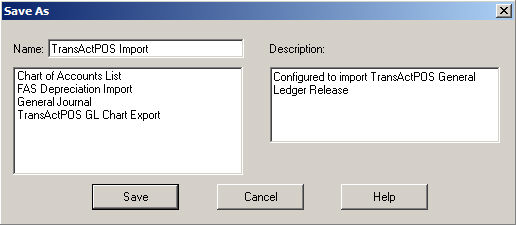
Select Save to create a unique file name for the specified configuration. Enter "TransActPOS Import" as the configuration name and then press Save again. A long description can be added to further clarify the saved configuration.
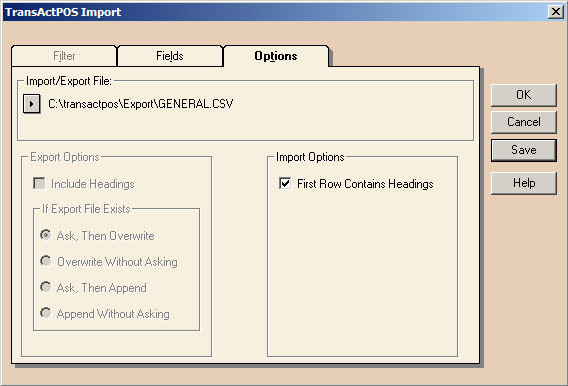
Upon selecting Save, the system will return to the newly titled page, "TransActPOS Import". Select the "OK" button to process the import file indicated within the file specification, "C:\transactpos\Export\GENERAL.CSV".
Note: You can redirect the import function to pickup a file other than the one indicated as the default. To do this, click on the "Pick List" icon located just to the left of the "C:\transactpos\Export\GENERAL.CSV" and select the specific file to import. During the General Ledger Release process within TransActPOS, the user can specify the name of the resulting export file. For instance, during the testing of this process, three different file names had been created thus allowing the user to pick which file to import based upon their specified criteria.