(c) Profile Systems Design Group, Inc. 2026 Build: 4.008.811 Help ID: 1172
If you do not see the expected content,press CTRL + F5 to clear your Browser's cache.
Assembling a CAT 5 / 6 Cable
The following sets show how to properly attach an RJ-45 end on to a CAT 5 / 6 cable.
Required tools:
CAT 5 / 6 cable
RJ-45 end (a female connector)
Punch down tool
Wire cutters
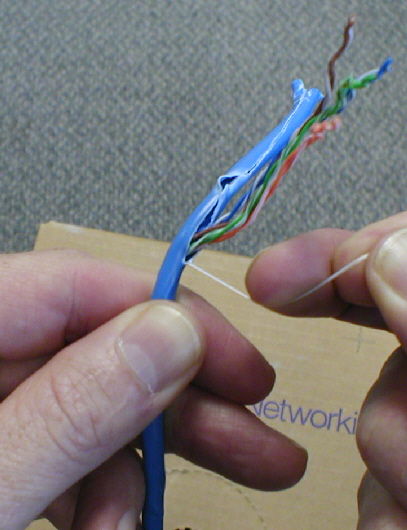
Strip back 3"-4" of the PVC shielding. The pull cord can make this a bit easier.
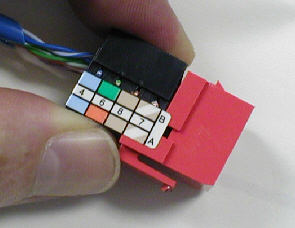
On the side of the RJ-45 connector, you will see an A and B which indicate the two different wiring patterns for Ethernet networks. Typically the B wiring pattern is chosen in your installations.
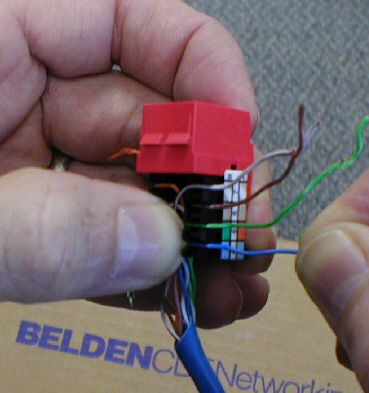
Unwind a portion of each cable pair and place into the coordinating color coded slot. Take a look at the next picture so that you can see the details regarding the twist of the cable pairs.
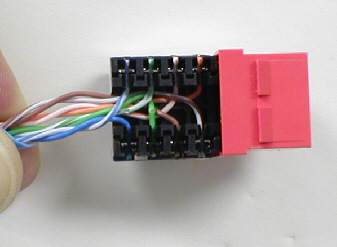
The finished product should look like this. Note: None of the twist is lost within the cable pairs.
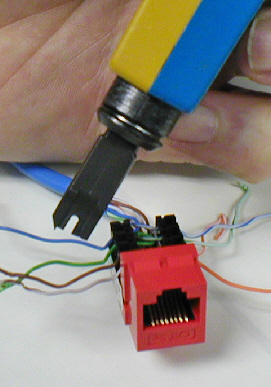
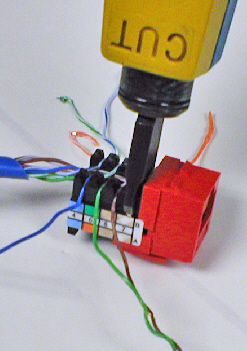
Next, the punch down tool will be used to push the wires into the indicated slots. Notice the small knife edge on the punch down tool. The knife edge should be toward the end of the cable. If the knife edge is on the inside of the connector you will have a problem. You will realize this when the connector falls off.
Press the tool perpendicularly into each wire's slot, on a firm surface, until the spring loaded cutter does its job of cutting and setting the wire.
The finished connector will than have a cap placed over the connector to secure the wire ends.