Zebra LP 2824 Installation
Physical Installation of Printer
1) Load Zebra LP2824 ZDesigner printer driver on a workstation
2) Attach the Zebra LP2824 printer to the workstation with a USB cable
3) Load a roll of Zebra compatible labels in the printer and close the printer's lid
4) Turn on the printer
Configuration of Printer Parameters
1) Within Windows, go to Start > Printers and Faxes and locate the ZDesigner LP 2824. The Status of the printer should be "Ready".
2) Right click on the "ZDesigner LP 2824" printer name and then select "Properties"
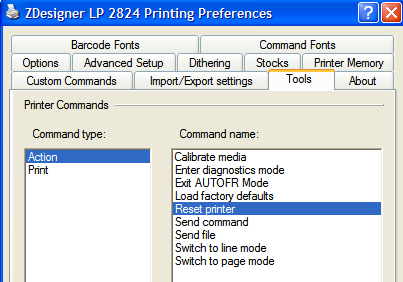
3) Within General > Properties > Printing Preferences, select Tools
4) Select the Command Type of "Action" then select "Load Factory Defaults" and complete this task by selecting "Send" at the bottom of the screen.
5) Next, select Command Type of "Action" then select "Calibrate" and "Send" at the bottom of the screen.
6) Select the Command Type of "Print" then select "Feed on label" and complete this task by selecting "Send" at the bottom of the screen. A single label should print with the label's perforation stopping at the printer's tear bar.
7) Within Printing Preferences, select the "Stocks" tab and then select "New" to create a stock named "BIN". Indicate the Label Width to be 2.00" and the Label Height to be 1.12". Select OK to complete this tab. Note: the Option > Darkness value at time is modified to make the print of the label darker - only modify this value if needed.
8) Select the "Options" tab and then select the newly created "BIN" type of label within the "Stocks" listing.
9) Select "Apply" from the "Printing Preferences" page and then return to the Properties page.
10) Locate the "Advanced" Tab and then select the "Printing Defaults" button.
11) Select the "Options" tab and then select the "BIN" label type within the "Stocks" field. Select Apply and then OK to exit all of the printer configuration screens.
If the Zebra LP 2824 is to be shared within the network, right click on the "ZDesigner LP 2824" printer within the Printers and Faxes screen and select "Sharing..." and then determine an appropriate name for the printer. This is the name of the printer to which other users will recognize the printer when creating the shared environment. Select Apply to complete the sharing process.
Zebra LP 2824 setup and configuration is complete.
Creating a Label within TransActPOS
1) Within TransActPOS, select System > Form/Label Editor > Label > New and then enter a recognizable Label ID and an appropriate description for the item label which you are creating.
2) The Type of Printer will be "Window", the Type of Label will be "Bin", the Label Format will be "Individual", and the Labels per Row may be left at "0".
3) Next, select "Modify Label" to create the desired label format.
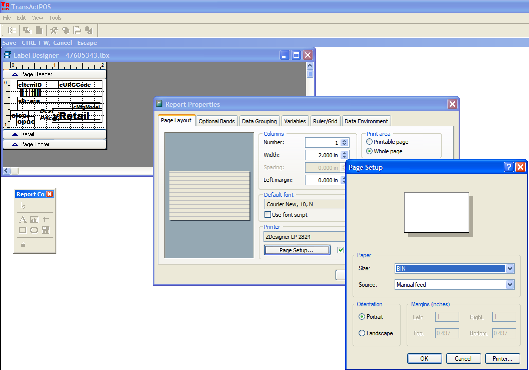
4) Within the label editor, select File > Page Setup. Below the "Printer" section of Report Properties, select "Page Setup" and then select "Printer". Locate the ZDesigner printer just created in the previous steps. With the label printer selected, the Size field will now have the "BIN" label format available. Typically, this is defaulted to the "user defined" value and will need to be changed to "BIN". If the appropriate "Size" is not selected, the printing behavior will be less than desirable.
5) Once the label format has been modified, press the "Ctrl" and "W" keys at the same time to have the system save the modified label format.
Printing a Label within TransActPOS
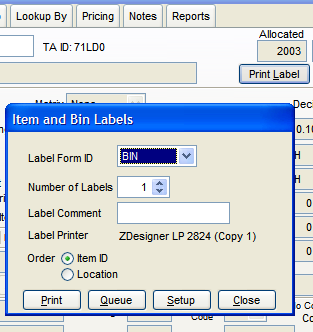
1) Within TransActPOS, select IC > Inventory File and then select "Print Label". Next, select the appropriate Label Form ID, the Number of Labels, and make note of the Label Printer. If the correct printer is not currently selected, choose the "Setup" button to pick the appropriate printer from the available printers listing.
2) Complete the process by selecting the "Print" button. The system should generate the desired label.