The Zebra printer has the ability to print 1x1 labels having two 1 inch labels in a single row (2x1 space). You must set up the printer both in Windows and in TransActPOS to do so. First, let's start in Windows.
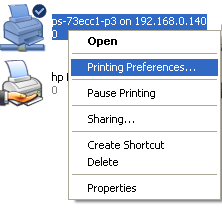
Click Start and click on Devices and Printers (Windows 7) or Printers and Faxes (Windows XP). This will bring up the list of printers on your system. Once you have located your Zebra printer in this list, right click on it and click on Printer Preferences.
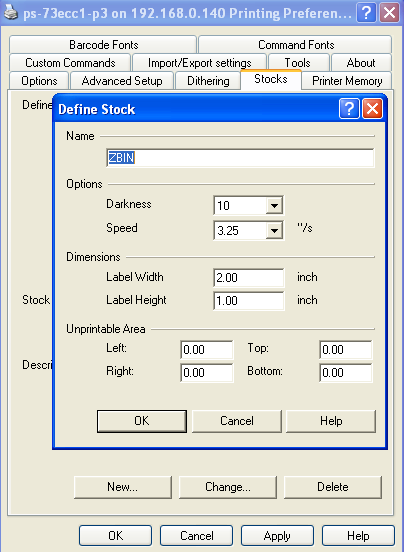
Once in the Printer Preferences, you need to click on the Stocks tab. This will allow you to changes the settings for the "paper" used in the printer. Once on the tab, click change if there is already an item highlighted in the list below or click New to create a new one. The most important settings are the Dimensions and the Unprintable Area. Make sure they match the settings in the image below. Once you are finished, click OK to save the changes.
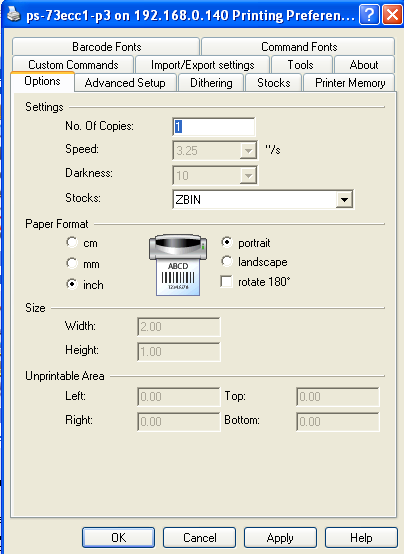
Now that you have created/modified the Stock, click on the Options tab to assign the stock to the printer as the default. Pick the stock you made/altered in the previous step from the drop down menu beside the Stocks field. Make sure the other values match here as well (especially Paper Format inch).
Once these settings have been set, click OK and enter TransActPOS.
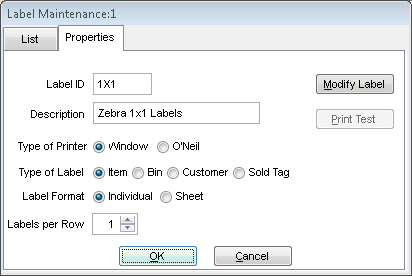
Once you are in TransActPOS, go to System | Form/Label Editor | Labels and click New to create a new label for your 1x1 labels. The Label ID and Description should be easily noticeable. For example, my Label ID is 1x1 and the Description is Zebra 1x1 Labels. Make sure the rest of the settings match the image below.
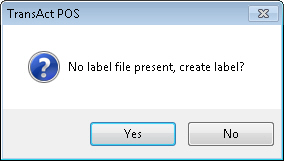
Once these settings have been inputted, click Modify Label. Chances are, the system will ask for you to create one, as there is no label for this specific new label. Clicking Yes will automatically create a label to be used.
Note: You may choose to edit the label to your liking if you wish. Click
here for more information on creating your own label.
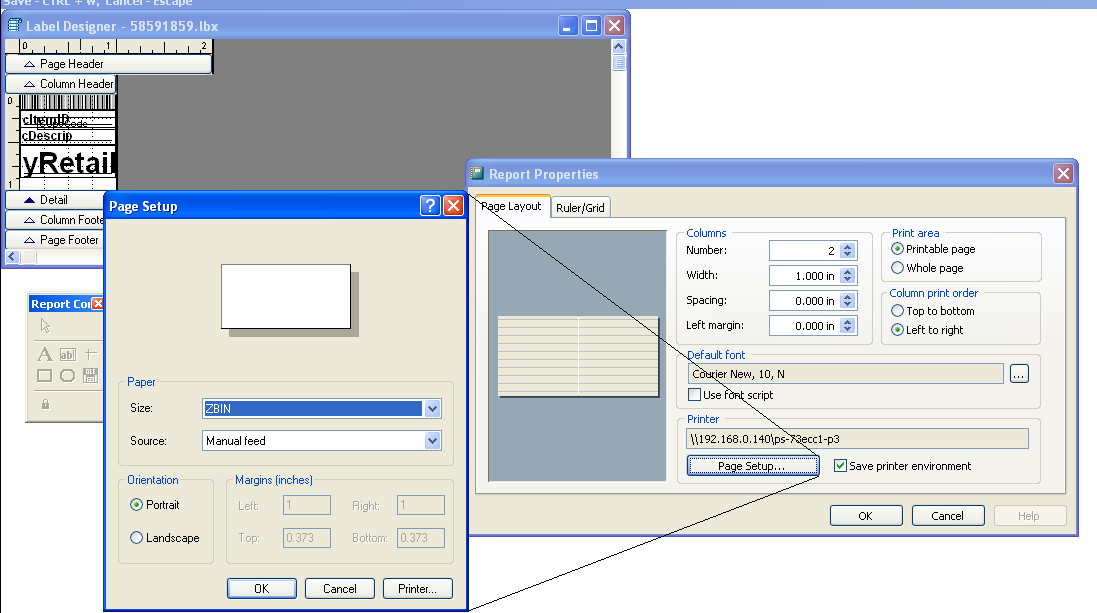
The label created is too large for the 1x1 label. The first thing we need to do is edit the label to fit a 1x1. Click on File | Page Setup to get to the settings for TAPOS. In the Report Properties screen (right side of the image below), make sure that the settings match in the top portion. The Zebra printer needs to be selected as the printer at the bottom of the Report Properties screen. Once your settings match the screen below, click on Page Setup. The most important factor here is changing the Size (of the paper) to the stock you created earlier. Once this is complete, click OK on the Page Setup, OK on Report Properties, and finish editing your label. Once you are happy with the label, press Ctrl + W to save it and exit out of the Label Editor.