Setting Up Delivery Charges
Create a delivery charge item as a non-stock, variable cost item with a selling unit of miles.
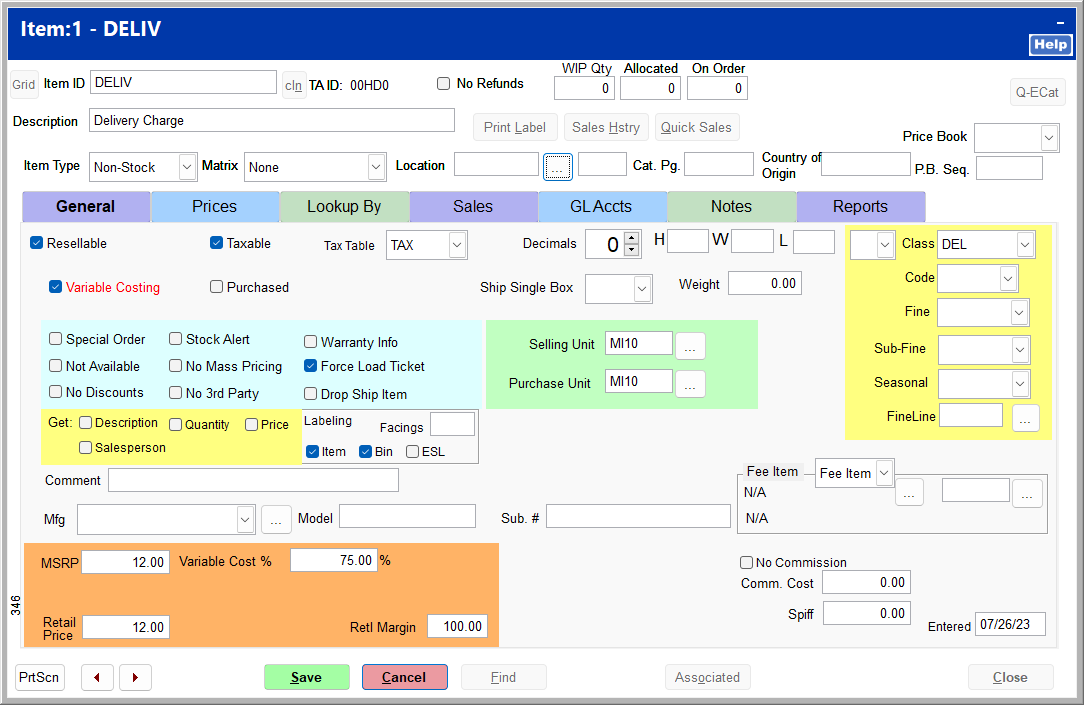
Fields to be aware on the general screen of when setting up the Delivery item:
-
Force Load Ticket is checked
-
Selling Unit and the Purchase Unit is identified as Mi with a unit that you desire.
-
You can set the Variable Costing as you wish.
-
You may want to Create a Class for just delivery and then Set a Report Group for delivery in the Sales by Class Report.
-
Next the Pricing needs to be set up
-
Click on the Prices tab and the screen as shown in the image below will be displayed
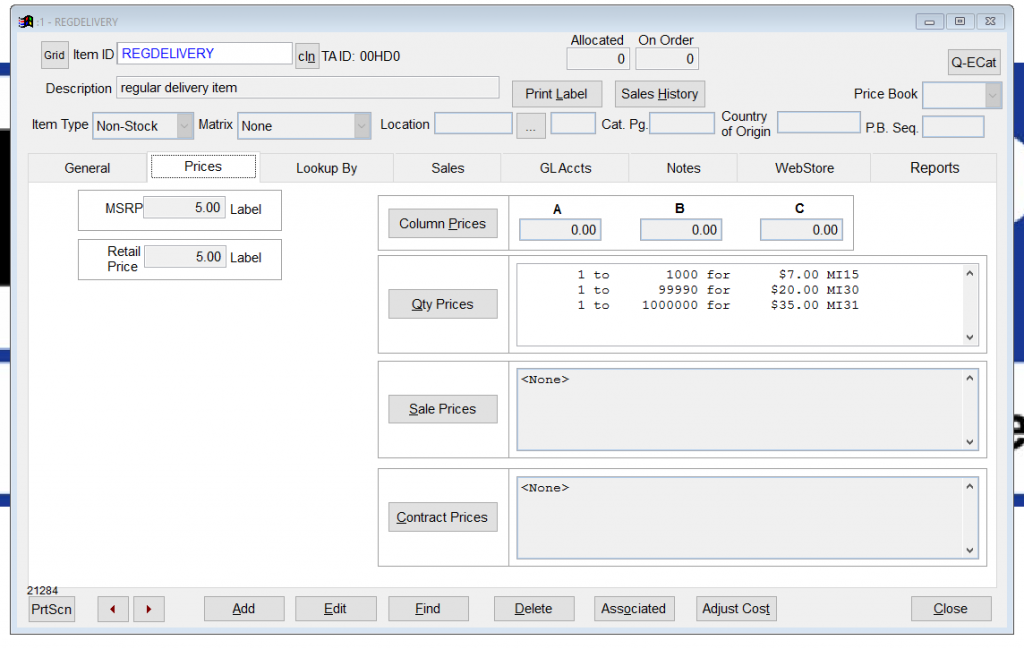
Next click on the Qty Prices button and the screen as shown in the image below will be displayed
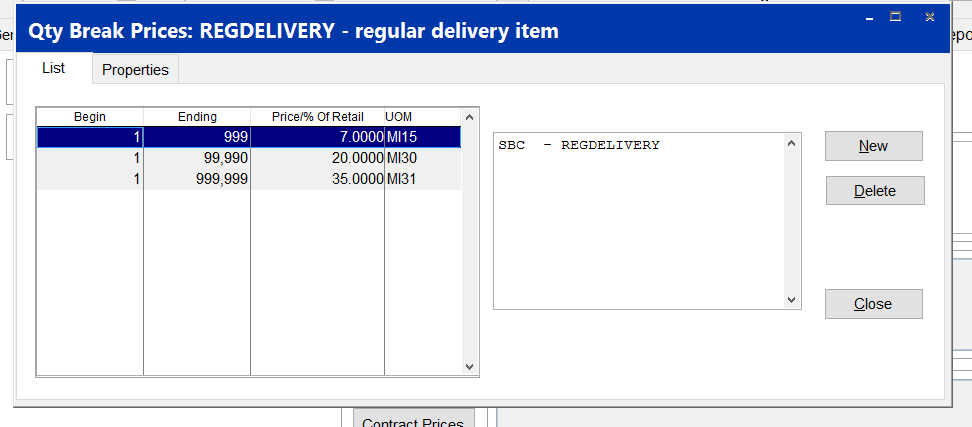
Next click the New button if you are adding a new price or the Properties Tab to display the highlighted pricing and the screen as shown in the image below will be displayed.
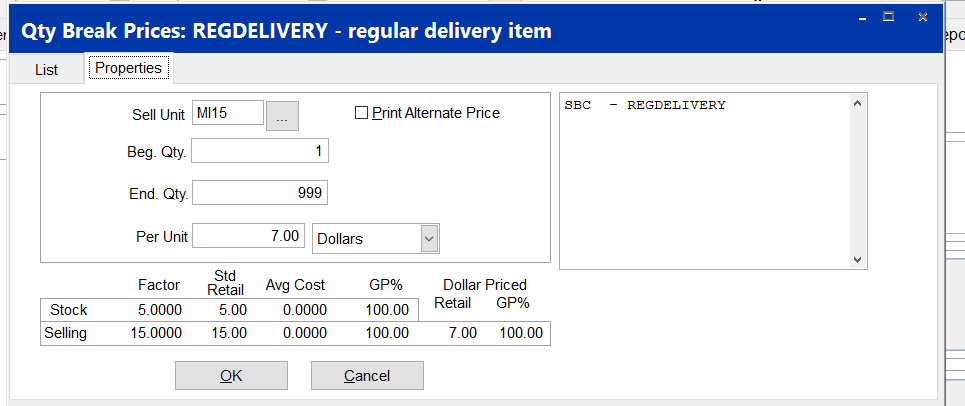
The Selling Unit will contain the Display Unit (in this example MI short for Miles) and the distance (in this example 15). The Beg. Qty will be 1 and the End Qty will be 999 or anything higher. The Per Unit will be the price for that mileage (in this example 7.00).
Next the selling units need to be set up in the Lookup By as shown in the image below.
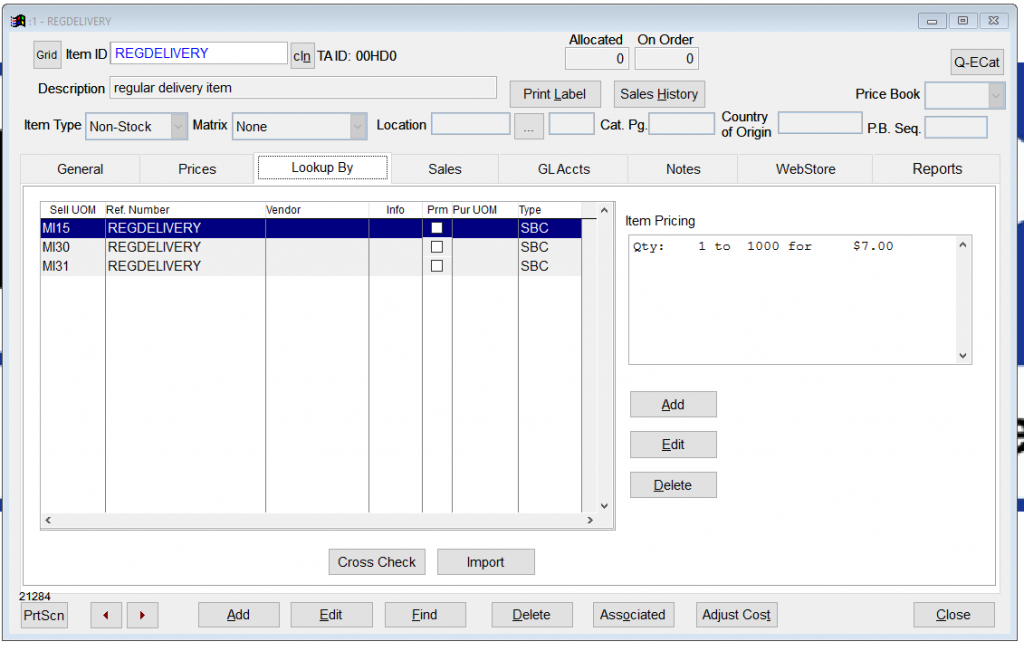
To set this up in the lookup by tab, click the Add button on the right hand side of the screen not the Add button along the bottom of the screen. To Modify an item that has already been set up, select the Edit button on the right hand side of the screen not the Edit button along the bottom of the screen. To Delete an item that you no longer want, highlight the item and press the delete button on the right hand side of the screen not the delete button along the bottom of the screen.
How to Add a New Item to the Lookup By screen
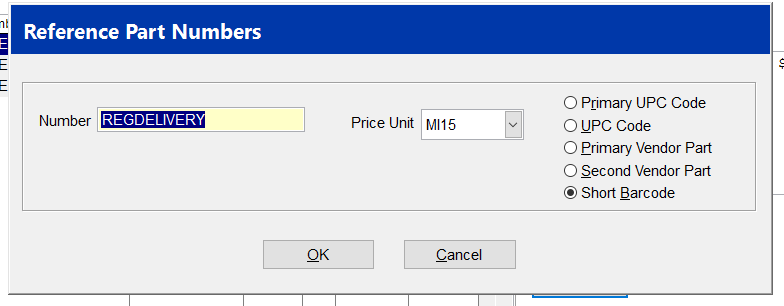
To add a new mileage item, (after pressing the Add button along the right hand side of the screen), enter the item number (in this example REGDELIVERY), select the correct price unit by clicking on the down arrow to the right of the Price unit field (in this example MI15) and then select the Short Barcode by clicking in the circle to the left of the words Short Barcode. Then click the OK button. You are done in the Inventory file. Close everything and so that you get back to the Main Menu.
The Next step is to Setup the Delivery item in the Company Setup area.
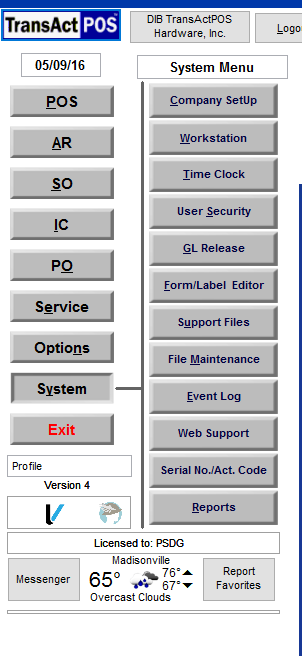
Go to the Main Menu and click on the System Module button. Next select the Company Setup button. This is the first button in the right hand column as shown in the image below.
Once you click on the Company Setup button, the screen will be displayed as shown in the image below.
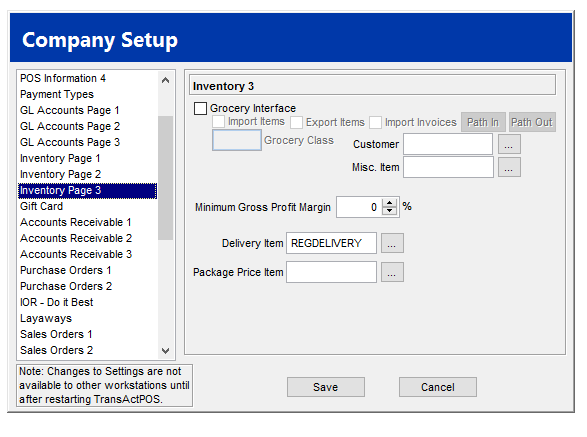
Select the Inventory Page 3 option in the left hand column and in the Delivery Item field, you want to select the Delivery Item that you previously set up in the Inventory File. (In this example, it is the item REGDELIVERY). If you click on the button with the 3 dots to the right of that field, you will be taken to the Find Item:1 screen as shown in the image below.
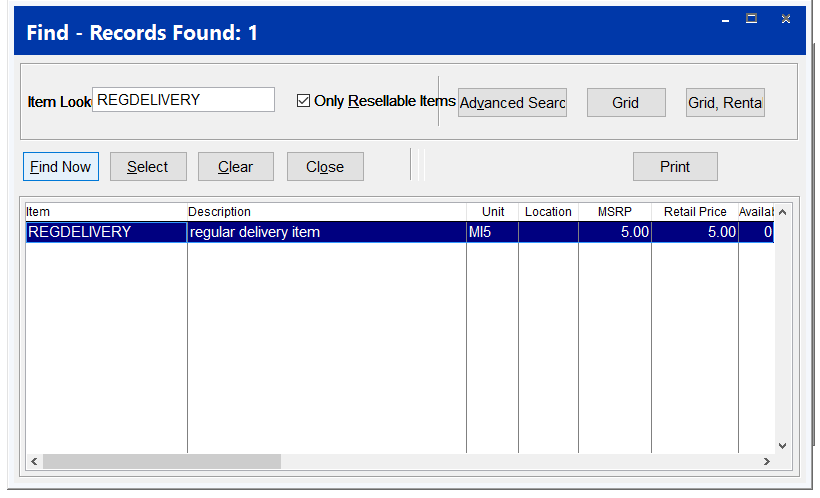
You can then enter the item that you are looking for, press the Find Now button, press the Select button and the field will be filled in as shown in the image below.

If you want the Delivery Charges to be required on Quotes and Sales Orders, there is one more check that is required in the Company Setup as displayed in the image below.
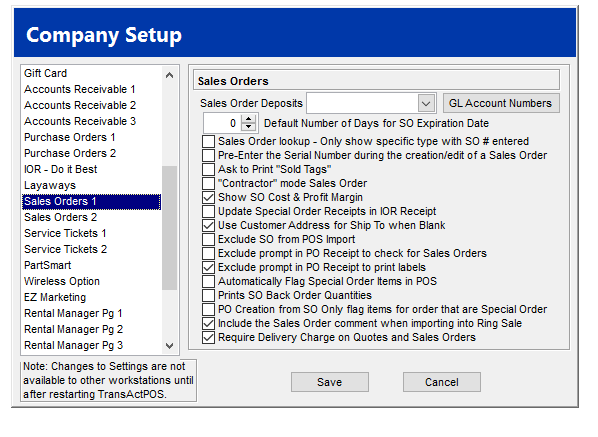
You’ll choose the Sales Orders 1 in the list on the left hand side in the Company Setup. Notice the very last checkbox in the list; Require Delivery Charge on Quotes and Sales Orders. Check this if your store requires this.
Next you'll want to see how this works in the Ring Sale Screen and the Sales Order screen
See the post on How Delivery Charges Work in the Ring Sale Screen.
See the post on How Delivery Charges Work in the Sales Order Screen.