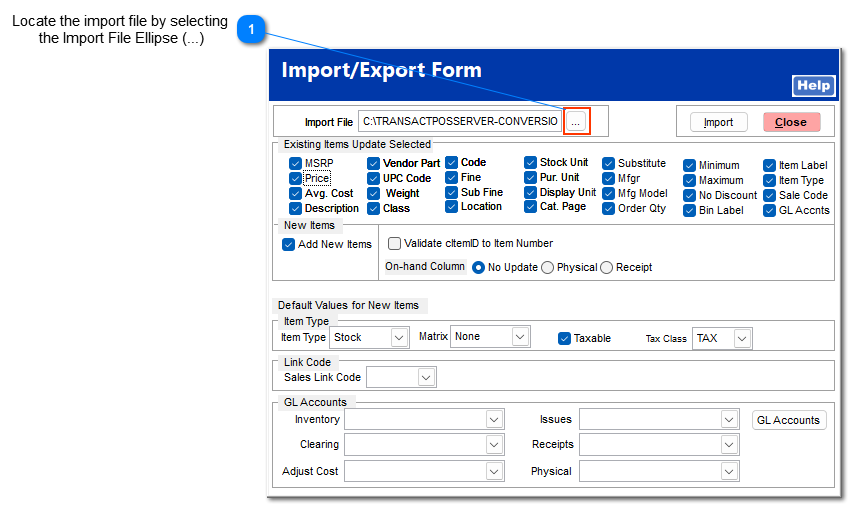
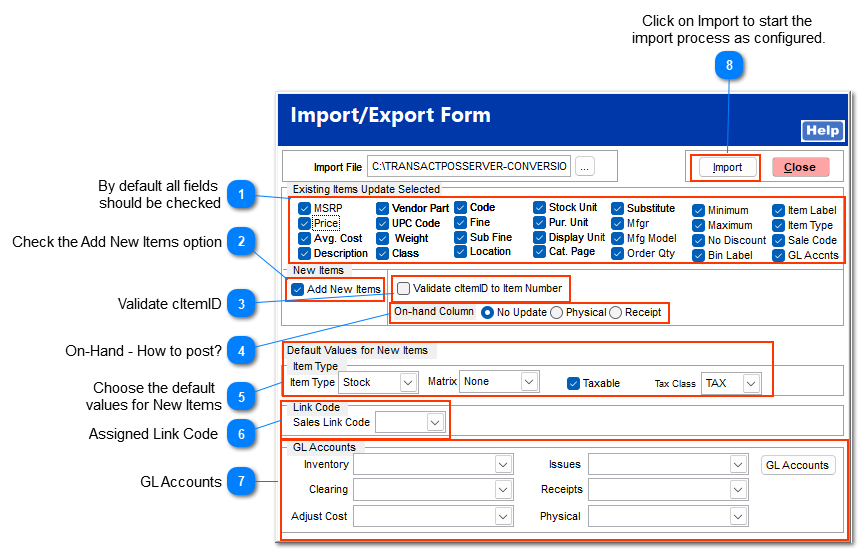
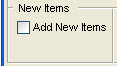
If the Add New Items option is not selected, the system will only update existing items within the inventory that match the cItemID value. Unchecked, items that are not already in the TransActPOS IC module will not be added to the system.
If the On-Hand value in the import file is to be ignored, select No Update.
If the On-Hand value in the import file is a physical quantity select the Physical radio button
If the On-hand value to the import file is to be added to the current on-hand in the inventory, check the Receipt option to add the value to the existing inventory.
Select the default Item Type (typically = Stock) for all items being imported. This is value is used if the Item Type is not indicted within the import file.
Check the Taxable option and select the related Tax Class (Typically = TAX). This is value is used if the Taxable status is not indicted within the import file.
The GL Accounts can be modified for the selected import file otherwise the system will assign the default system values as indicated within the System > Company Setup GL Pages 1, 2 & 3.
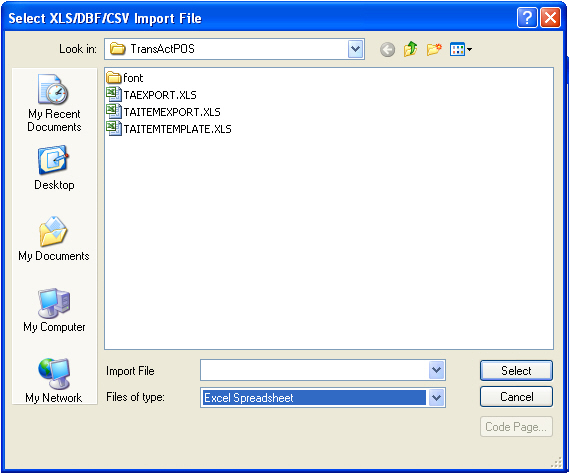
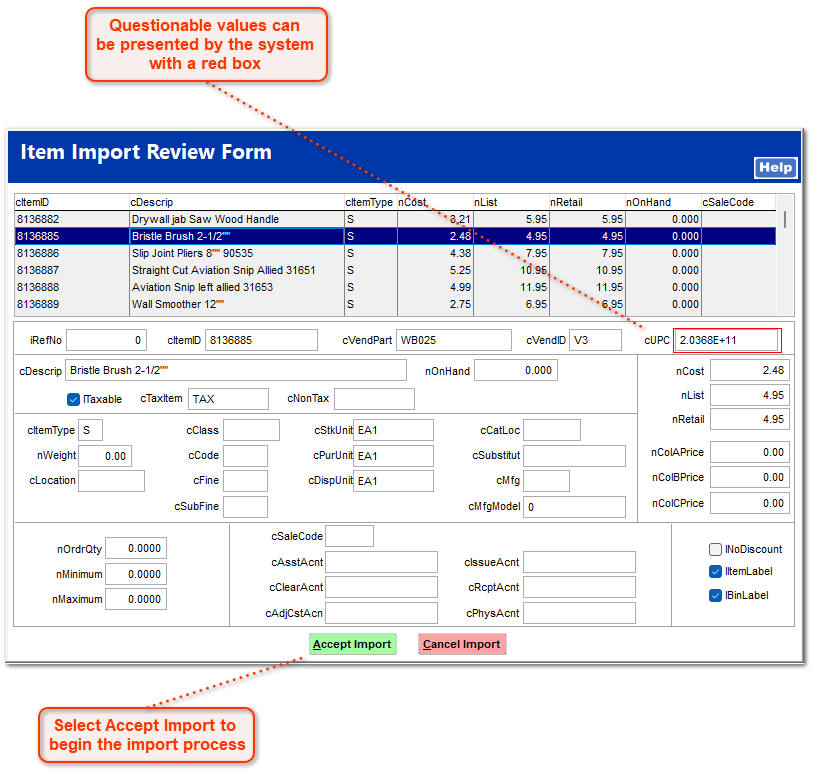
Upon selecting the Import button, the system will present the Item Import Review Form which allows the user to review the contents of the file prior to the actual import into the inventory file.
Questionable values can be presented by the system with a red box
In this example, the UPC within the import file (source file) is incorrectly formatted and fails the validation process within the Item Import Review Form. This incorrect UPC format will be imported into the system but as a SBC value.
If this is a correctable issue within the original import file, select Cancel Import and repeat this process once the source file is corrected.
Once the Accept Import is process, the system will import the source file as configured within the preview screen.
Upon further examination of the import file, the system will verify the units of measure found within the import file. If this issue is presented, add the indicated units of measure to the system within IC > Support File > Units of Measure then return to the process.
The system will automatically generate the TAError.XLS file in the folder from which the import file was selected for your review.
A quick way to address this Unit of Measure issue is to go to another workstation and add the missing Unit(s) of Measure, and then return to the workstation that is importing the file. Go to IC > Support Files > Units of Measure to create new units.
System system will post groups of 1,000 items and then repeat the process until all items are imported into the system's Inventory Control module.
This completes the process of importing items into the IC module from a source file.