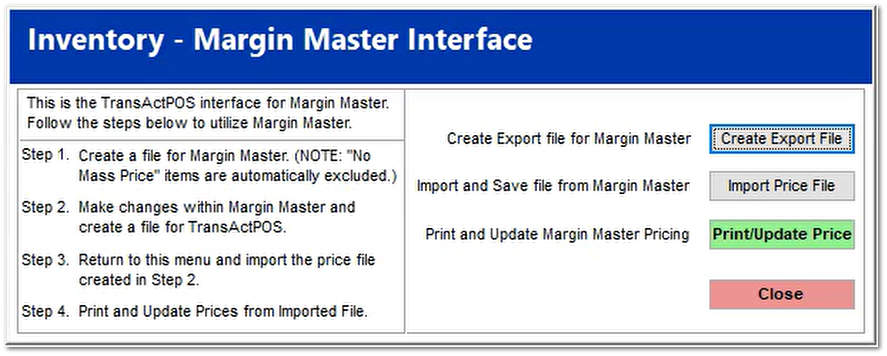
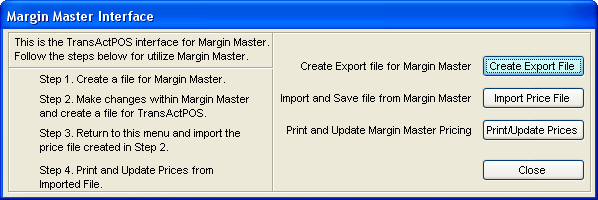
This menu option allows you to interface Margin Master within TransActPOS. The Margin Master Interface screen is self explanatory. Follow the steps on the left (in order) and use the buttons on the right when necessary.
Margin Master should be setup on a local machine, not the server. If you are running RDP, the local resource will need to be selected so that the drive is available. This will need to be setup by our support staff.
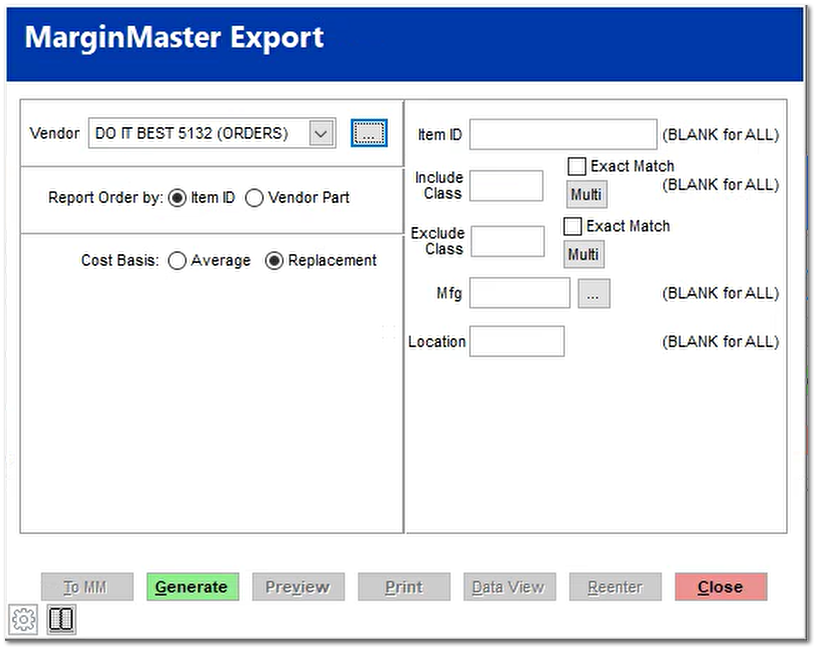
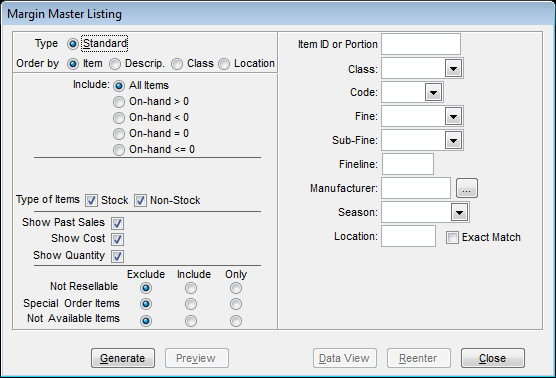
Step 1
From the Margin Master Export screen, select the appropriate filters to reduce the volume of data exported.
Select Generate to process the indicated request.
| | In the above example, the system will filter to all instances were the indicated vendor is present, either PVPN (Primary Vendor) or SVPN (Secondary Vendor).
|
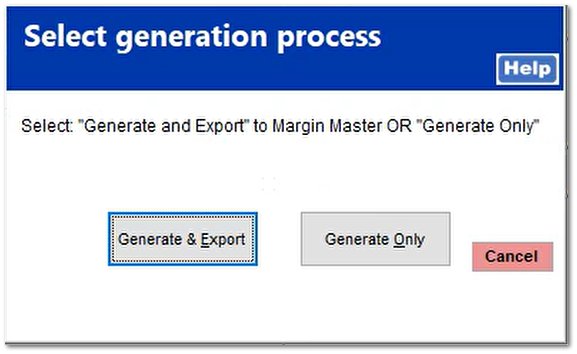
The option will come up to either Generate & Export or Generate Only.
Typically, the Generate & Export is the preferred since the exported file is created AND exported (copied) to the Margin Master directory in one step.
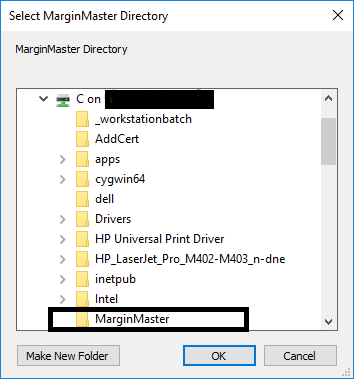
Selecting Generate & Export will bring up a prompt asking for the MarginMaaster Directory
| | If you are using a remote desktop protocol connection (RDP), make sure to select the \\T\TSCLIENT\C\Margin Master path to save the exported file.
|
Otherwise, the Margin Master installation is on the workstation that you are working so selecting C:\MarginMaster would be appropriate.
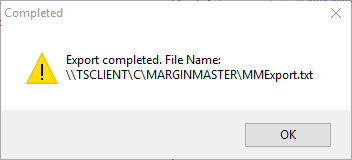
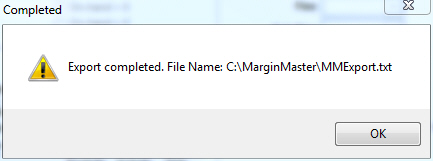
Once that is selected it will export the file and give a confirmation that it was exported successfully to the indicated path and directory.
|
Local installation of Margin Master
|
Terminal Server (RDP) installation of Margin Master
|
|
|
|
Step 2
Make changes within Margin Master and create a file for TransActPOS. This step involves using Margin Master to open the exported file and making the desired changes to it within the Margin Master program. Note, you must do this Margin Master process on the PC that has Margin Master loaded onto it. Do not attempt to export a file on one workstation and open the file on another using Margin Master. Use the same PC for this entire process. Once the changes have been made to your file, create a file for TransActPOS.
Step 3
Return to this menu and import the price file created in Step 2. This step is completed by clicking on the Import Price File button on the right side of the Margin Master Interface screen. After clicking on this button, the import file prompt will appear based on the directory you previously linked to.
Select Yes and Save the XML file that is created.
Step 4
Print and Update Prices from Imported File. Click on the Print/Update Prices button on the right side to finish this step. Locate the XML file you created in Step 3. Once you have located it, the system will import the file. You will then be able to print new labels from here.