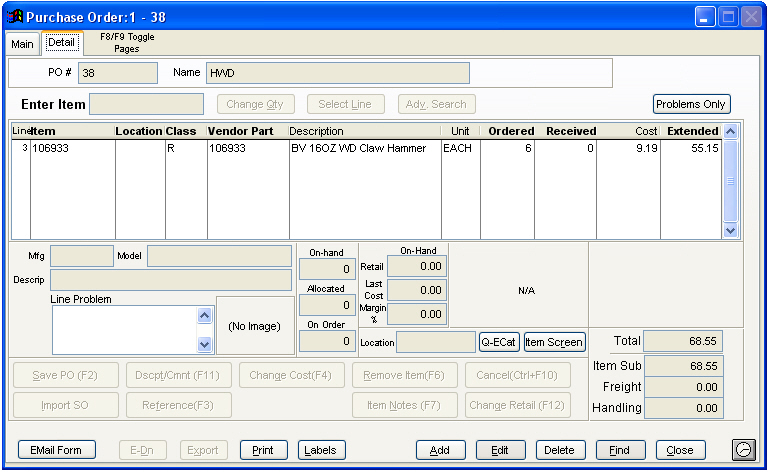
The function buttons at the bottom of the screen relate to the whole PO except for the Edit button. The Edit button will allow for editing of the details of the PO.
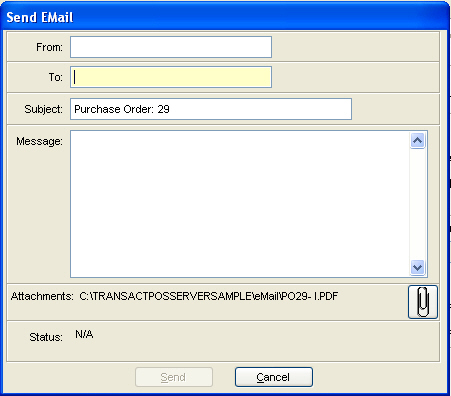
EMail Form
The PO may be e-mailed or faxed to the vendor. Select the order in which the items will be listed and click on the Print button to create an attachment file for the e-mail or click on the Fax button to fax the PO to the vendor.
Enter the e-mail address information and any message.
E-Dn
The E-Dn button is used to transfer the current purchase order to an E-Dn Trading Partner via an internet connection. The E-Dn parameters are set in PO | Vendors | Setup | Part Smart/E-DN Setup.
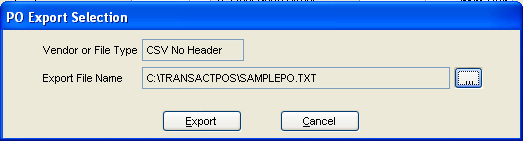
Export
The PO may be exported to a PDF file to be ordered in some other manner. Create a file name and click the Export button to create the file.
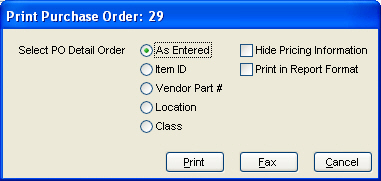
Print
Select the order in which the items of the PO will be listed. Check the Hide Pricing Information box if appropriate.
Labels
The item or bin labels for the PO items can be printed by ordered number, received number, or requested number.
Add
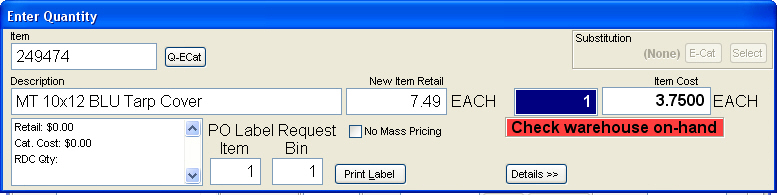
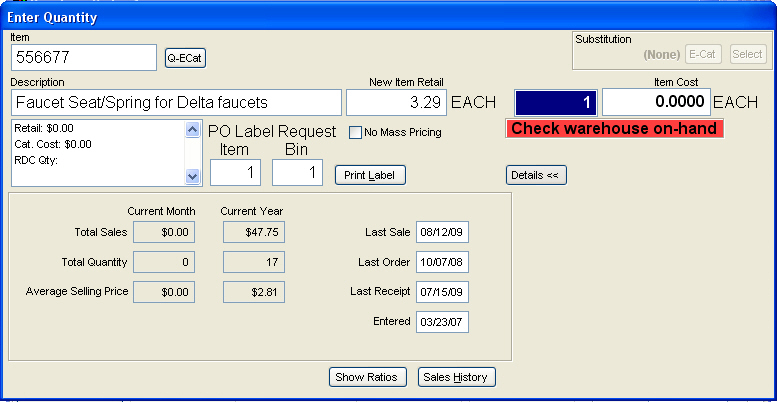
Another PO may be created to enter items which may be related to this PO or not. The Substitution options will be grayed out if there are no substitution items for the displayed item. If there are substitution items, click on the E-Cat button to display the electronic catalog of the substitution item or the Select button to replace the currently displayed item with the substitution item. The cursor will, by default, highlight the quantity to be ordered field to enter the number to be order.
Click the Details >> button to view the Sales History and Ratios for the item.
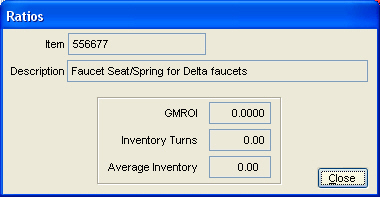
The Show Ratios button will display the GMROI, Inventory Turns, and Average Inventory for the displayed item.
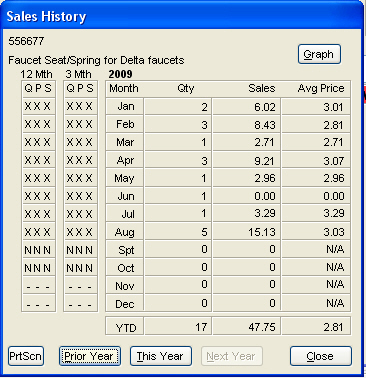
The Sales History button will display the current year's sales history for the item. The Prior Year button will display last year's sales history. The PrtScn button will print the currently displayed history.
Delete
Delete the currently selected PO.
Find
Find another PO.
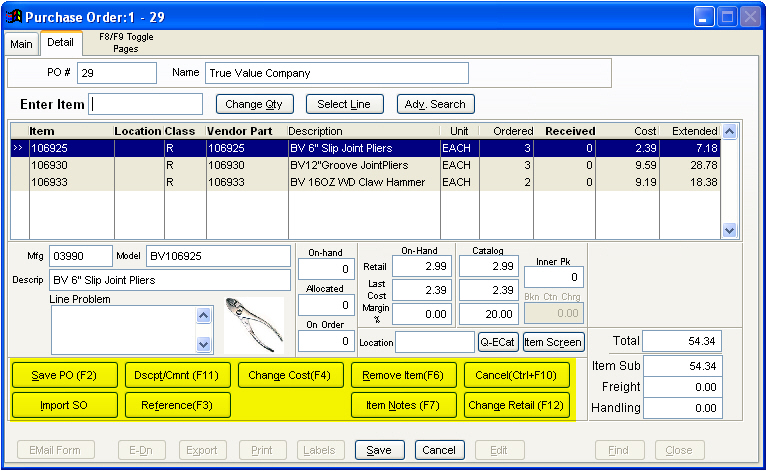
Edit - Detail Tab
Selecting Edit will allow items on the PO to be changed. Use the Select Line button or the cursor to highlight the item to be edited.
The Edit screen buttons provide the following functions to the PO or the highlighted item.
Save PO (F2)
The Save PO button (or F2) will save the PO with the current changes.
Import SO
Other items from an SO may be imported into the PO. Clicking the Import SO button will list the current SOs. Check the box or boxes of the appropriate SOs.
Check or uncheck the items of the selected SO. Click the Import button to incorporate the selected items into the PO.
The selected items will now be displayed on the PO.
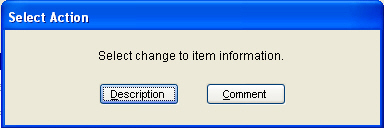
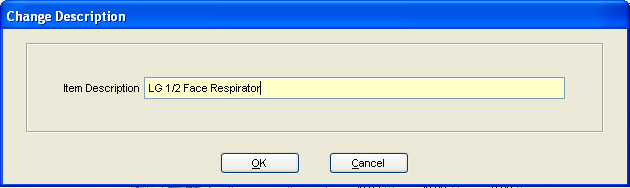
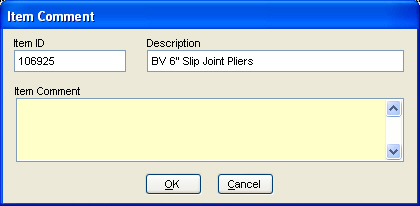
Dscpt/Cmnt (F11)
The Edit Description/Comment button will change the highlighted item's Description or Comment. Select Description or Comment.
The item's current Description will be displayed to be edited.
The item's current comment will be displayed to be edited.
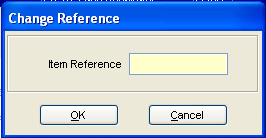
Reference (F3)
A cross reference number or text can be entered for the PO.
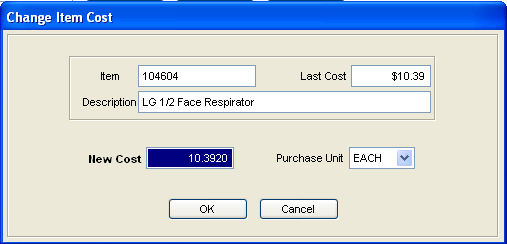
Change Cost (F4)
The item's current Last Cost will be displayed. The New Cost and Purchase Unit can then be changed appropriately.
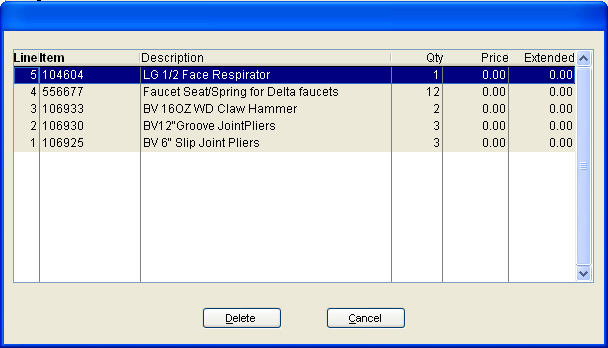
Remove Item (F6)
The Remove Item button will display the current items on the PO. Select the item to be deleted and click the Delete Button.
Item Notes (F7)
Any notes for the highlighted item can be displayed for reference.
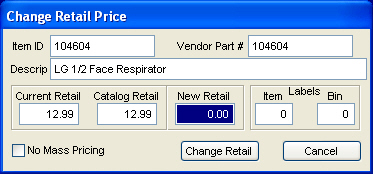
Change Retail (F12)
Change Retail will display the Current Retail and Catalog Retail prices and prompt for the New Retail price. The number of item and bin labels can then be indicated to be printed. Click the Change Retail button to complete the change in the retail price. Check the No Mass Pricing box to exclude the item from any future mass pricing changes.
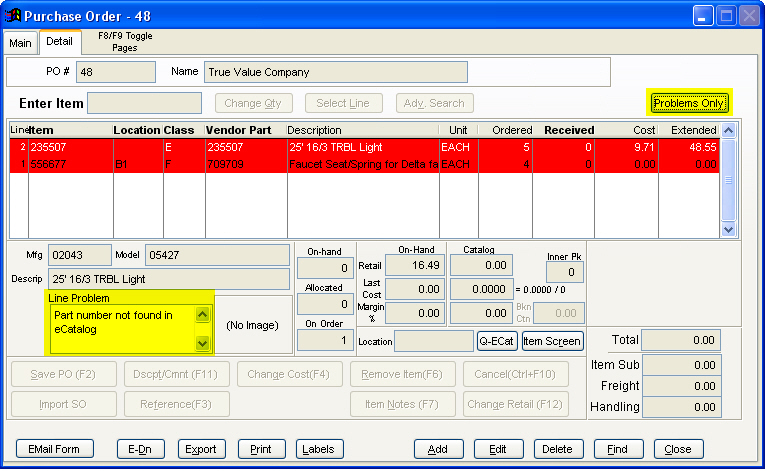
Line Problem
When editing a PO, any problems with an item will be highlighted in red and the problem will be displayed in the Line Problem box. The Problems Only button will list only the items with ordering problems of the items on the PO. The Line Problem box will display the problem associated with the selected item. If there is more than one problem, the second one will be displayed after the first one is corrected.
After completing the editing of the PO, click on the Save button to save changes and return to the main PO screen.