Despite what the Sales Tax Menu shows, setting up your taxing within your system should be done in reverse order. Using this setup guide, establishing the taxation on your system will be simple.
Step 1
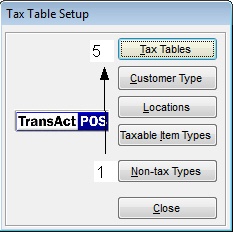
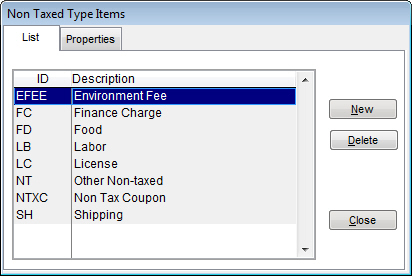
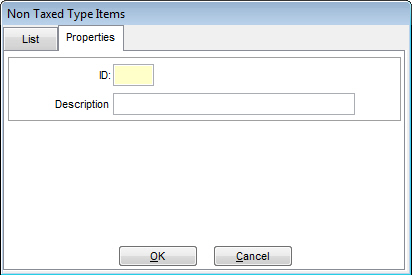
On the Tax Table Setup menu, Tax Tables is the first option. Without setting up the information below this menu option, you cannot establish the Tax Tables. For our first step, click on Non-tax Types. Here, you will establish the Non-tax types your inventory will use. Some examples of non-tax types are labor, shipping, and food items. Within this submenu, clicking New will allow you to add a non-tax type. Simply enter a maximum of four characters for the ID and a short, but descriptive Description and click OK to save it into the system.
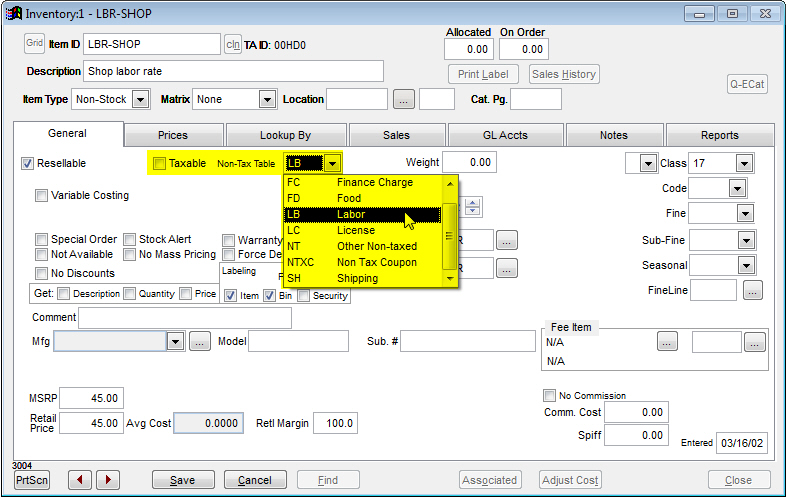
Once your Non-Tax Types are setup, you can start to assign them to items within your inventory. The example below shows the rate for labor used to charge customers for labor done on particular items. The "Taxable" box is unchecked, designating that the item is non-taxed. With that option unchecked, the dropdown menu beside it has all the Non-tax types you setup previously. LB was chosen and now when a report is ran, any labor being charged will show up under this label.
Step 2
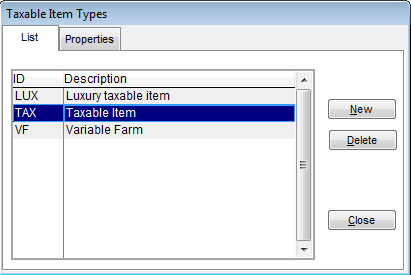
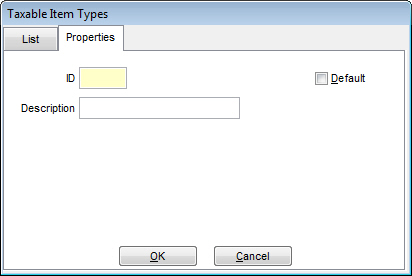
Now that you have set up the Non-tax types, let's setup the Taxable item types. Clicking Taxable Item Types from the Tax Table Setup menu will bring you to a listing of taxable item types within your system. Like before, clicking New will allow you to create a new taxable item type. Just like with the Non-tax types, enter a maximum of four characters for the ID and short description. You can also select which of these taxable item types will be the default when creating a taxable item (if an item type already exists that you want to be the default, highlight it within the list and click the Properties tab and check the Default box).
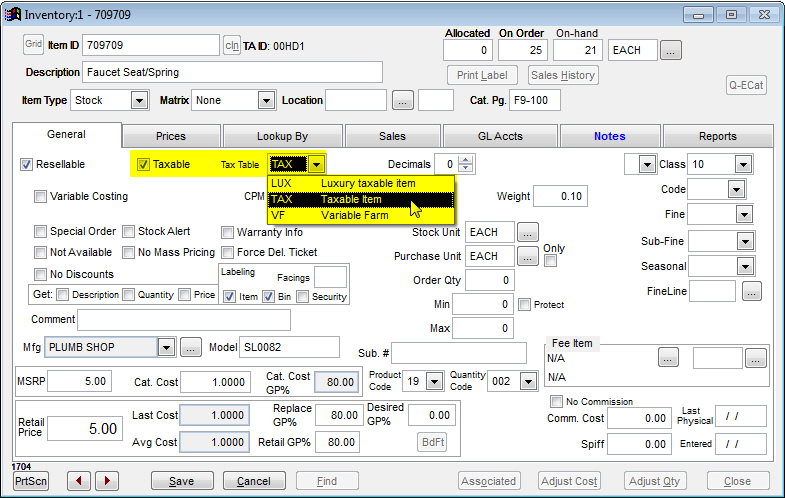
Once these types have been set up, you can establish them within your inventory. Whichever one was set to Default will be the one automatically placed on new items entered. To change it, find the item you want and make sure the "Taxable" check box is enabled. This will allow you to select one of the created taxable item types for the item shown in the dropdown menu beside this check box. Just like with the Non-tax types, these taxable item types will display on the Sales Tax report individually, showing how the taxation has been split within the date range reported on.
Step 3
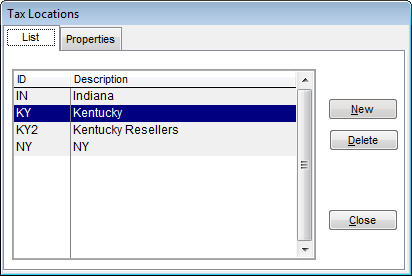
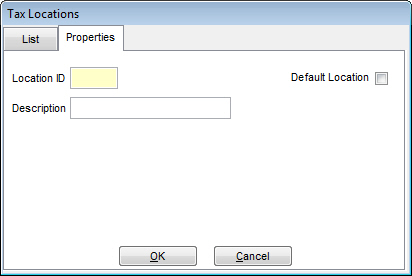
The next step is to create tax locations for your system. Some stores have multiple taxation locations located around their store or may have contractors and workers that travel to various tax locations. Clicking on the Locations button will bring up a tax location list for your system. To add a new one, click New and enter a maximum of four characters and a short description. You can also set a default location for taxation to occur by checking the Default box in the corner of the Properties screen. Much like with the Taxable Item Types, if you wish to have a default location that is already in the list, highlight it and click the Properties tab. From here, you can click the Default box to make this location the default for your system.
Once the Tax Locations have been setup, you can start establishing them, but we will get to that in the next step.
Step 4
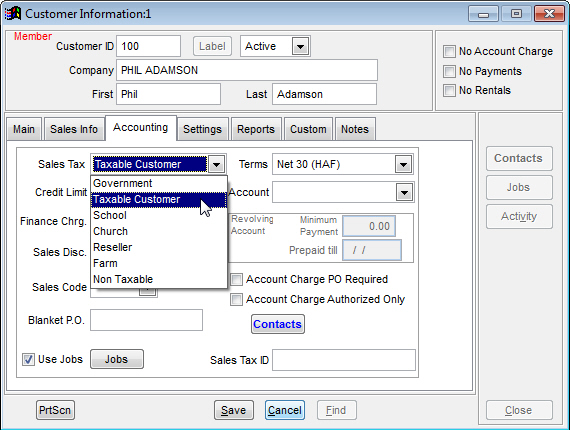
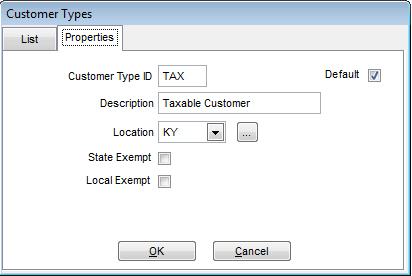
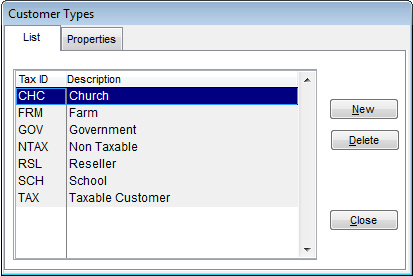
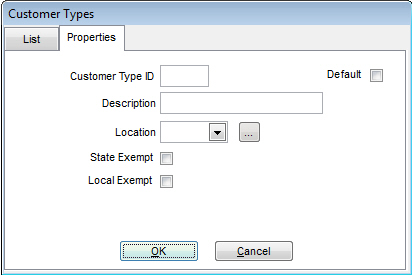
Customer Types allows you to setup different taxable customer types within your system. These are set at the customer level. By clicking on Customer Types on the Sales Tax Menu, you will be presented with a listing of current customer types in your system. To create a new one, click New. Here, you can enter up to six characters for the customer type ID and a short description. Below the Description field is a location dropdown menu. These are the locations established in the previous step. Simply choose the location for the specific customer type you are creating. If you are viewing this list and don't see one that fits, clicking the button next to it will open the Locations list, allowing you to create another one (see Step 3). Once one is selected, you can enable a few options. There are two boxes for exemptions: one for State Exempt and one for Local Exempt. Select the ones that fit the created customer type. You can also set a default customer type for all new customers being entered into your system by checking the Default box. Just like before, you can highlight an existing one in the list and click the Properties tab to set an existing customer type as the default customer tax type.
Once the Customer Types are established, you can start assigning them to specific customers within your Customer File. Once you are in AR | Customer File, click the Accounting tab and the first dropdown menu on this tab is the "Sales Tax" field. Here, you can select from the various Customer Tax Types you set up before.
Step 5
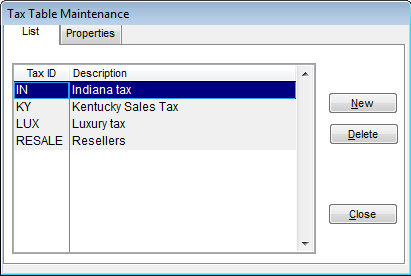
Before you setup the Tax Tables to be used in your system, the previous four steps must be completed. Otherwise, you won't have enough information to fill in for each Tax Table. Clicking on Tax Tables brings up a listing of existing Tax Tables already established in your system. To create a new one, click New.
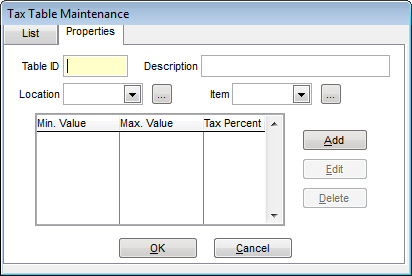
On the Properties tab, you can establish the Table ID (maximum of six characters) and description for the given tax table. Now that you have created locations and taxable item types, you can select them from the dropdown menus respectively. Clicking the button beside each dropdown will allow you to create a new type without having to back all the way out.
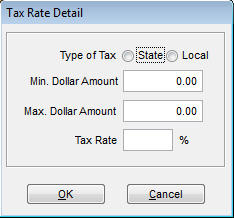
The bulk of your time will be within the bottom portion of this screen. This is where you establish from what price ranges do you want what percent of sales tax for the selected location/taxable item type. Clicking the Add button will bring up a Tax Rate Detail screen, allowing you to enter details for the tax rate your are adding.
First, select whether the tax rate you are creating is a State or Local rate. Next, enter a minimum dollar amount and maximum dollar amount that this rate will apply to. Finally, enter the percentage of tax to be charged when the total falls within the range set previously. Clicking OK will add it to the Tax Table you are creating. You can create multiple tax rates for each tax table.
The reason Tax Tables are utilized is because by themselves, the location tax type and taxable item types do nothing, as there is nothing in the system that assigns a tax rate to those items. The Tax Table does just that. See the example below to fully understand how taxation works in TransActPOS.
Example
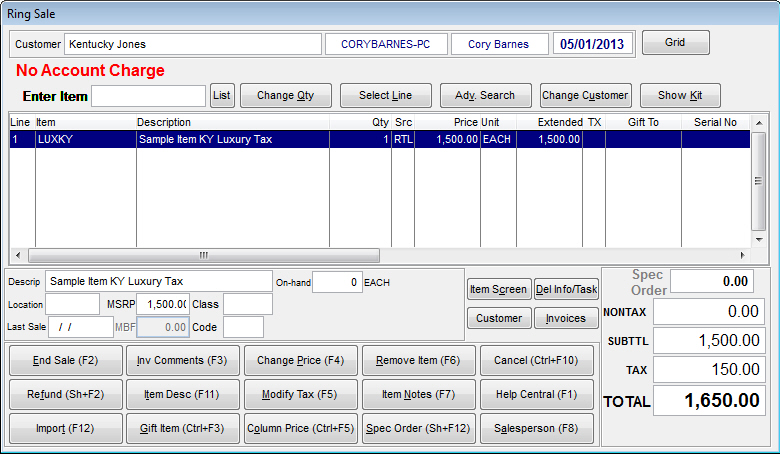
Kentucky Jones is a new customer. When they were created, they were setup as a "Taxable Customer."
Within our system, this means they are taxed on purchases and the location they are based in is KY and are neither state or local exempt.
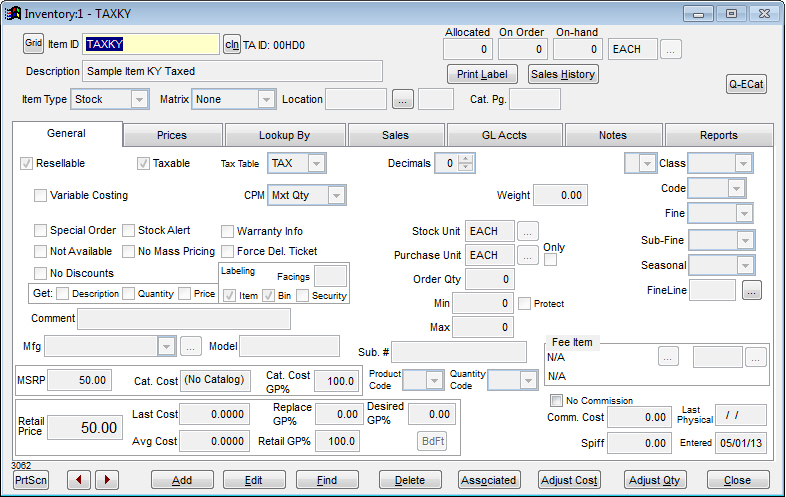
They come into our store and purchase an item (shown below). As you can see, this item is a taxable item under the Taxable Item Type "TAX." The product is $50.00.
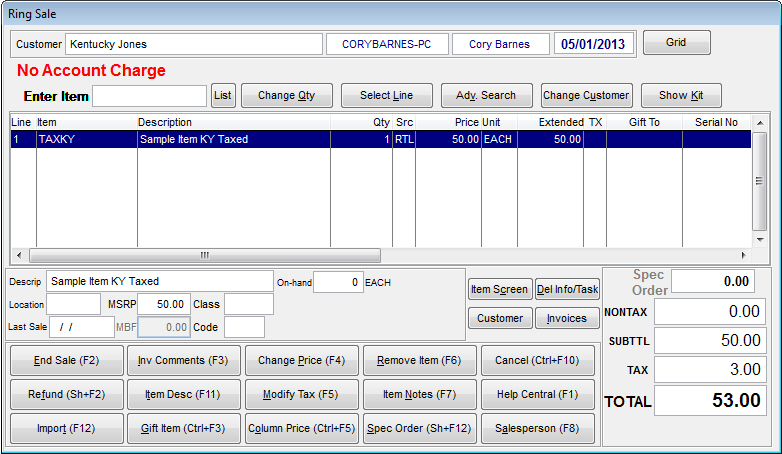
When Mr. Jones purchases this item, the Sales Tax is calculated to 6% as seen below.
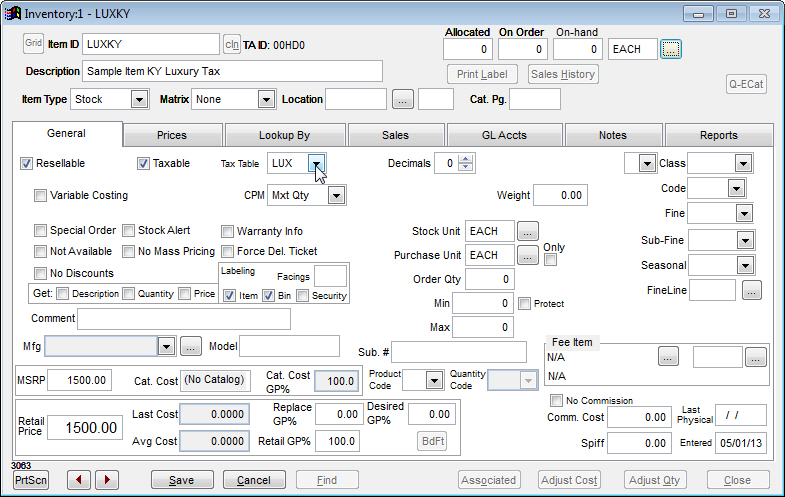
Now, the same customer comes in buying a different item (shown below). This item is also taxable, but has been assigned the Taxable Item Type "LUX." This product is $1,500.00.
When Mr. Jones purchases THIS item, the Sales Tax is calculated to 10%.
The big question here is why were the two items taxed differently for the same customer? The answer is simple. Tax Tables.
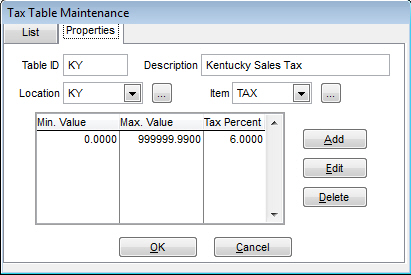
When we look at the tax tables that are established on this system, we see that one table (ID = KY) is for all items with the Taxable Item Type of "TAX" sold to a taxable customer in the tax location "KY." This table has a tax rate of 6% for all items priced between $0 and $999999.99.
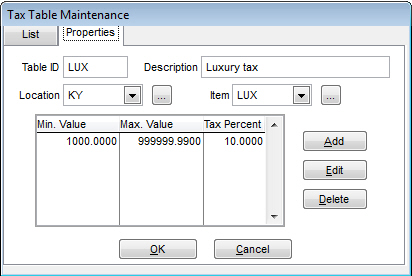
A different Tax Table has been setup for all items with the Taxable Item Type of "LUX" sold to a taxable customer in the tax location of "KY." This tax table has a tax rate of 10% for all items priced between $1000.00 and $999999.99.
As you can see within this setup guide, none of the tax tables were PHYSICALLY applied to any item or customer within the system. The tax tables pull from other areas that have been setup and applies them automatically. It is that simple!