Setting up Orgill as a IOR Vendor
Setting up Orgill as an IOR Vendor
Path 1: (Duel Vendor) System | Company Setup | Properties tab | IOR - XXXX | Other Vendor Interfaces check Orgill Incorporated
Path 2: IC | Vendors | Add
Path 3: Options | IOR Menu | Orgill Inc. | Utilities | Orgill Member Info
Step 1
Start the set-up process by finding out from our TransActPOS Customer:
-
Orgill Account number ____________________________________
-
Orgill Warehouse ____________________________________
-
Orgill Pricing Program ____________________________________
Step 2
Email Orgill with client contact information to brandym@orgill.com Phone number (800) 347-2860 ext 459
-
Customer Name ____________________________________
-
Customer Address ____________________________________
-
Orgill Account number ____________________________________
Orgill will email the client user name (the same as the Orgill Account Number) and Password (all caps eight alpha numeric ending in an Alpha)
Step 3
If dual affiliated, will need to activate the IOR controls in Company setup.
Path: (Duel Vendor) System | Company Setup | Properties tab | IOR - XXXX | Other Vendor Interfaces | Check Orgill Incorporated
Step 4
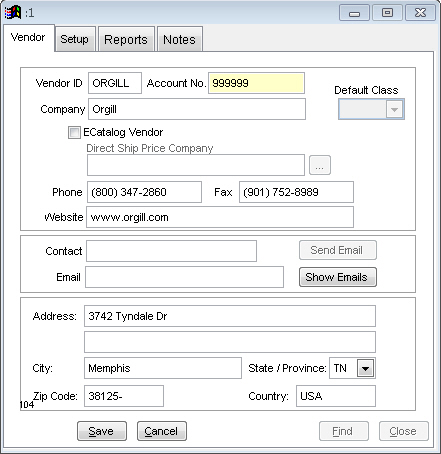
Set up Orgill as a
vendor. Be sure to include your 6 digit Orgill account number.
Step 5
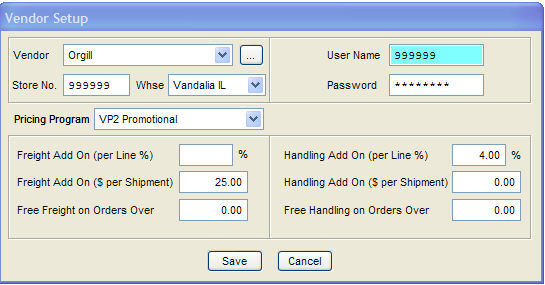
After Orgill, Inc notifies you of the client's Electronic Bulletin Board user name and password, proceed to Options | IOR Menu | Orgill Inc. | Utilities | Orgill Member Info. In the Vendor Setup Screen, use the client's Orgill Vendor Information. In Vendor, use the account that was created or verified in step 4 from above. Use the client's Orgill account number for the Store No. Use the Whse Pick List to select the proper Orgill warehouse. In the Pricing Program Pick List, select the proper pricing level. In User Name and Password, use the information supplied from Orgill, Inc.
Select Save then OK to close Vendor Setup
Step 6
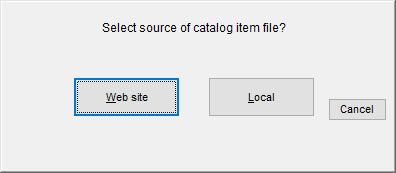
Select Utilities | maintenance | Download Items. This will bring up a screen asking for the source of the catalog item file.
If a file was was provided by Orgill with store specific pricing, select local. The provided file may be in a zip file and once uncompressed contain a .txt file. The extension needs to be changed to .I80 (that is an I not a 1) to work properly with the import. If you were not provided a file, the Web site option will download the generic pricing file from the Orgill website.
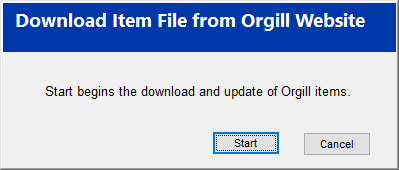
The next screen will ask if you want to include the reatil and cost in the ecatalog from Orgill. If you are using their pricing, select Yes.
You're now ready to import the catalog, so select Start.
Once the import is complete, you will need to add an Orgill item to your inventory and complete a test PO. Once you complete the PO and send to Orgill, they will let you know if all looks good and move your access from the test server to the production server.
Please be aware, localized pricing can be sent to Orgill with your PO's, but this does not update the website. That is a seperate process that you will need to contact Orgill for information on.