(c) Profile Systems Design Group, Inc. 2026 Build: 4.008.811 Help ID: 1765
If you do not see the expected content,press CTRL + F5 to clear your Browser's cache.
Setup QuickBooks Integration
QuickBooks Setup
Install QuickBooks and create your Company File.
TransActPOS Configuration
Point TransActPOS to your QuickBooks Company File.
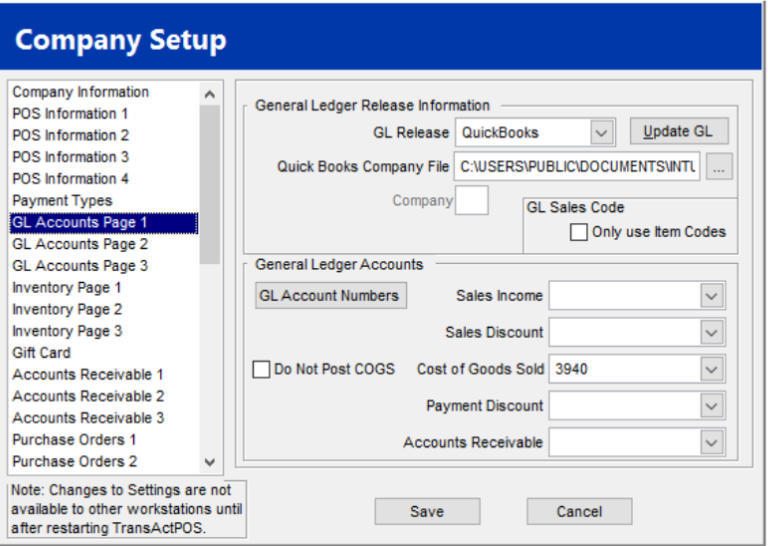
Within TransActPOS, go to System > Company Setup.
On the left hand side, select “GL Accounts Page 1.”
In the drop down menu labeled “GL Release”, select “QuickBooks.”
Next, select the location of your QuickBooks Company File.
If the file is on the same PC as TransActPOS, the typical location is: C:\Users\Public\Documents\Intuit\QuickBooks\Company Files\"file".qbw
If the file is in a shared network location, the location may be: \\"name of pc"\Company Files(where "name of pc" is the computer that the Company File is saved on.)
Click “Save”
QuickBooks Setup
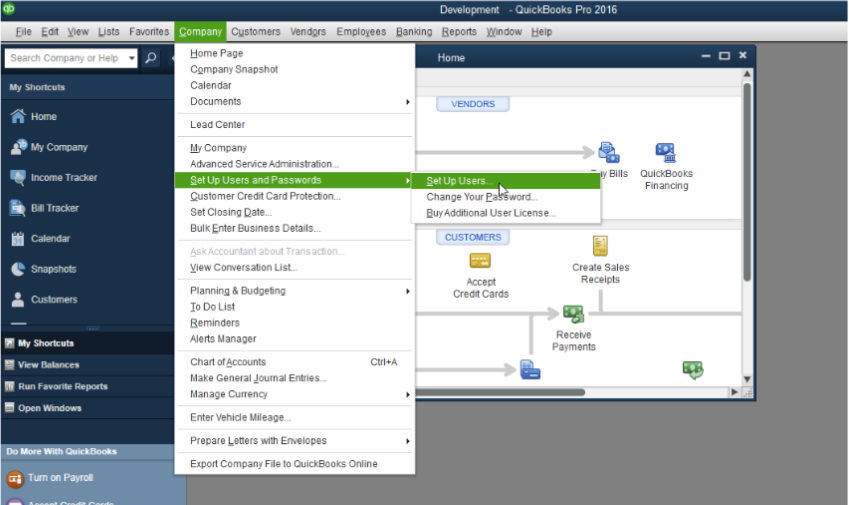
In QuickBooks, set up a user for TransActPOS.
Add TransActPOS User in QuickBooks
Click “Company” at the menu across the top of the screen. Then select “Set up Users and Passwords,” and then select “Set up Users"
In the next screen, click on “Add User...”
Fill out the username and password. It can be anything you like. For example, user name of “TransActPOS” and password “superstrongpasswordthatcantbebeat”
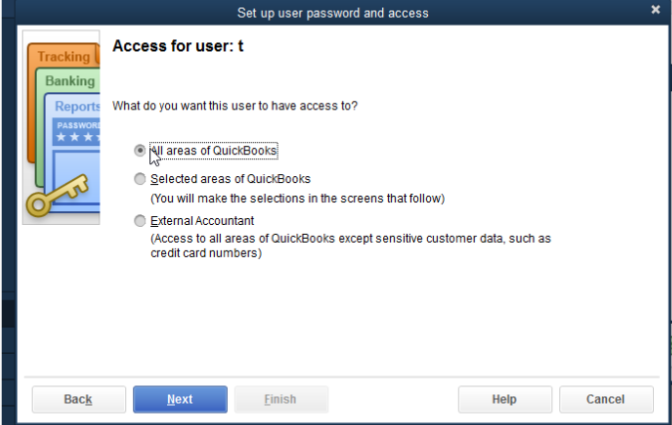
Once all of the fields are filled out, click “Next”
Allow access to all areas of QuickBooks
A warning window will appear. Click Yes.
Click Finish.
Add a TransActPOS Vendor in QuickBooks
In QuickBooks, select “Vendors” on the menu across the top of the window.
Select “Vendor Center”.
Click the “New Vendor” button.
IMPORTANT: TEXT MUST BE EXACT In the Vendor Name field, type in “TransActPOS Vendor”
Click OK
Turn on Account Numbers in QuickBooks
On the menu across the top of the window, click on "Edit and then "Preferences."
Click "Accounting" in the menu on the left hand side.
Click the "Company Preferences" tab.
Check the "Use account numbers" box.
Click "OK".
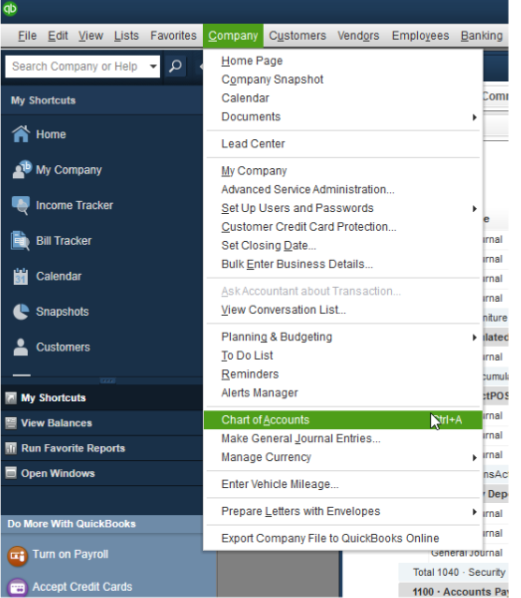
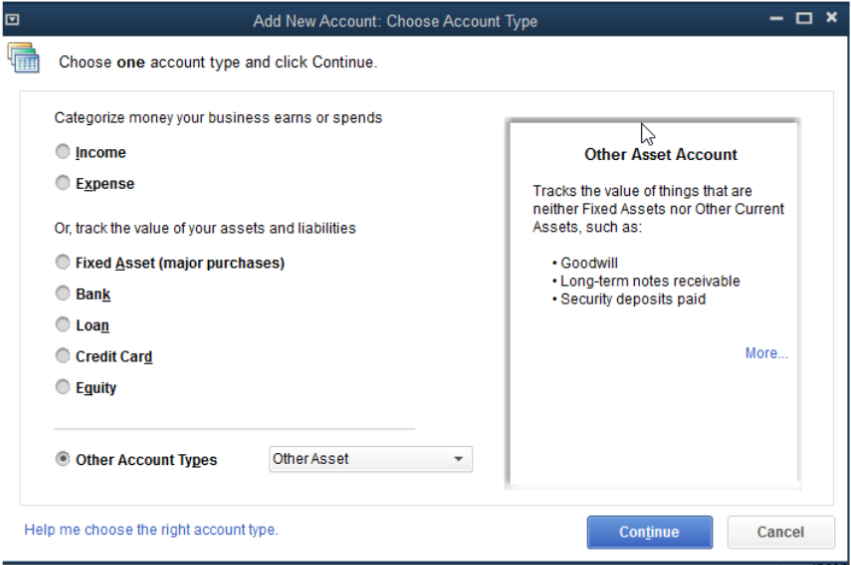
Add a “TransActPOS Accounts Receivable” asset in QuickBooks.
In QuickBooks, select “Company” on the menu across the top of the window. Then Select “Chart of Accounts”.
Click “Account” at the bottom of the window. Then, click “New”.
In the dropdown menu, select “Other Asset”.
Click Continue
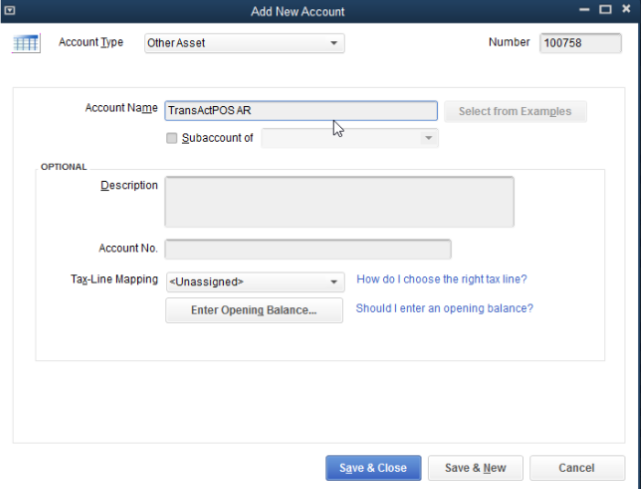
Type the number for your AR account in TransActPOS in the Number text box in the top right of this window.
Name the Account “TransActPOS AR”.
Click “Save & Close”
Run the TransActPOS integration for the first time
In TransActPOS, go to System > GL Release.
Make sure “QuickBooks” is selected for file format.
Click “Release”
Follow any on-screen prompts.
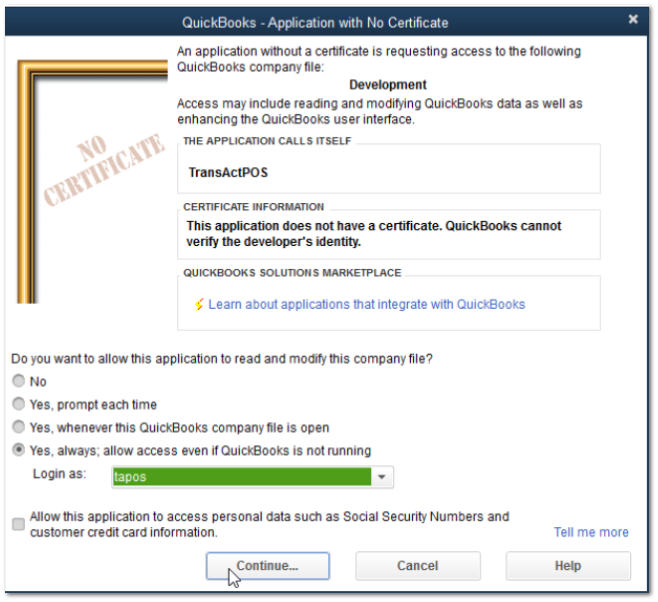
You should be prompted in QuickBooks to allow TransActPOS to access QuickBooks.
Select, “Yes, always; allow access even if QuickBooks is not running.” Then, in the dropdown next to “Login as:” select the user that you created earlier. Then click “Continue...”.
A window will pop up. Select “Yes.”
Another window will pop up. Select “Done.”
TransActPOS will continue to Release GL.
Topics and Answers
:
QuickBooks does not need to be open to perform the TransActPOS General Ledger Release since the QuickBooks Company File can be located on a common folder within the larger network. DropBox, or similar service can provide a similar accessibility to a shared remote directory.
If missing accounts are found, you will be given a report of the missing accounts. Within QuickBooks add the exact account numbers that were reported. Once you have added the missing accounts, you must then attempt to release GL from TransActPOS again.
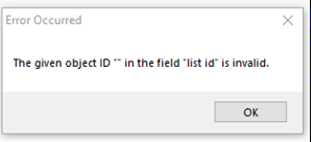
If the following error is received, then there are issues with the account numbers. Make sure all account numbers match.
The following error can be resolved creating a Sales Tax Payable Account under other assets that matches TransActPOS
If you already have an account within QuickBooks for Sales Tax Payable, change the account number by 1 number. Then create a new Expense account using the original account number with an account name of TransActPOS Sales Tax Payable.