| | The EZ-Commerce is an eCommerce site developed and supported by EZAdTV.
Website: https://ezadtv.com/
Phone: (888) 580-5593
|
First, obtain the EZ-Commerce module activation code from Profile Systems Design Group, Inc.
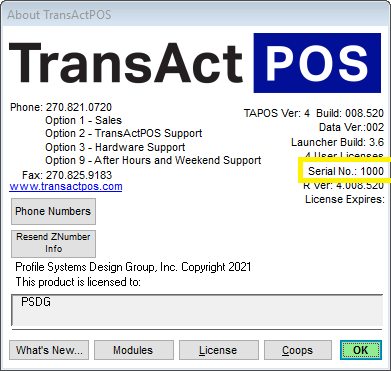
In order to communicate with the EZ-Commerce site the store must establish an account with EZAdTV. The store’s TransActPOS Serial Number will be requested by EZAdTV which is found in TransActPOS by selecting Help from the menu bar at the top of TransActPOS, then select About TransActPOS.
The About TransActPOS form will appear. On the right side of the form is the Serial No. value. Give this to EZAdTV. They will run a process that will make a token available for TransActPOS to obtain. They should let the store know when that process has been completed.
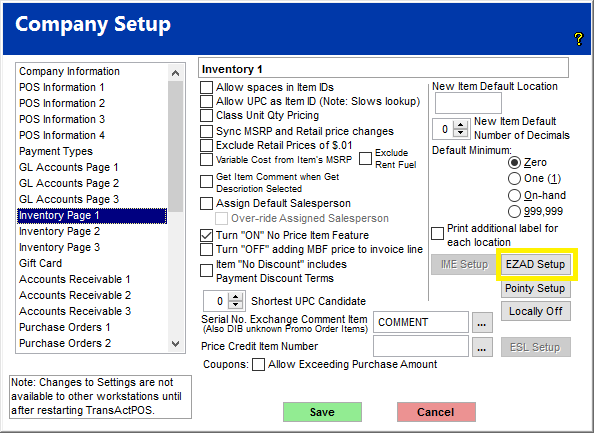
Once, the store has been advised that the token is available to continue to this next step. Select System from the Main Menu followed by Company Setup. Select Inventory Page 1 from the Company Setup. Select the EZAD Setup button which will communicate with the web and obtain the token. It will present the token value if available.
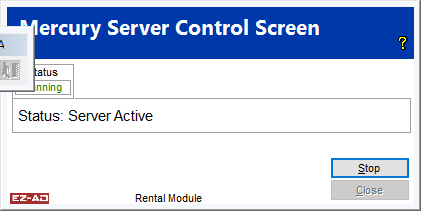
At this time restart the Mercury application to recognize the EZ-Commerce token. Upon restarting Mercury the EZ-AD logo should appear on the Mercury form.
The communication process will start at this time uploading inventory as changes are updated within TransActPOS.
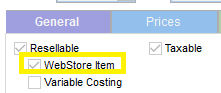
The website is able to provide item information for stock items and rental items from within TransActPOS. Setup is straightforward utilizing Do it Best Product Classifications for DIB items based upon the FineLine values assigned to items by the catalog or by the store assigning the values to other items. Rental items do not use the DIB FineLine value but rather the Code, Fine and SubFine values assigned by the store in TransActPOS. Only items that are flagged as a “WebStore Item” are uploaded to the EZ-Commerce site.
In preparation for the upload process to EZ-Commerce it is recommended that these settings be done prior to establishing communications with the EZ-Commerce site.
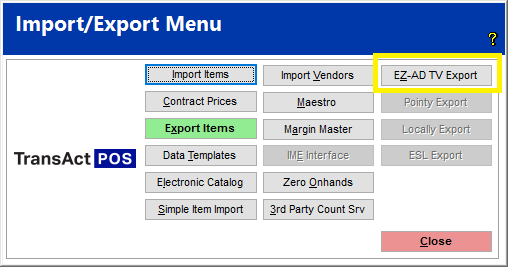
Once the inventory is set up, upload the full inventory with the following process. Select IC, then Maintenance. Select Import/Export from the Maintenance Menu.Select the button EZ-AD TV Export.
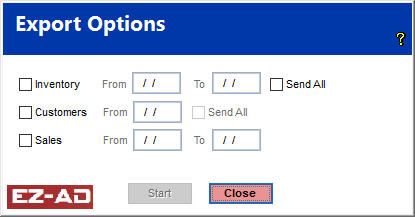
Check both the Inventory checkbox and the Send All checkbox. The Start button should then become available and click it to start the upload to the queue to be processed by Mercury.
Any changes or additions to inventory will be uploaded via Mercury. Items with the Webstore Item and Resellable checkboxes checked will appear on the EZ-Commerce. The on-hand quantity displayed on the EZ-Commerce shows the quantity less 1 (normally).
How to turn off the EZ-Commerce implementation
1. Delete the EZADSetup.ini located in the TransActPOSSever directory.
2. Restart the TransActPOS Mercury Server application.