Event Orders
True Value's promotions, aim for profit, Relay, and C4P programs have been combined into an Event Order program. Purchase orders can be created to take advantage of the promotional offerings offered by True Value. Key to this process is the ability to sort the offering in order of greatest savings. As the user reviews the offering, the desired quantity for up to four order windows can be created. The resulting purchase orders will contain the request date which correlates with the indicated order window.
Process Summary
-
Begin by selecting
New and then selecting the Promo No. from which purchase order will be created.
-
Select
Properties tab to filter and sort the offerings into a manageable view to quickly create purchase order for the indicated ship dates created by you.
-
Once back to the
List tab, review the list of SKUs reviewing the prior sales and entering the order quantities within the applicable order request fields.
-
Upon completion of reviewing and entering order quantities, select Save to create the purchase orders that contain the associated Request Dates (Future Ship Dates).
-
Manage the resulting individual Purchase Orders within the PO > Modify PO menu.
| | Operational Note:
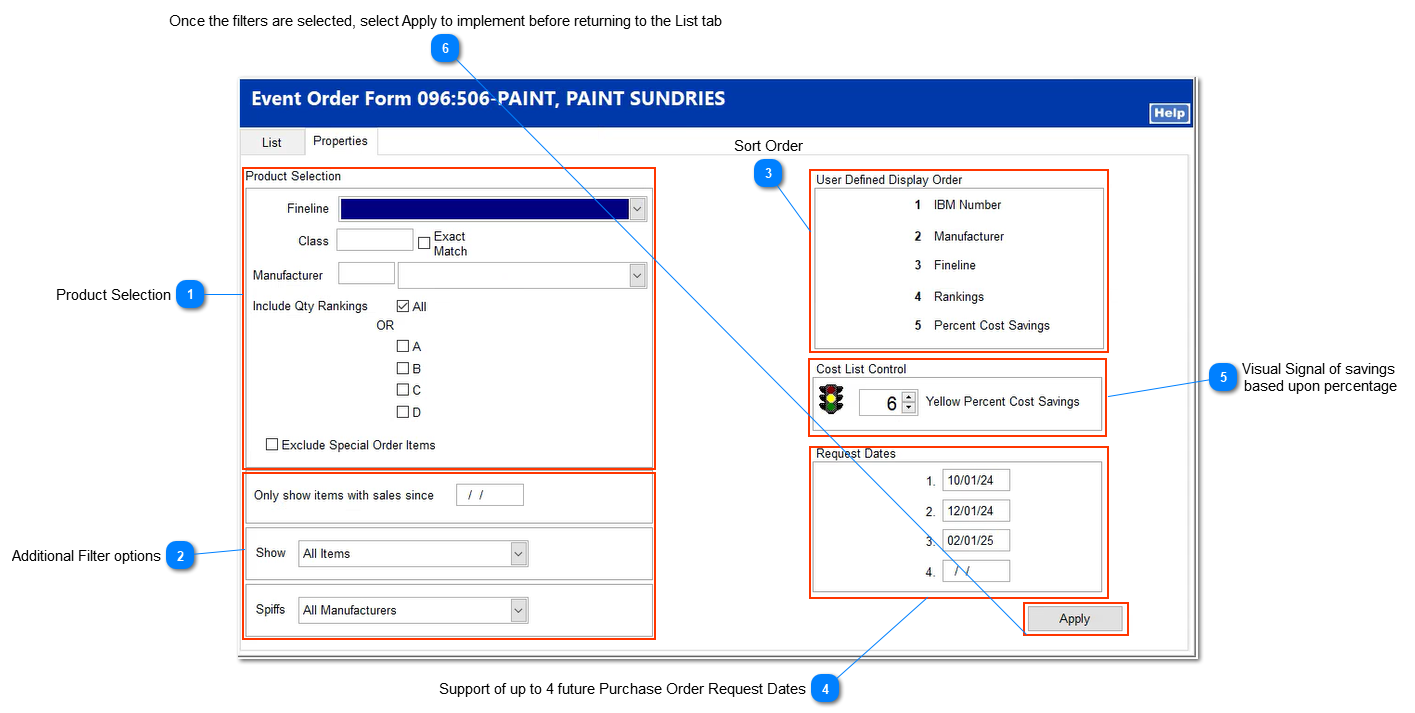
The Properties contains filtering and indexing controls that apply to the presentation of the products within the List form. Once the filters and indexes are selected, select Apply at the bottom of the Properties page to implement the selected filters before selecting the List tab.
|
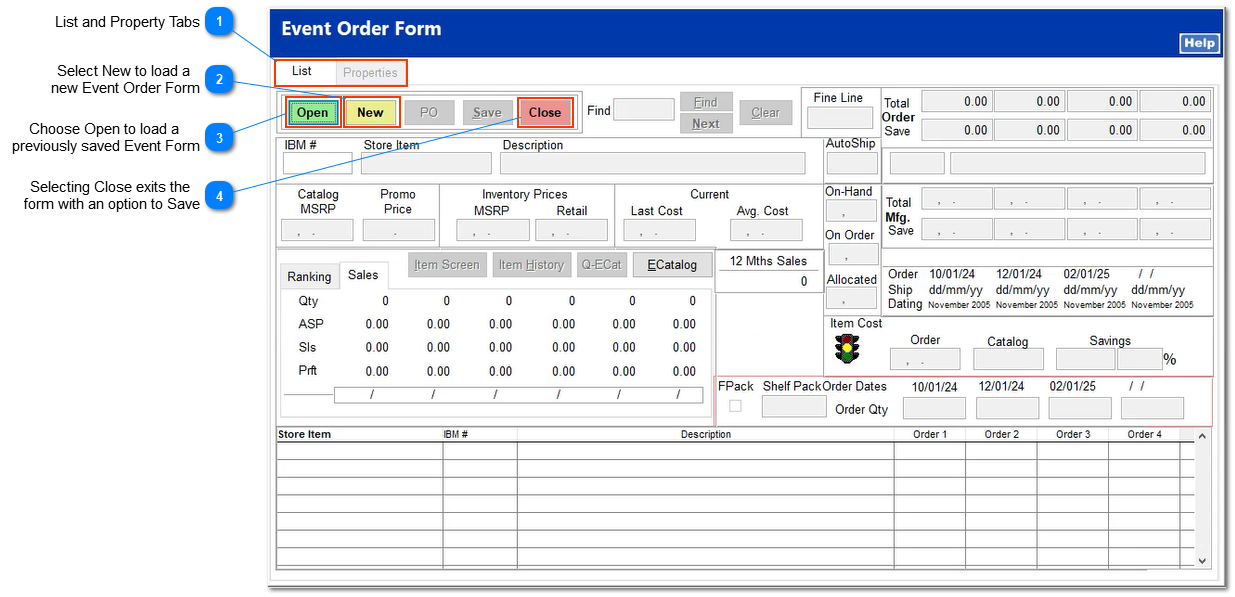
List Tab
Based on the events that have been downloaded from the True Value Event Update communications, a purchase order of selective items can be created from the items listed. From the detailed item information, sales history, and ranking, items can be selected to be ordered. The cumulative cost and cost savings are displayed for the order. Select an item from the list for review and ordering.
 List and Property TabsSelecting the List tab presents the product page of the Event Order and all of its item level details. From this page the user will review and enter the order quantities into the configured order date fields.
Selecting the Properties tab allows the user to control various aspects of the List page with the application of various filters and indexes.
|
|
 Select New to load a
new Event Order Form |
|
 Choose Open to load a
previously saved Event Form |
|
 Selecting Close exits the
form with an option to Save |
|
How to use the Event Order Form
Select New to begin the process
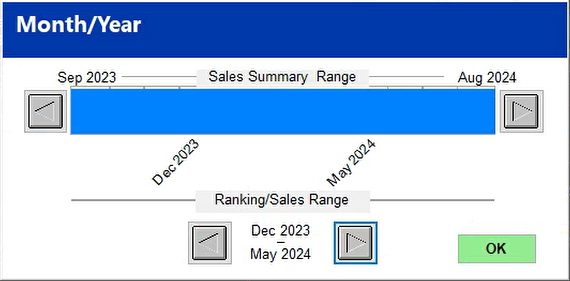
The time period for the sales history and ranking can be adjusted to the desired range.
Select the left and right arrows move
the time frame back and forward in timeThe arrow button allows the use to adjust the Ranking/Sales window dates that determine the amount of data to be presented within the Event Order.
|
|
Select OK to move forward in the process |
|
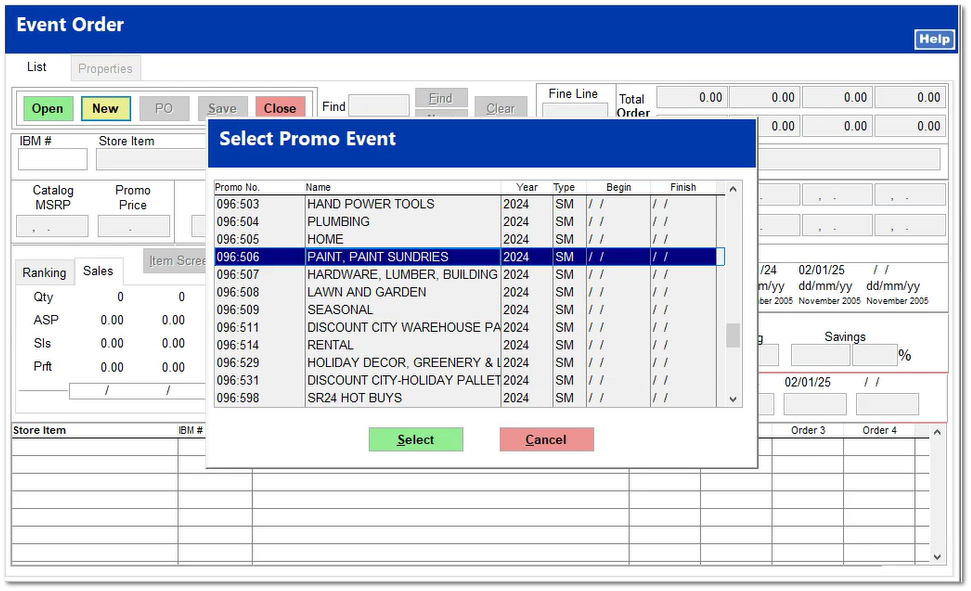
Selecting the Prommtional Event
The promotional information presented within the Select Promo Event listing are automatically downloaded during communications with True Value.
From the list of promotions provided, select the desired Promo No. using the mouse or keyboard to position highlight bar. Once positioned, choose the Select button.
Within the selected promotion, choose which Section(s) by either individual sections or by using the Select All option.
Selecting the Proceed button moves the process forward.
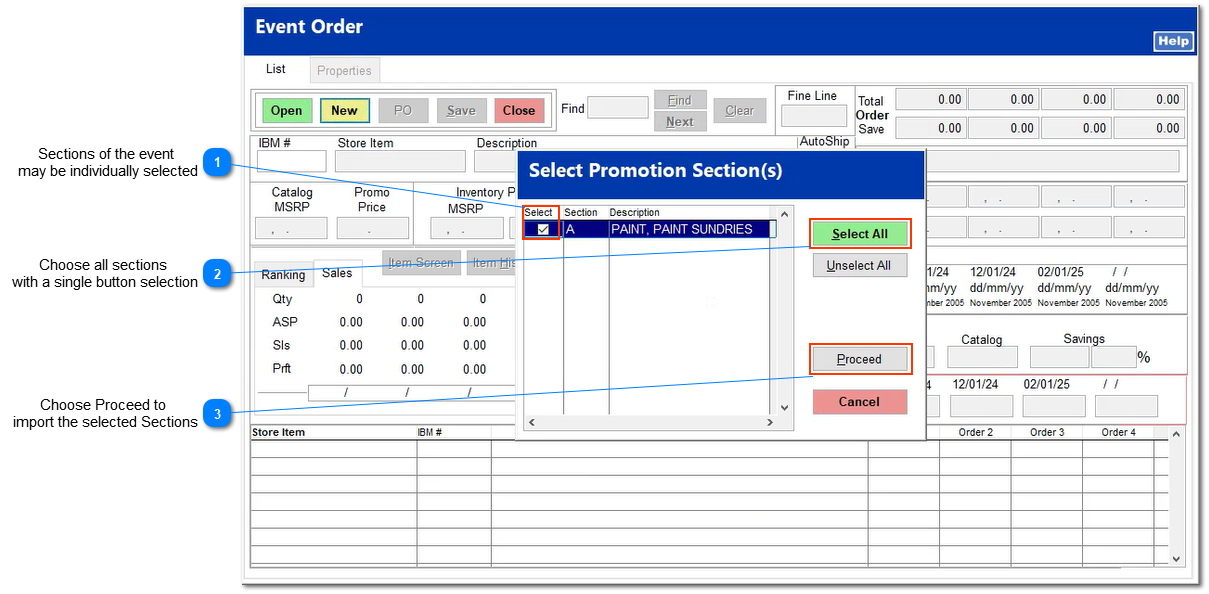
Sections of the event
may be individually selectedA Left-click or space bar will toggle the check box field indicating the the selected Section will be imported into the system.
|
|
Choose all sections
with a single button selection |
|
Choose Proceed to
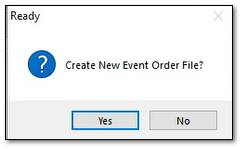
import the selected SectionsChoose Yes to create the New Event Order file.
|
|
Controlling the Order and Filters to the List within the Properties tab
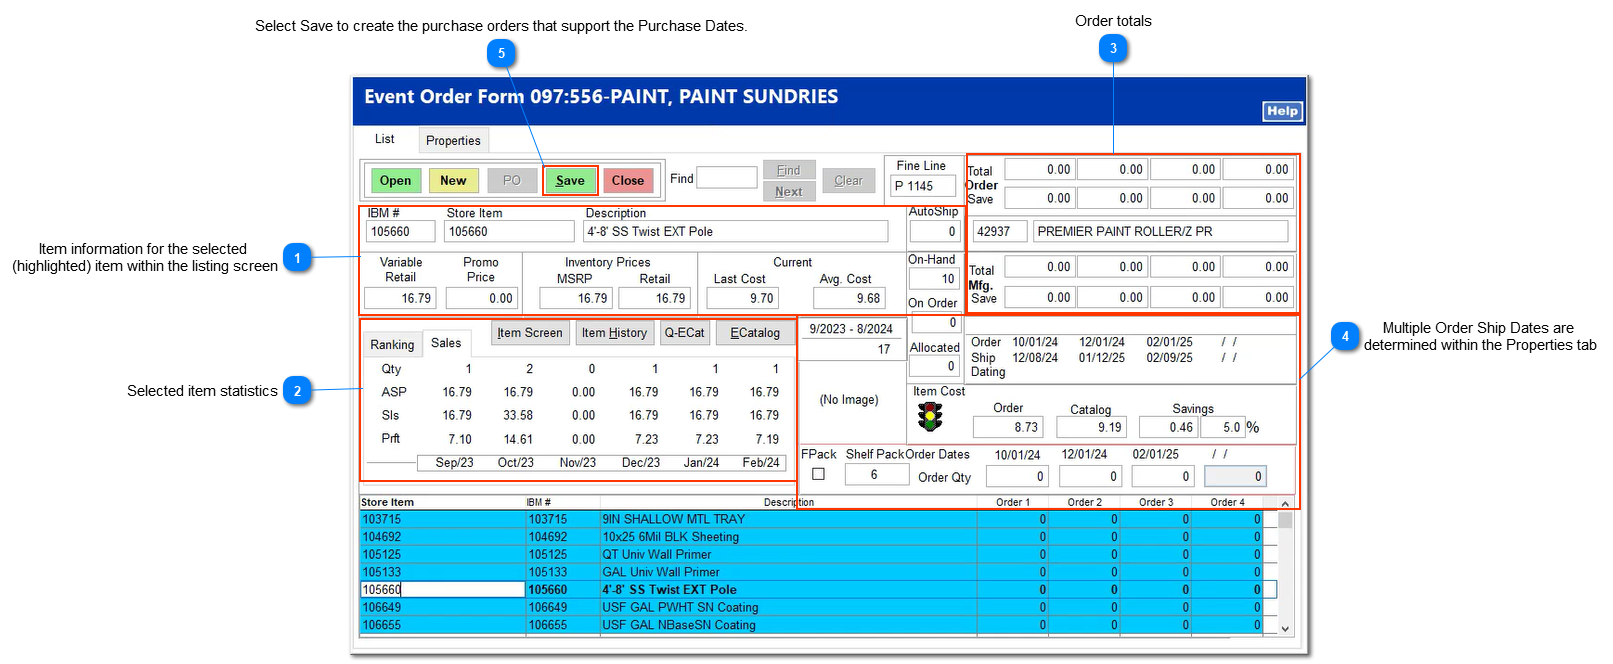
Item information for the selected
(highlighted) item within the listing screen<TODO>: Insert description text here...
|
|
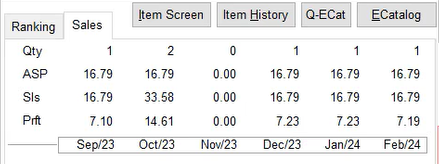
Selected item statisticsSelecting the Ranking and Sales tabs will display the related information for the month/year in a columnar formation.
The additional buttons of Item Screen, Item History, Q-Ecat and ECatalog allow access to these Inventory File Maintenance topics.
|
|
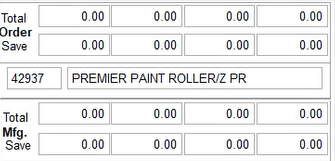
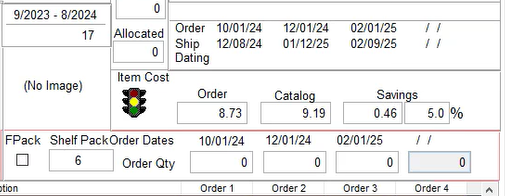
Order totals
|
|
Multiple Order Ship Dates are
determined within the Properties tab
|
|
 Select Save to create the purchase orders that support the Purchase Dates.Once created, the purchase orders may be edited within the PO > Modify Orders.
|
|
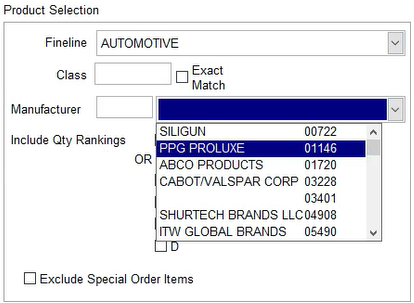
Properties Tab
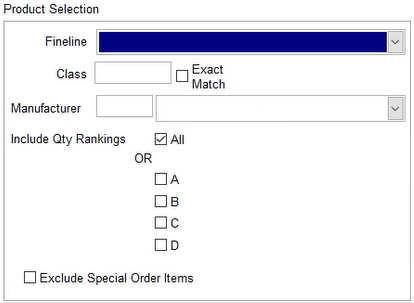
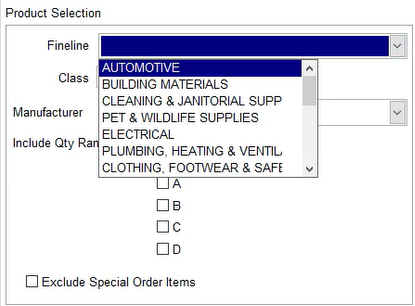
Product SelectionChoose Fineline, Class, Manufacturer, Rankings and Special Order options to trim the list of items within the detail listing.
|
|
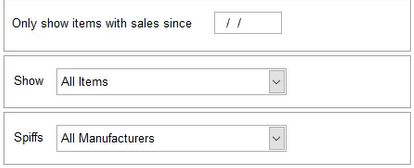
Additional Filter optionsFilter show items based upon sales activity
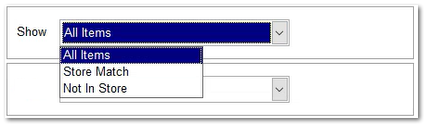
Show
Choose to show All Items, Store Matches to the Promotional Items or Not in Store.
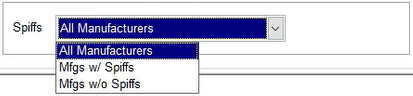
Spiffs
Select to show All Manufactures, Mfgs w/ Spiffs, Mfgs with out Spiffs.
|
|
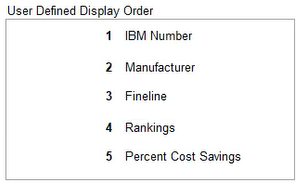
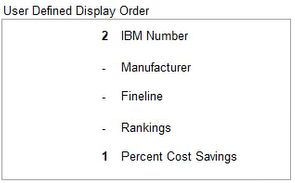
Sort OrderSimply click on the titles in the order to which you prefer to view the item listing. Typically, the first click is on the Percent Cost Savings and then IBM Number (SKU).
|
|
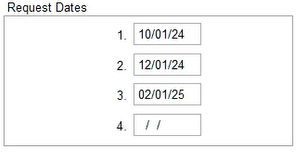
Support of up to 4 future Purchase Order Request DatesEnter the dates of the future orders.
|
|
Visual Signal of savings
based upon percentage |
|
 Once the filters are selected, select Apply to implement before returning to the List tabSelect Apply to implement the selected filters before selecting the List tab.
|
|
Creating the Purchase Orders
With the dates of the purchase order dates entered, the user may enter the desired quantity for each of the order dates.
Purchase Order DatesThe purchase orders dates are assigned within the List tab.
|
|
Enter the desired quantities for each request date. |
|