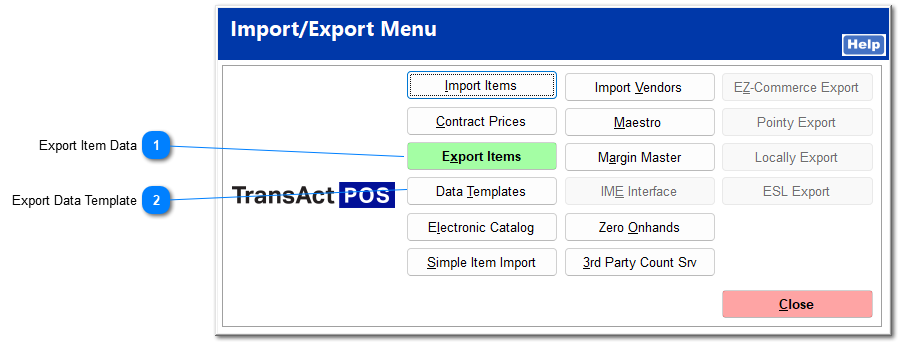
You can export an item list to add or change a secondary vendor to a set of items within any of the groupings in the Export Items form. Enter the group of items to export, and click Export.
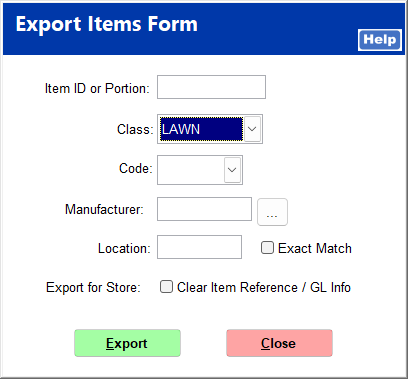
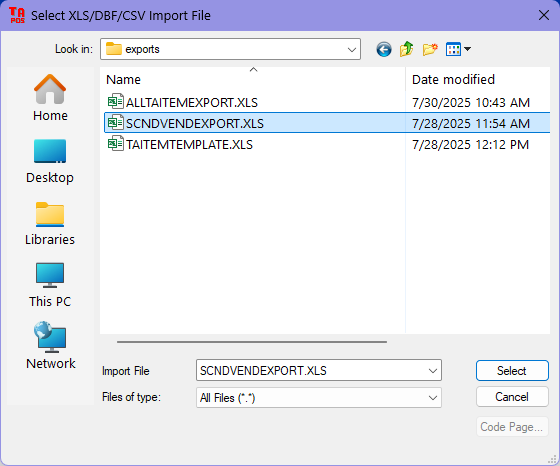
Choose a location to which to save the export file, and rename it as desired. Click Save.
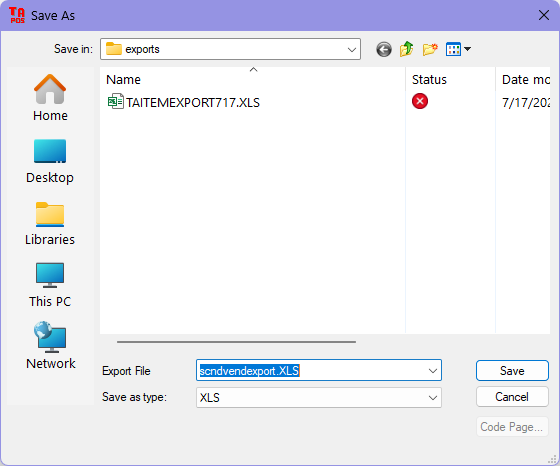
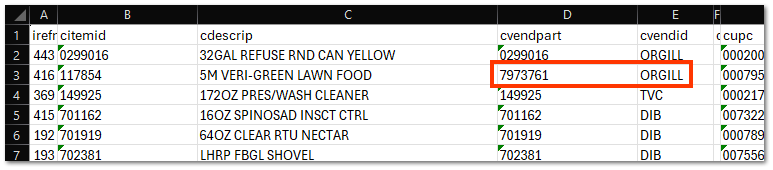
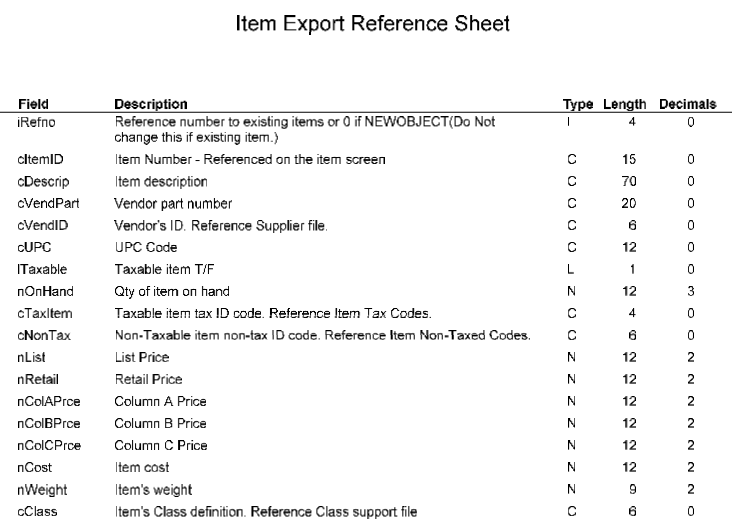
The export file looks as follows. You can edit your items to include the secondary vendor by changing cvendpart and cvendid to the correct values for the secondary vendor.
If you wanted to add Orgill as the secondary vendor for the items in the spreadsheet, you would enter the vendor part number and vendor ID for Orgill for each item. For example, Orgill's part number for the item 5M Veri-Green Lawn Food is 7973761, and Orgill's vendor ID is ORGILL. Cvendpart and cvendid should be changed accordingly.
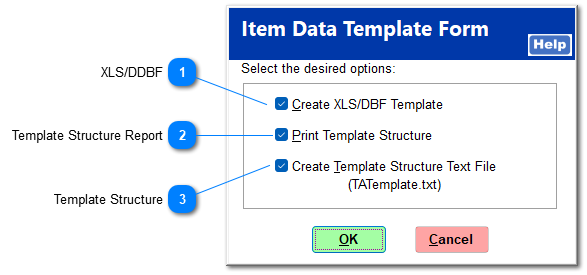
You can also build a custom item list if all the items to be changed cannot be captured with one of the options available through Export Items. It is helpful to start with the Data Template to ensure proper formatting. After clicking Data Templates, check the files you wish to create.
XLS/DDBF
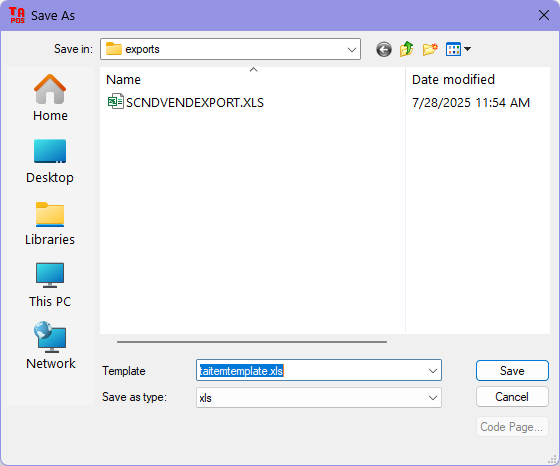
This file is the actual template into which you can enter your item data. Choose a location to which to save the export file, and rename it as desired. Click Save.
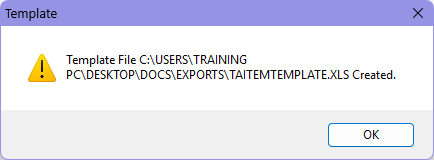
You should receive the following message if the template was created properly.
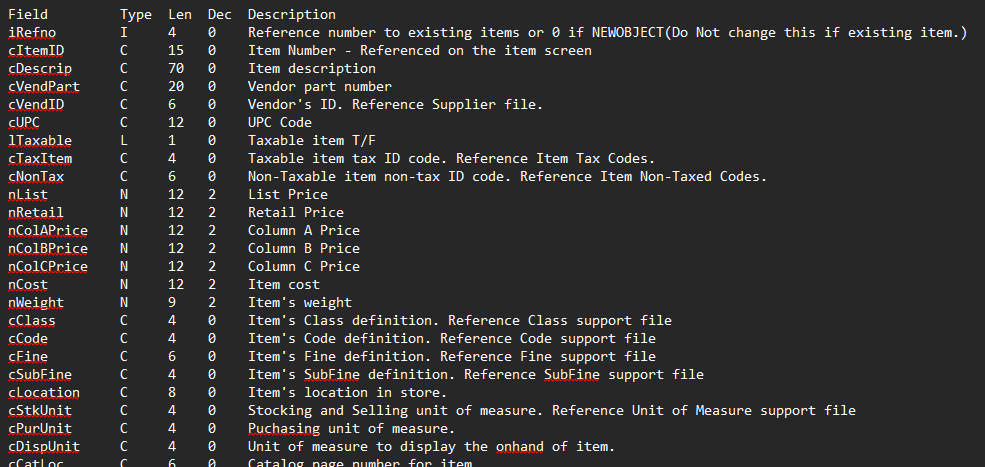
The blank item import template looks as follows. For adding a secondary vendor, only citemid, cvendpart, and cvendid must be filled in.
For example, if you wish to add Orgill as a secondary vendor for the item 5M Veri-Green Lawn Food, you must enter the item ID, 117854, (the primary vendor's part number in this case); Orgill's part number, 7973761; and Orgill's vendor ID, ORGILL.
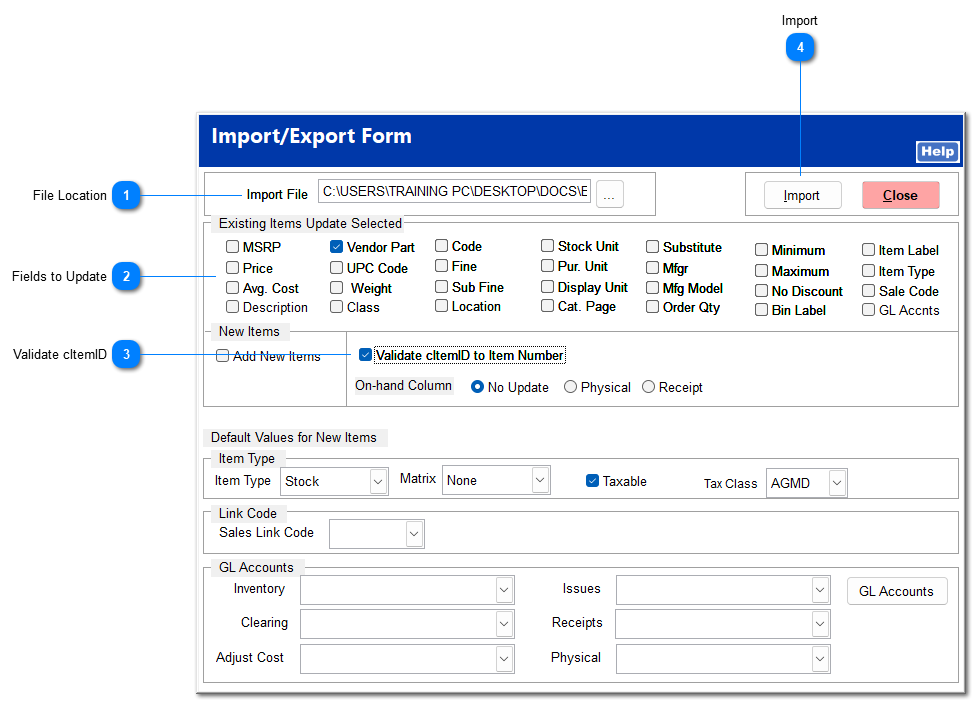
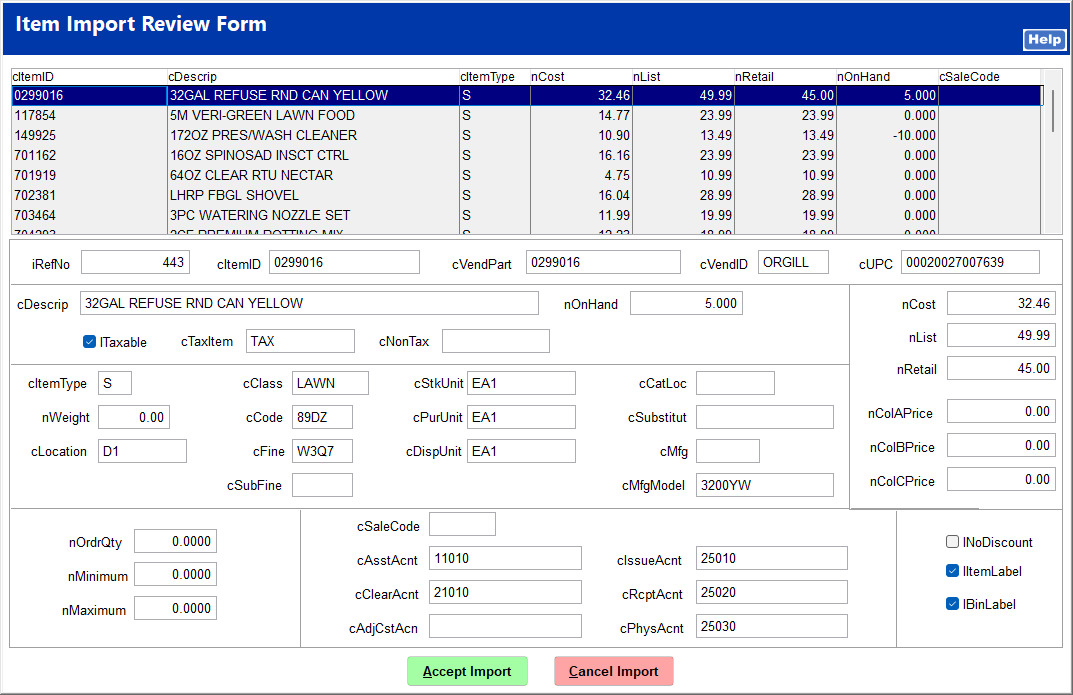
Click Import to proceed with the import process. You are presented with a review form; you can click through the items in the import list to verify the data to be imported.
If you are satisfied with the data, click Accept Import.
You are unable to make changes from within the review form. Rather, you must click Cancel Import, make changes in the import file, and reprocess the import.