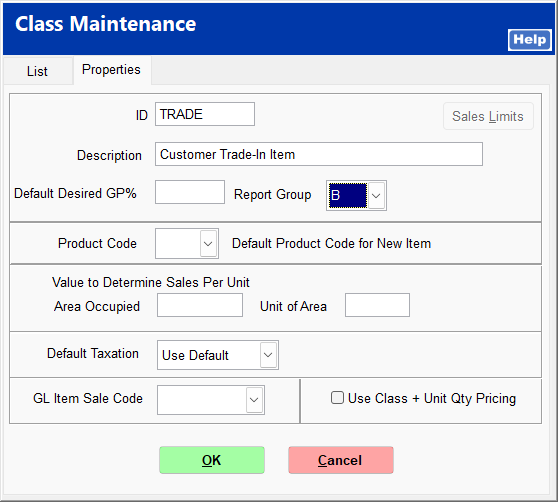
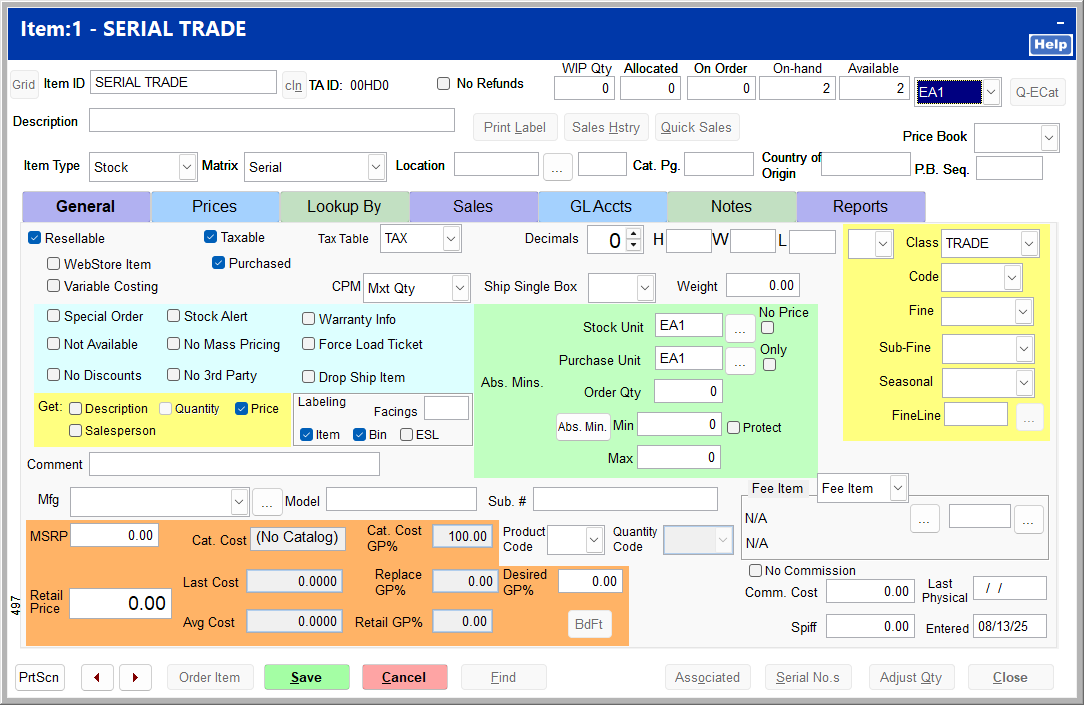
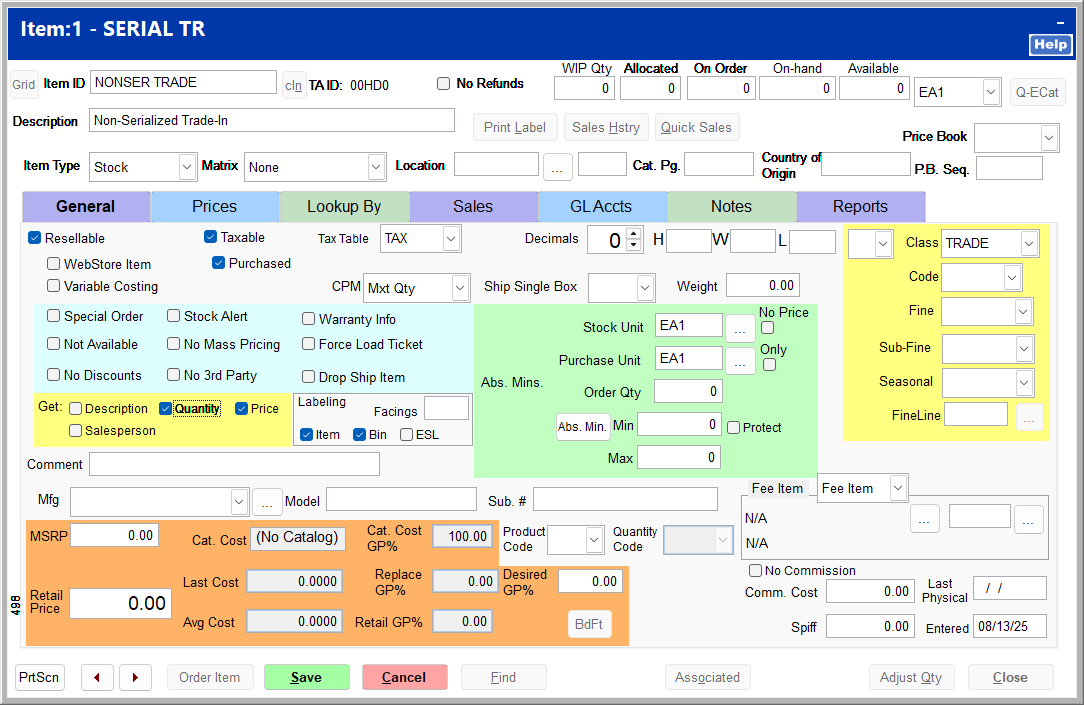
Create two stock items with no price: one serialized to be used when trading in a serialized item, and one non-serialized to be used when trading in a non-serialized item. Check Get Price so that the clerk is prompted to enter the quantity and price in Ring Sale. Set the class to the trade class you created.
3. Complete the Trade-In at Ring Sale
At the ring sale screen, enter the item to be purchased as you normally would.
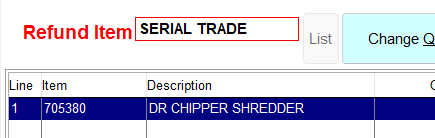
To enter the trade-in item, click Refund and then Refund Next Item. Enter the appropriate serialized or non-serialized trade-in item ID.
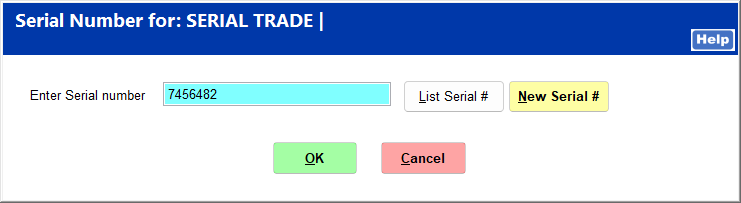
If you enter a serialized trade-in item, you are prompted to enter the item's serial number.
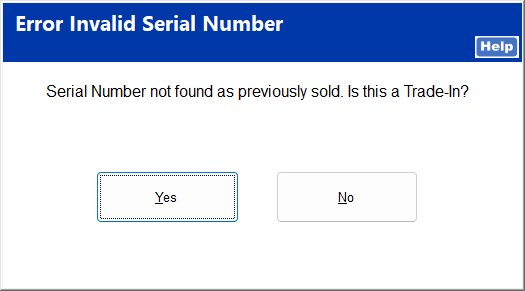
Since the serial number is not already in your system, you are prompted to confirm that the item is a trade-in. Click Yes to continue.
Click Cancel to bypass the Refund Invoice screen.
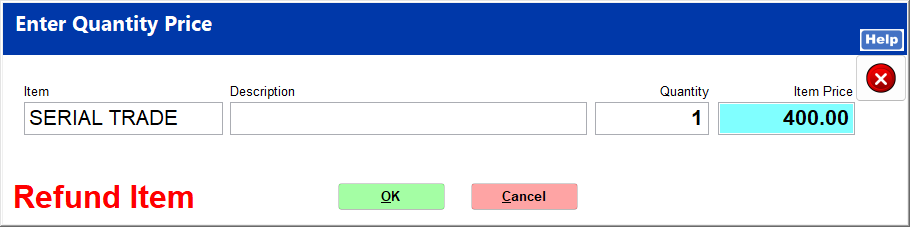
Enter the agreed upon trade-in price on the Enter Quantity screen.
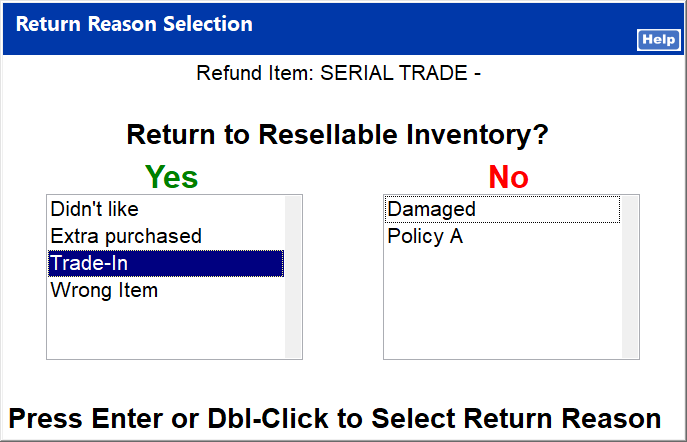
Select the appropriate return reason.
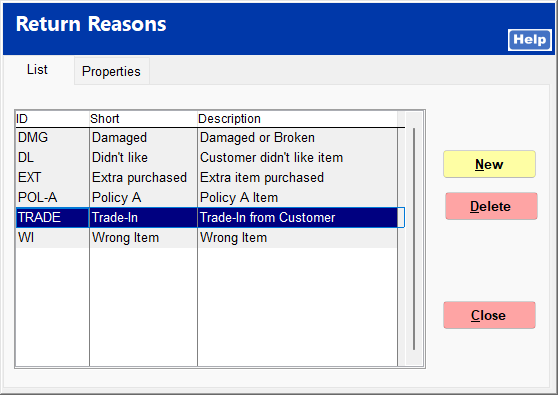
For accuracy, you may wish to create a return reason specifically for trade-ins. Return reasons are managed in System | Support Files | Return Reasons.
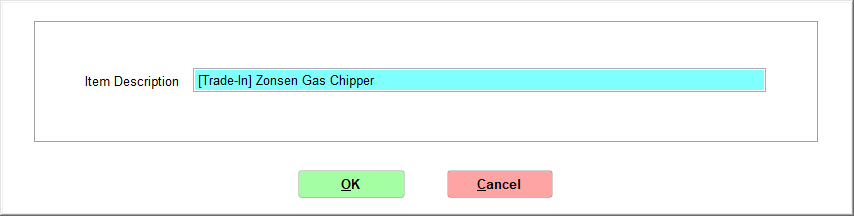
Click Item Desc to change the item description to enter a description of the trade-in item.