(c) Profile Systems Design Group, Inc. 2026 Build: 4.008.811 Help ID: 4066
If you do not see the expected content,press CTRL + F5 to clear your Browser's cache.
Pay on Account
To apply payments directly upon entering a payment, Payment on Account Create Credit must be unchecked in System | Workstation | System.
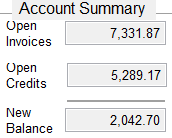
Select a customer and enter a payment as outlined in POS | Payments | Pay on Account. Upon entering a payment method, the Payment on Account application screen opens.
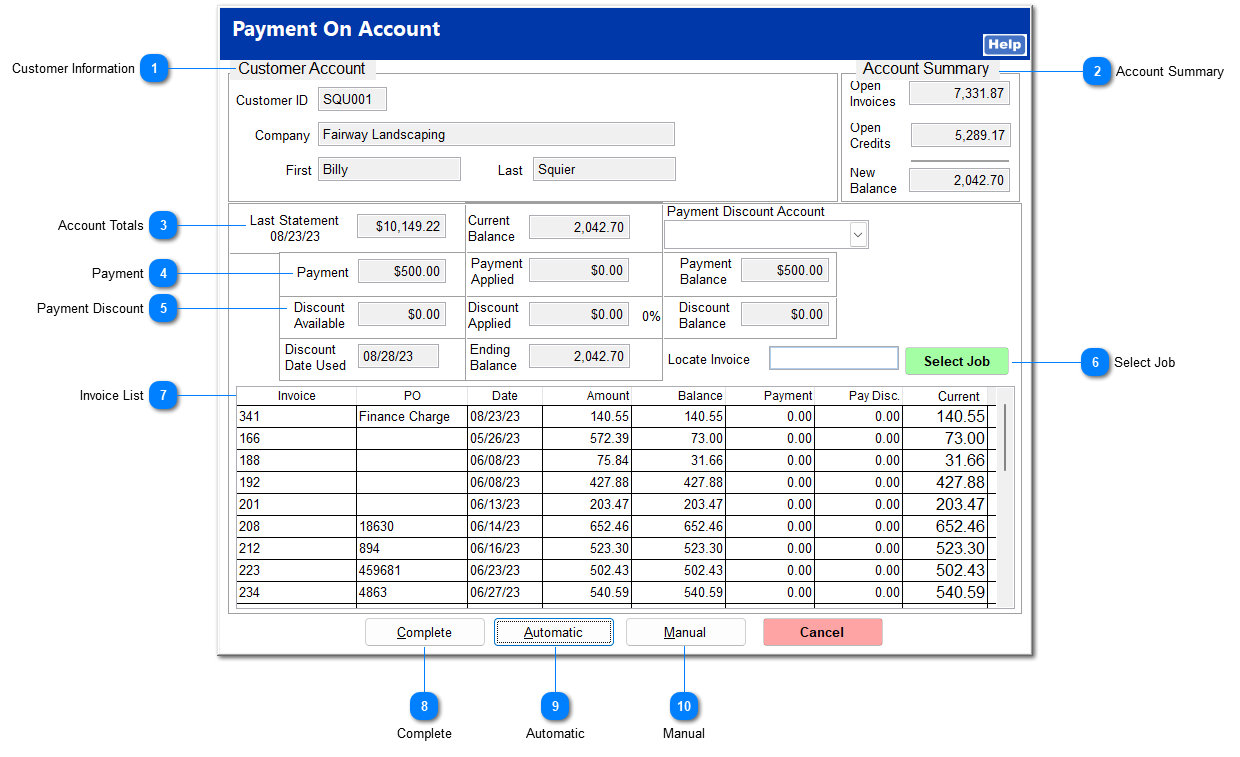
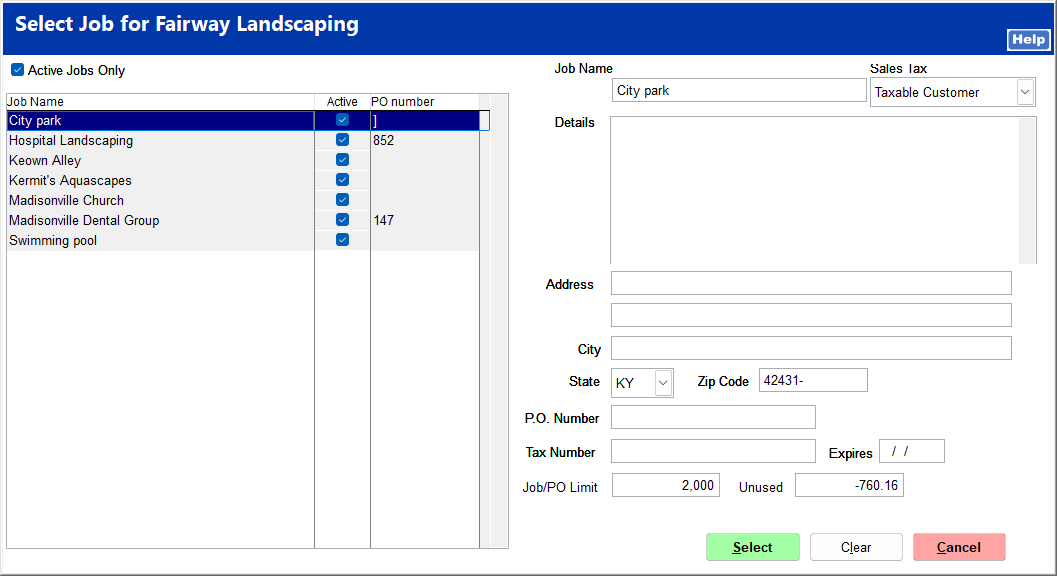
Customer Information
Basic customer information is displayed. Note that the customer cannot be changed at the payment application screen.
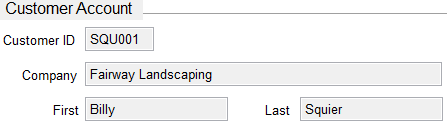
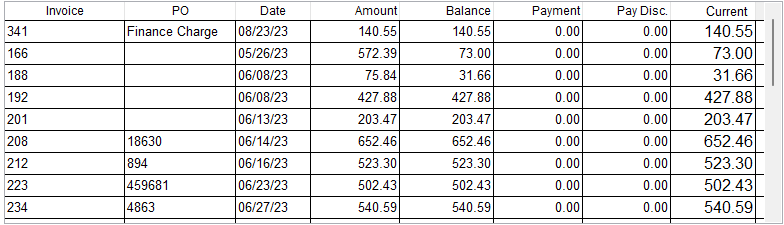
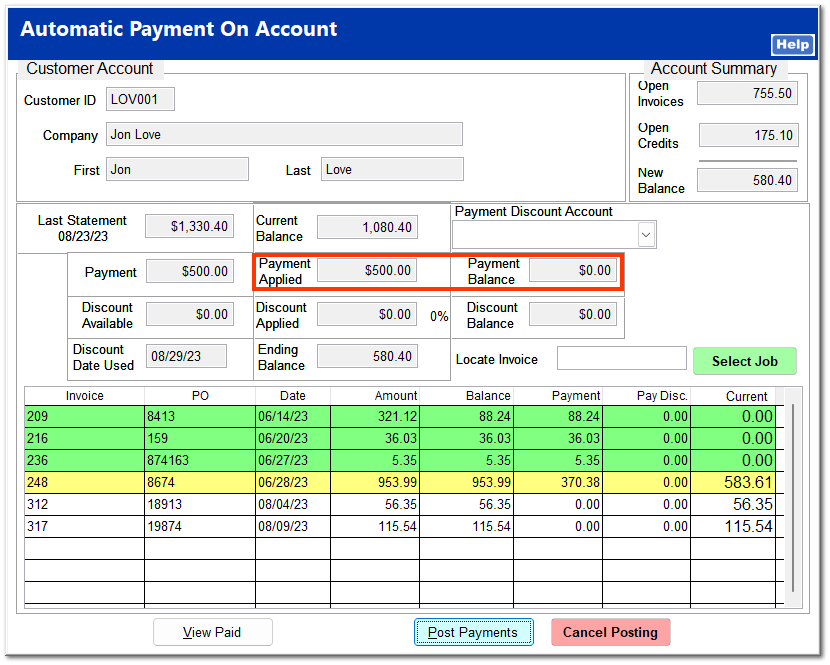
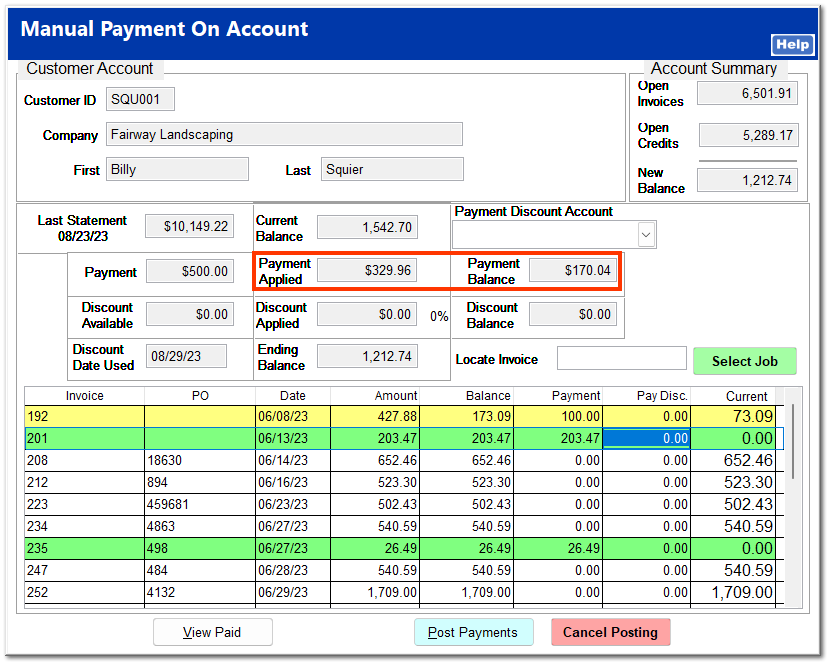
This displays the total amount of the current payment, the amount already applied, and the balance. As the payment is applied to invoices, these amounts change to reflect its application.
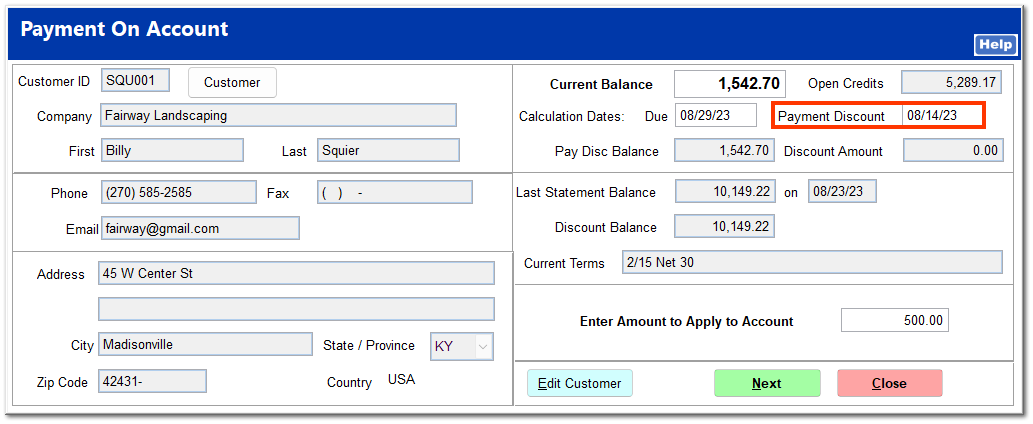
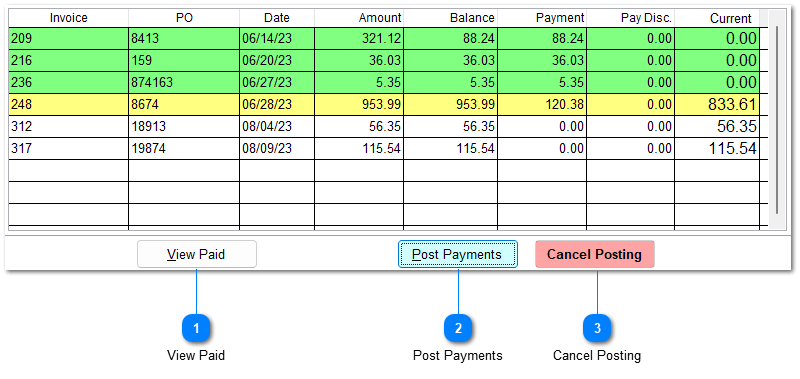
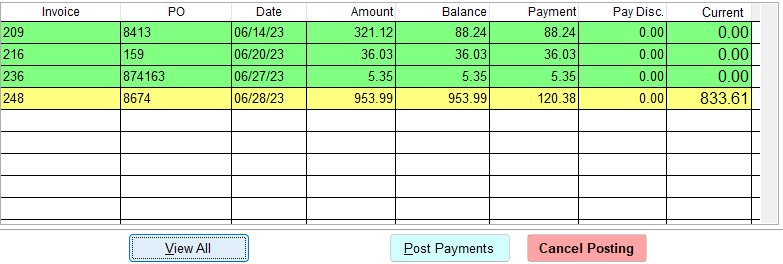
This applies the payment automatically, starting with the oldest invoice and continuing through until the payment is consumed.
Upon clicking Automatic, the entire payment amount is entered in the Payment Applied field, and the Payment Balance field is zeroed out. Invoices that are paid in full are highlighted green. Invoices that are partially paid are highlighted yellow.
This allows you to choose which invoices to apply the payment to and how much to apply to each.
After clicking Manual, click on an invoice you wish to apply the payment to, or enter an invoice number in the Locate Invoice field. You can enter an amount in the Payment column or right-click in the Payment column to automatically enter the full balance of that invoice. As the payment is applied, the Payment Applied and Payment Balance fields update to reflect Invoices that are paid in full are highlighted green. Invoices that are partially paid are highlighted yellow.
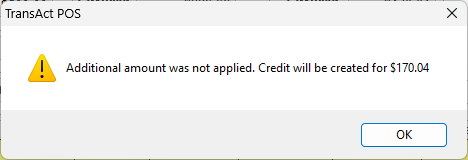
Any portion of the payment that is not applied generates a credit on the customer account.
This cancels the payment posting, removing all payment information entered, and returns you to the Find Customer screen. You are prompted to confirm that you wish to cancel the posting.