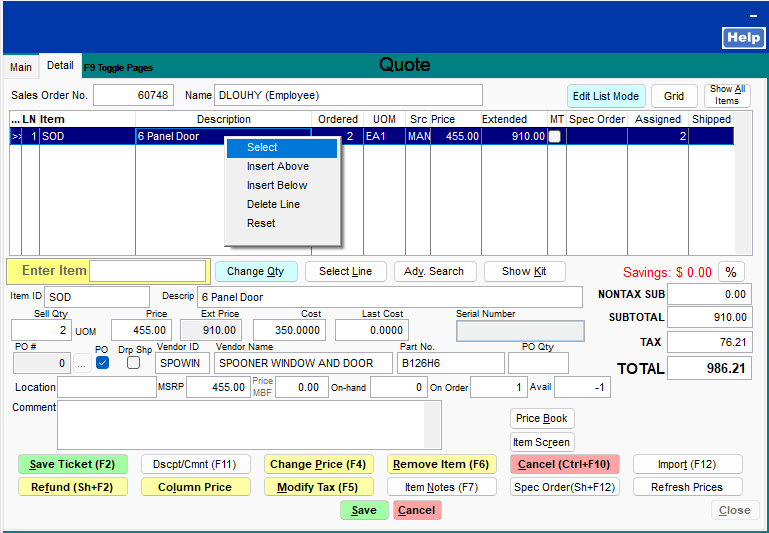
Special Order Item Detail Popup
Selecting this option will allow the salesperson to quickly enter the core information about a Special Order item beginning with the description, vendor part number, selected vendor, cost, the calculated retail price based upon the customer's Discount Pricing and then the quantity of the special order item.
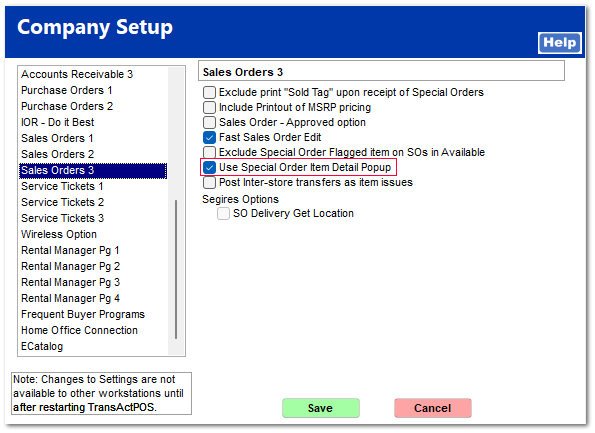
1) This option requires a change within the System > Company Setup > Sales Orders 3 > Use Special Order Item Detail Popup
2) This option is only applicable to "Special Order" Items. IC > Inventory File > General Tab > Special Order
3) This option utilizes the AR > Customer File > AR Tabs > Settings > Pricing Discounts to derive the Cost Plus % for the Retail Price.
|
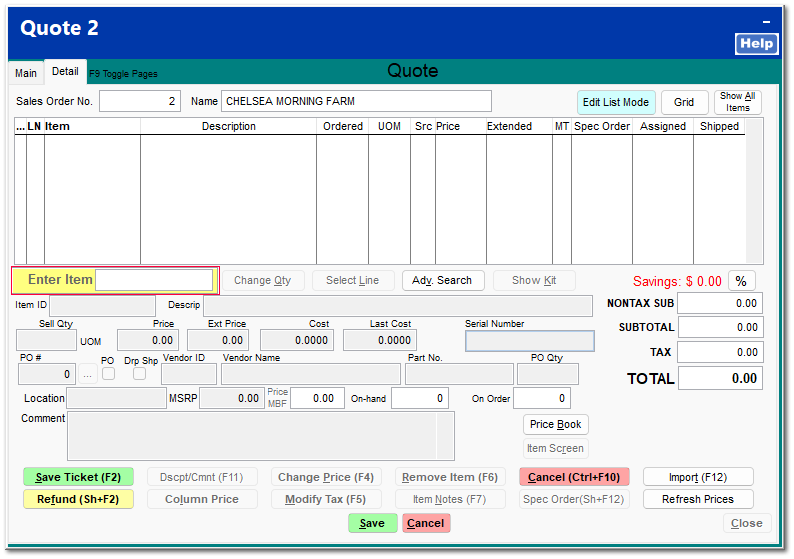
With the "Special Order Item Detail Popup option checked, the system changes the typical item entry screen to the following Special Order Item Entry screen for items that have the Inventory Control > General Tab > Special Order field checked.
|
Turn on this option within System > Company Setup
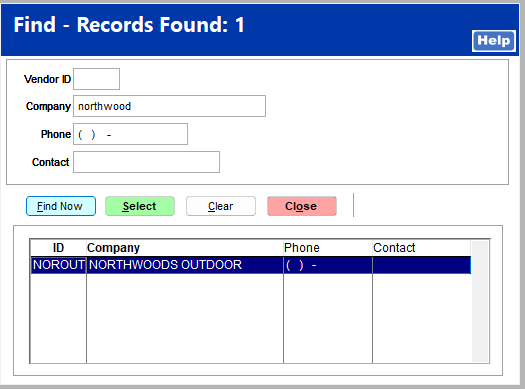
Entering a "Special Order" SKU (Item ID) into the Enter Item field, the system will present the "Special Order Item Entry" popup screen.
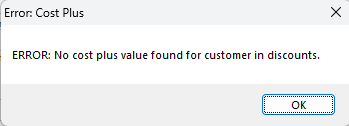
Note: If the selected customer does not have a Cost Plus calculation for the selected SKU within AR > Customer File > AR Tabs > Settings > Pricing Discounts, the following prompt will appear indicating that the customer does not have a Cost Plus for the selected SKU within the Pricing Discounts setup for the customer.
 |
By design, the Special Order Item Entry screen requires an Enter after entering the selected field information. The cursor does not automatically proceed to the next screen upon reaching the end of the field.
|

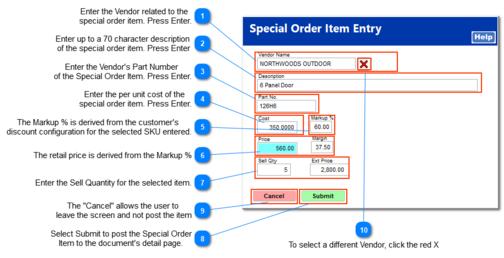
The Markup % is derived from the customer's |
Select Submit to post the Special Order |