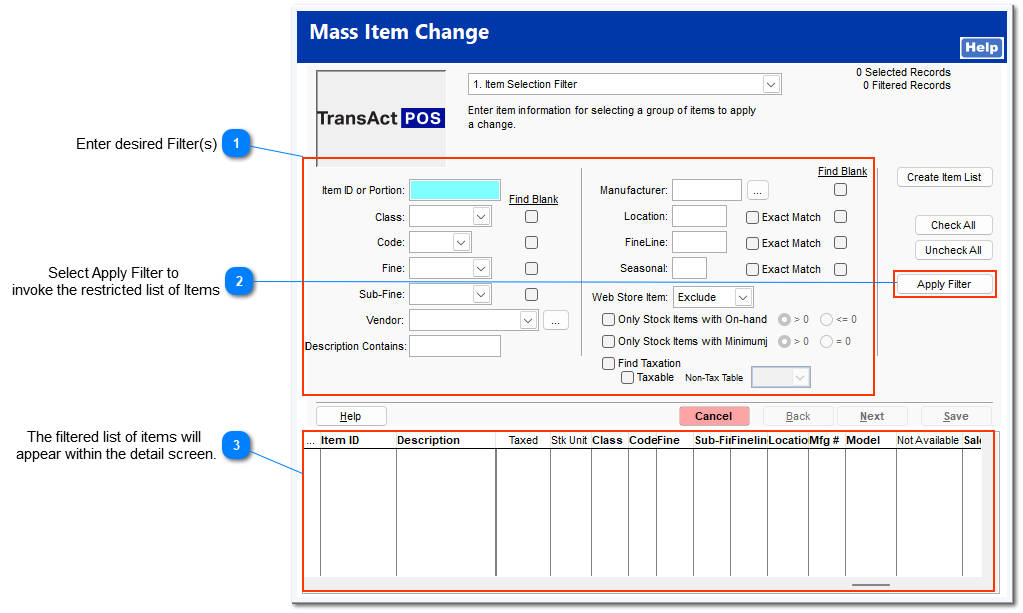
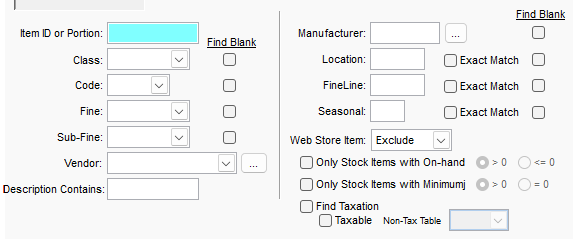
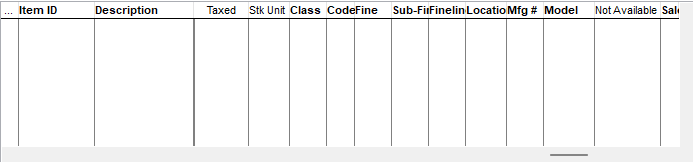
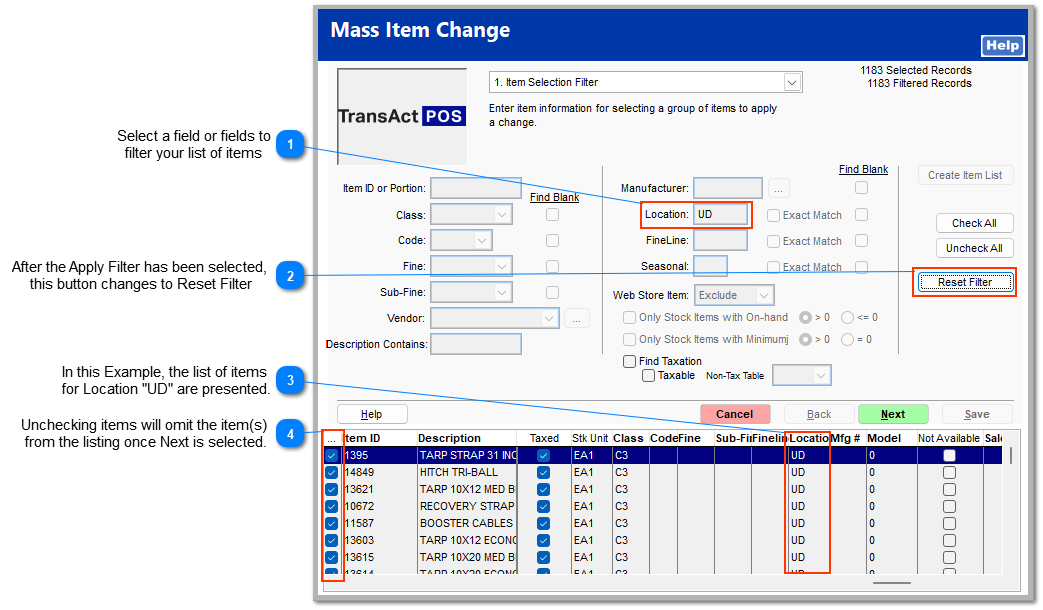
On this screen, you must designate an item filter to apply to your inventory items. Enter in any of the fields on this screen to narrow the search down (you can enter multiple fields). Another thing you filter the items by is by checking the Find Blank box. If you check this box, it will find all items with a blank in the specific field (if Find Blank is checked next to Class, it will find all items with a blank class). Once you have entered in the information you wish to filter, click the Apply Filter button. This will search the inventory file for matches, based on your specific filters. You can use the check all or un-check all buttons to select or deselect all the items in the field below respectively. You may also use the check boxes next to each item on the left.
The Import Item List option allows the user to import a one column of either Item IDs or the indicated Vendor's part number (As seen within the IC > Lookup By screen).
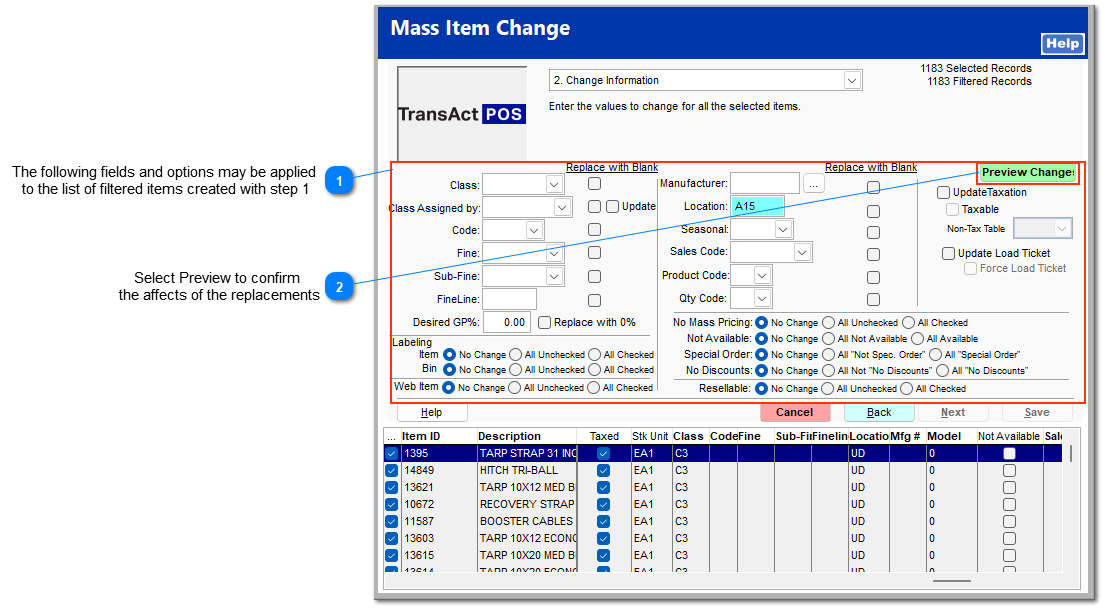
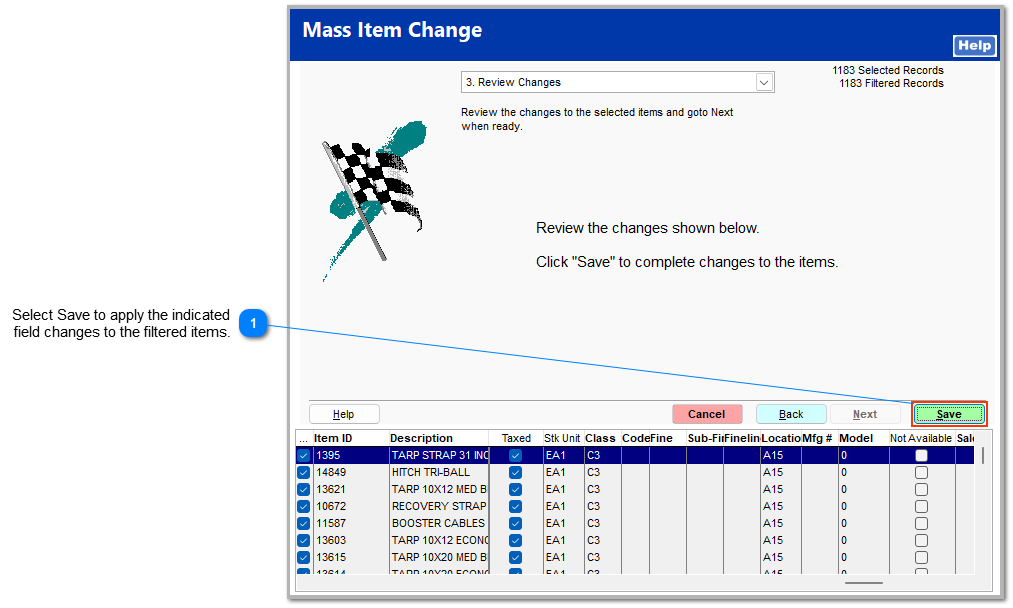
This screen allows you to change the information of the selected items below. You can change multiple fields at a time. If you are wanting to get rid of a field (say an item has a class but you want to delete that class), you check the Replace with Blank box. This, after saving, will clear the specific field of any input. You can also select if you want the selected items to all be available or all not be available and/or make all items checked special order items or not special order items. Once you have entered in the fields you wanted, click Preview Changes to view the changes to the inventory file below. Note, clicking this button DOES NOT change anything permanently. In order to make the changes final, click the Save button or Next.
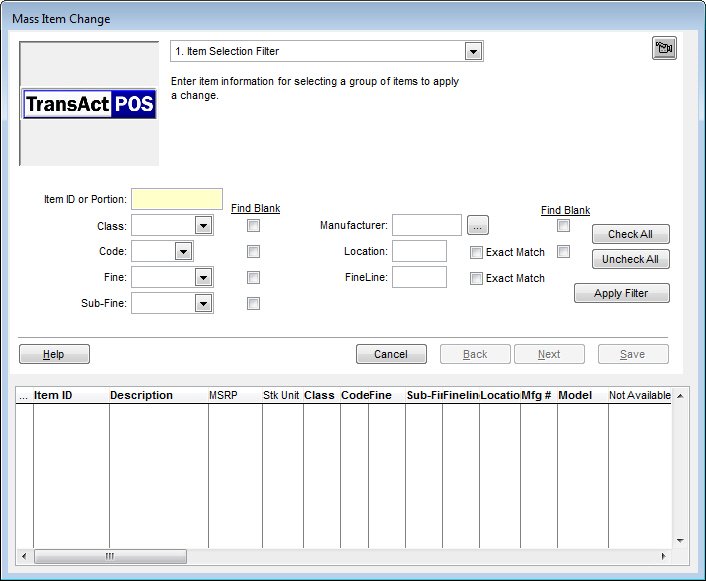
The following fields and options may be applied to the list of filtered items created with step 1
Choose which options to be be applied to the filtered list.