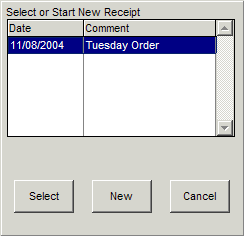
The inventory receipt process is based upon groups of receipts to help organize the process. In this example, the "Tuesday Order" was already in the system, but the order being processed for this exercise will be assigned to an order called "Saturday". To create the new receipt group, simply select "New" and then enter the desired comment name. If a group already appears that fits your requirements, simply highlight it and press "Select".
In this example, the comment field indicated is a generic receipt by day, but a better method may be the packing slip number that is included with the shipment. If the packing slip number is used, the back office will have a clear understanding so matching received invoices will be easier.
The receipt groups can be created from the desktop application within Options | Wireless Menu |
Item Receipt Maintenance | New to allow future control from the back office. This way, the back office can assign specific group names to known daily receipts.
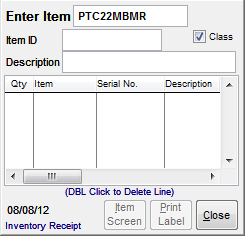
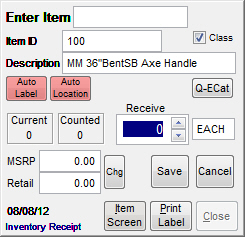
In this example, a model number is scanned or manually entered into the Enter Item field.
Upon pressing Enter, the system does not locate the requested sample item. In this particular case, the user knows that the item will be new to the inventory and is actually located in the ECatalog. If the user selects the "Add" button at this point, they will not be accessing the ECatalog information.
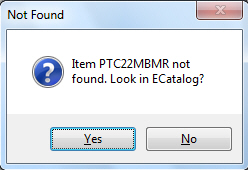
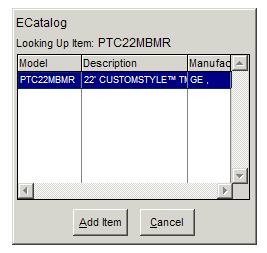
To properly add from the ECatalog, select Cancel and the system will present the following prompt to review the contents of the ECatalog for the indicated item.
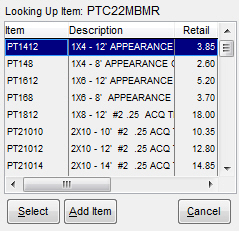
In this example, the item PTC22MBMR is located within the ECatalog, as shown by the screen below. The user will recognize that they are looking at the ECatalog and not the inventory by the header "ECatalog" located at the top of the screen.
Selecting "Add Item" will then add the item to the inventory file.
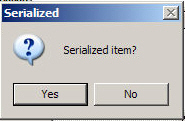
During the add process, the system will present a screen asking if the item is serialized. If so, select "Yes" to properly establish the item as a serialized item. If the inventory type is incorrectly stated, this can be corrected within the IC | Inventory File | Inventory Maintenance | General screen.
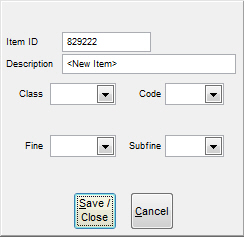
The first screen will ask you to input the class, code, fine, and subfine. Afterwards, you can enter the quantity received, change the prices, and other functions that you can normally do in the Wireless Inventory Receipt screen.
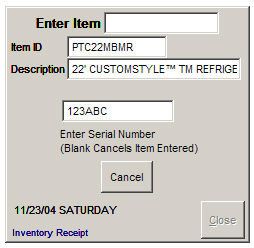
If a serialized item is entered, the system will prompt the user for the appropriate serial number.
After Enter is pressed on the PDA device, the system will then present the following screen indicating the quantity of "1" and the serial number of the received item.
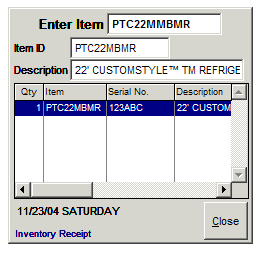
If an item is scanned that already exists in the inventory, the following screen will appear which is a streamlined version of the previous process. The user will simply enter the serial number of the selected item and then press Enter, if necessary.
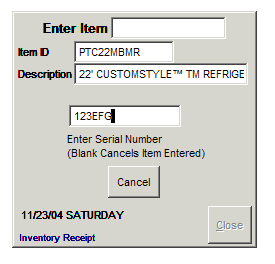
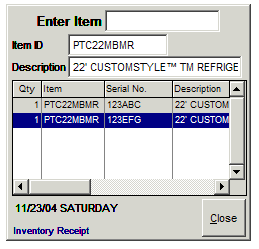
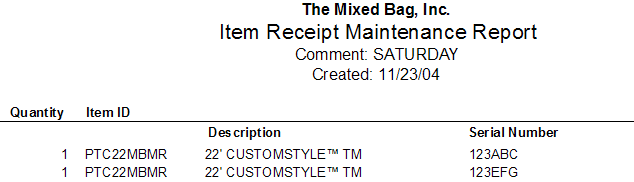
Upon receiving this second serialized item, the system presents a second line indicating the separate serial number. If the item is not a serialized item, the system will request the quantity of the received item and the system will indicate this information within the Qty field.
Selecting Close will end the current receipt process within the indicated receipt group, i.e. Saturday. The user may return to the group at anytime while the receipt group has a status of "receiving." The status of the group is controlled from the desktop application. Review Inventory Receipt for the specific steps to process the scanned inventory receipt into the current inventory.
Within the desktop application, the user may access the "Item Receipt Maintenance Report" which indicates the details of the items received within the selected group.