(c) Profile Systems Design Group, Inc. 2026 Build: 4.008.811 Help ID: 875
If you do not see the expected content,press CTRL + F5 to clear your Browser's cache.
Creating a Gift Registry
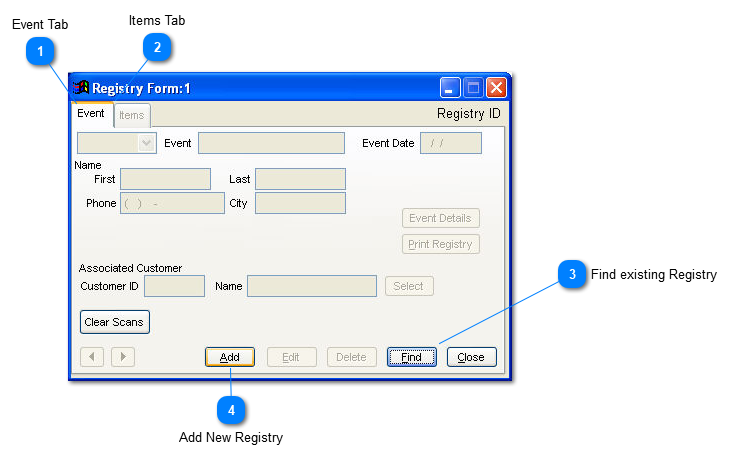
Upon entering the Gift Registry option, the user can add a new gift registry or locate an existing gift registry. When adding a new gift registry, the user will assign the specific type of registry being created: bridal, baby, or wish list. Note: the wish list is used for all non bridal or baby lists. Based upon the type of event, the Event page fields will vary.
Event Tab
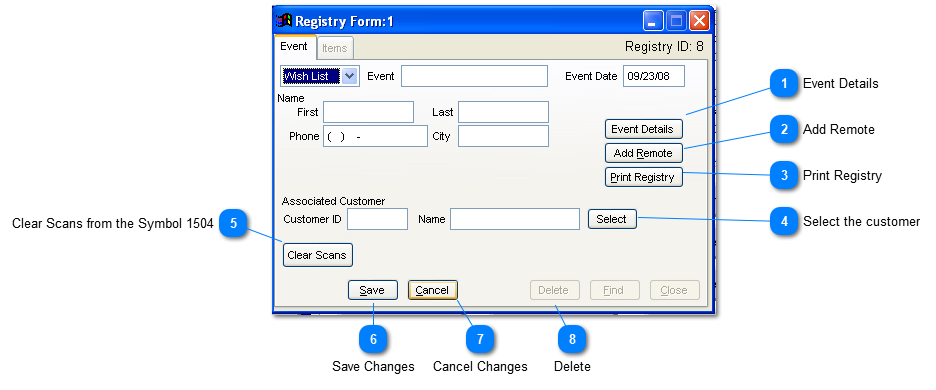
The Event tab contains the base information about the registry.
The items tab contains the list of products within the registry. The items can be manually entered, scanned with a batch scanner like the Symbol CS1504 or entered utilizing the TransActPOS Wireless application connected to the store's wireless network and the TransActPOS server.
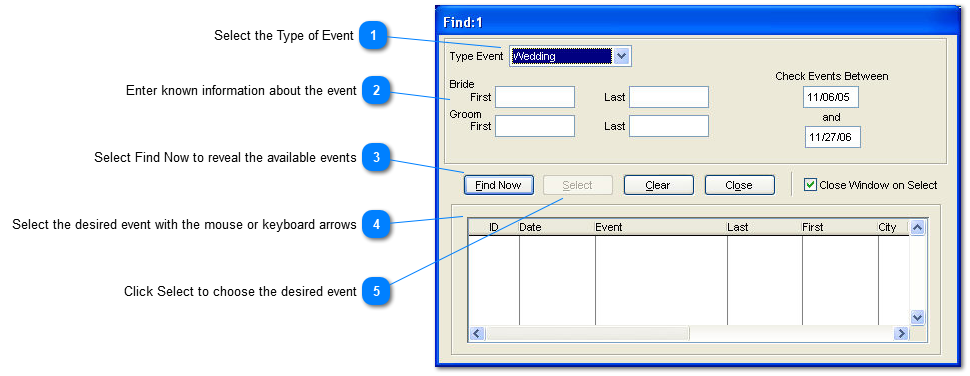
Within the Find option, the user has the option of locating the appropriate gift registry by Type of Event and date range. If any portion of the registrant's information is entered, the list will be further refined.
The Associated Customer is the related customer account within the Customer file of the Accounts Receivable module. If a Customer ID is indicated and a purchase is completed for the Gift Registry, the system will record the purchase within the recipient's Customer file account. If an Associated Customer ID is entered, you can go to that Customer ID within the Customer File | Reports | Gift Report | Gifts Received and display the names of the individual who purchased gifts for the individual.