Creating a Rental Contract
| Alternative information for Rental Version 2 is presented in blue boxes.
|
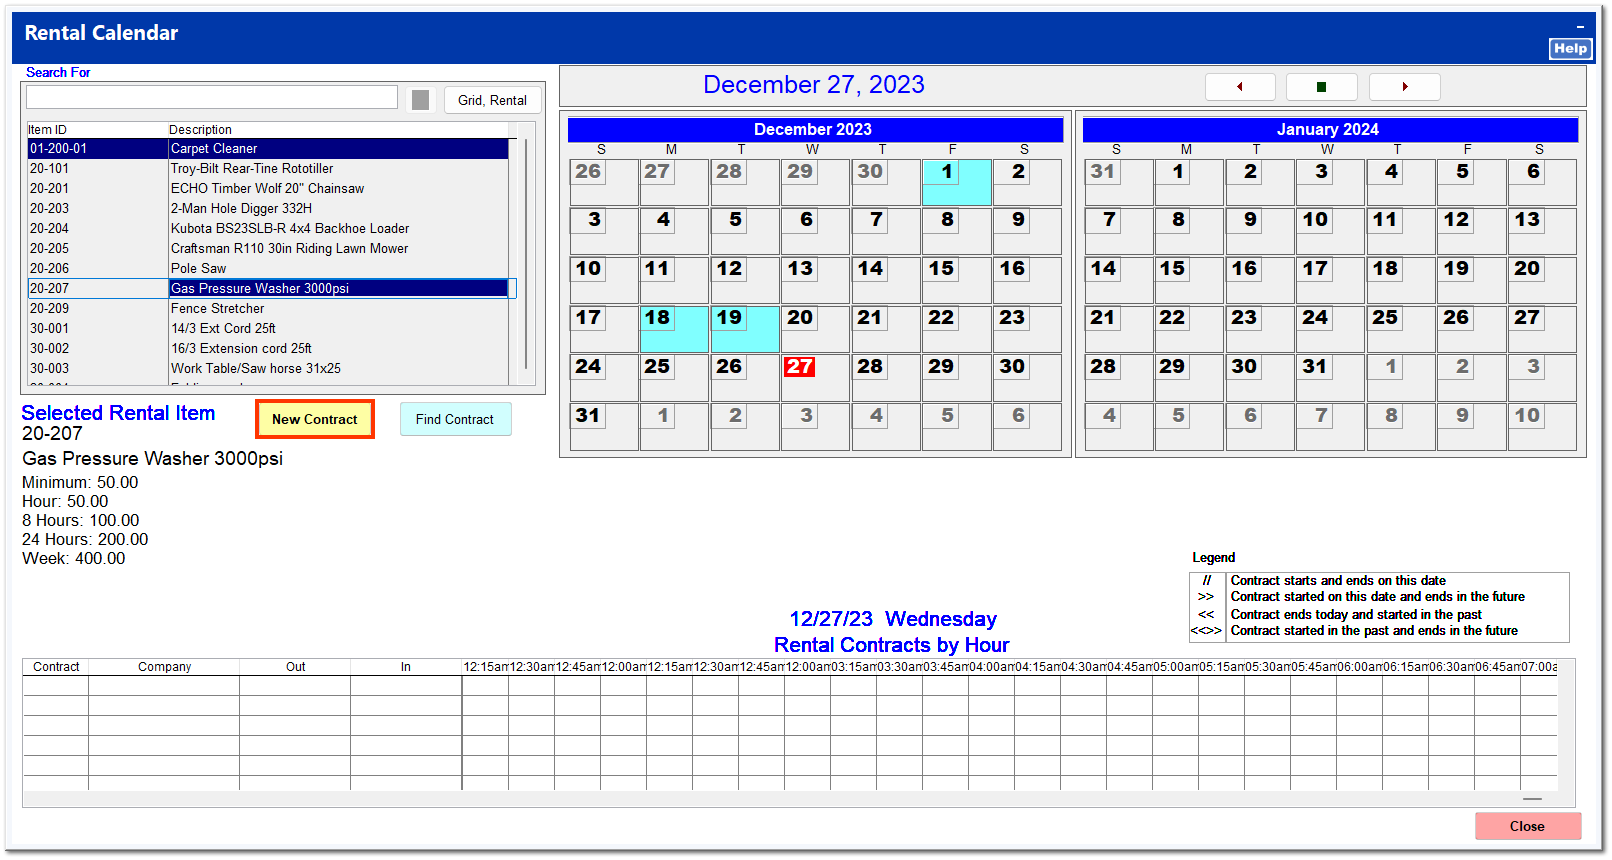
To create a new contract, select the item to rent from the list on the Rental Calendar, and click New Contract. You can search for a rental item in the Search For field by entering the item number, by entering any word from the item description, or by clicking on the rental grid.
This opens the Rental Wizard, which steps through the creation of a new rental contract. To bypass the Rental Wizard and go directly to the Master Rental screen, uncheck Utilize Rental Wizard in Rental Manager Pg 4.
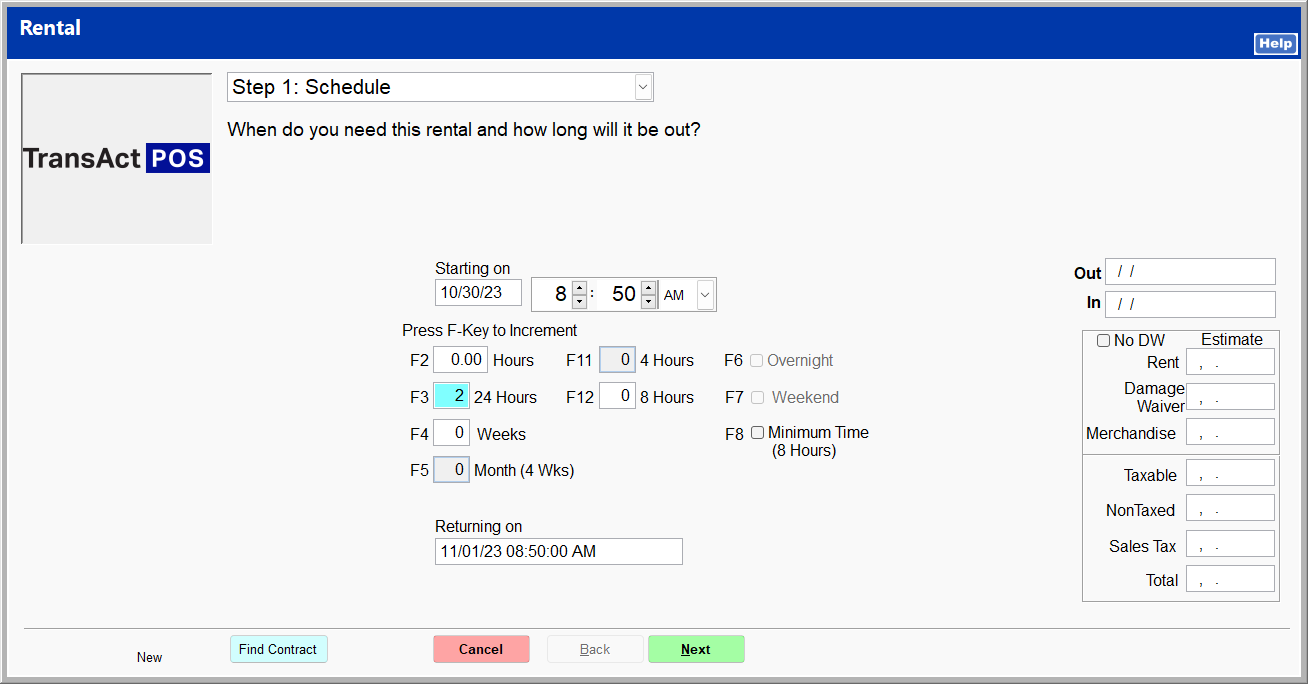
Step 1: Schedule
Enter a starting date and time for the rental reservation. You can use the F-keys to increment the quantity of the rental period required, or you can type the required rental period in the appropriate field. The return date and time are calculated using the starting date and time and the rental period. Click Next to proceed.
If a cleaning fee is entered on the item inventory file, the Enter Quantity Price screen opens. Press the Enter key twice to proceed through the cleaning fee screen. It is not necessary to enter the price; it is automatically entered into the master rental form from the item inventory file.
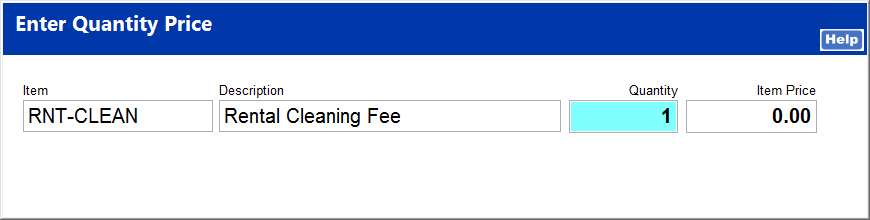
| Click OK to proceed through the cleaning fee screen.
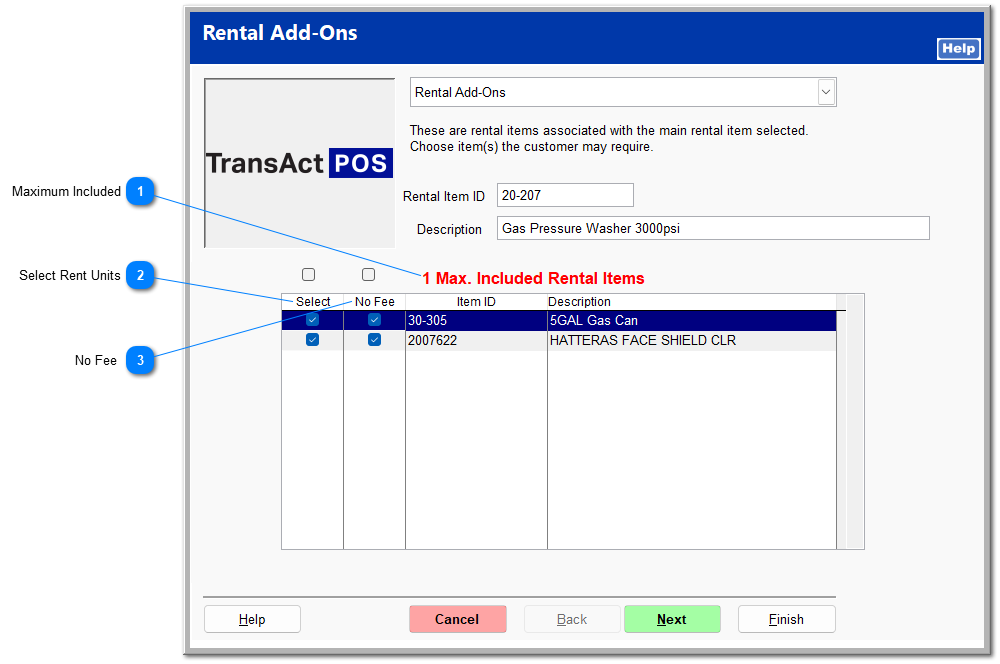
If the rental item contains rental rent units, the rental add-ons screen opens with a list of all rental item rent units.
 Maximum IncludedThis is the maximum number of rental item rent units that can be included on the rental contract at no charge. It is set in the item inventory file rent units. The customer may choose to include more rent units than the maximum set but may incur the rental price of the additional rent units.
| |
 Select Rent UnitsCheck the box next to the rent units the customer wishes to include on the rental contract.
| |
 No Fee You can choose which rent units to include at no charge. If you select more rent units than the maximum allowed, a warning is displayed. Confirm that you wish to include all selected rent units by typing YES and pressing the Enter key.
| |
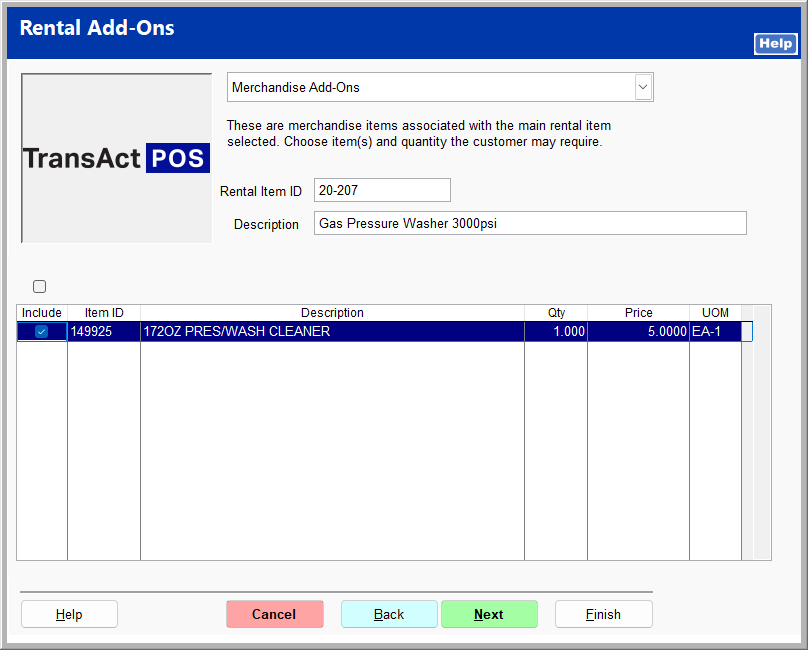
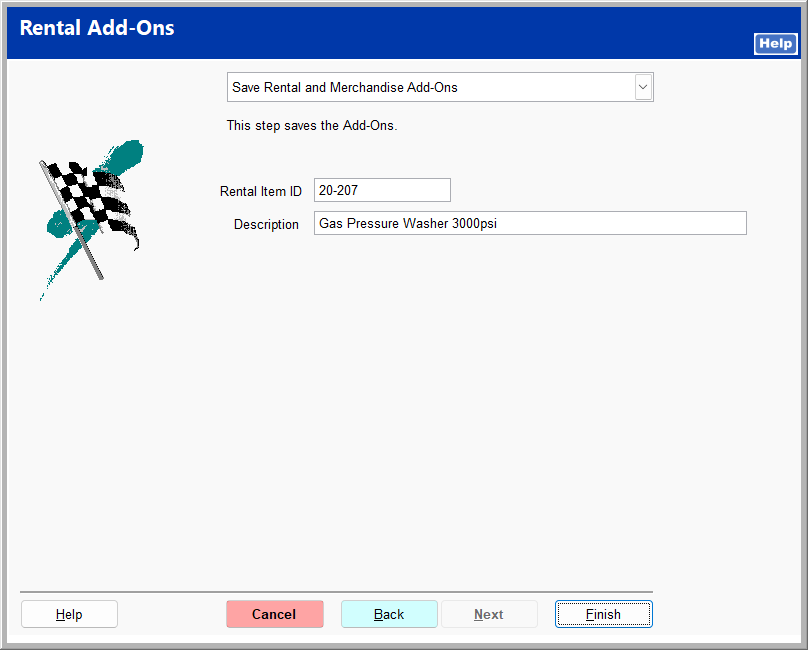
If the rental item contains merchandise rent units, the rental add-ons screen proceeds with a list of all merchandise rent units. Check the merchandise items that the customer wishes to include, and click Next.
Click Finish to close the rental add-on screen and proceed with the rental wizard.
For information on setting up rent units, see Rent Units. |
If a rental item is already out on contract during the time period entered, an error message is shown with the schedule conflict. Clicking OK removes the rental item.
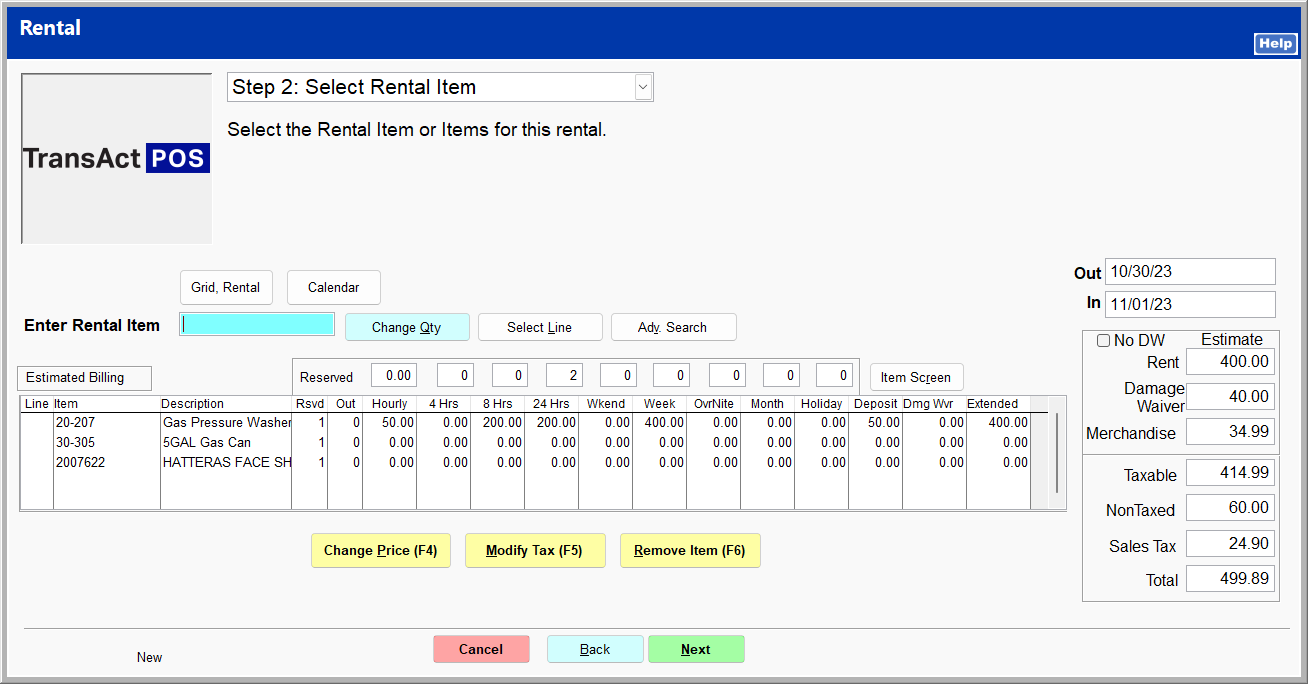
Step 2: Select Rental Item
The rental item and all associated rent units are entered with their hourly rates, required deposits, and damage waivers. You can enter additional rental items as needed by entering the item in the Enter Rental Item field, scanning the bar code, or selecting an item from the rental grid. A few functions are available to make modifications to the items listed. With an item selected, clicking Item Screen opens the items inventory file. The rental period entered on the previous step is indicated in the reserved fields. Estimated totals are calculated and shown to the right. Click Next to proceed.
Step 3: Select Merchandise Item
The cleaning fee and associated merchandise rent units are entered. You can enter additional merchandise items by entering the item in the Enter Item field, scanning the bar code, or selecting an item from the Ring Sale grid. A few functions are available to make modifications to the items listed. Click Next to proceed.
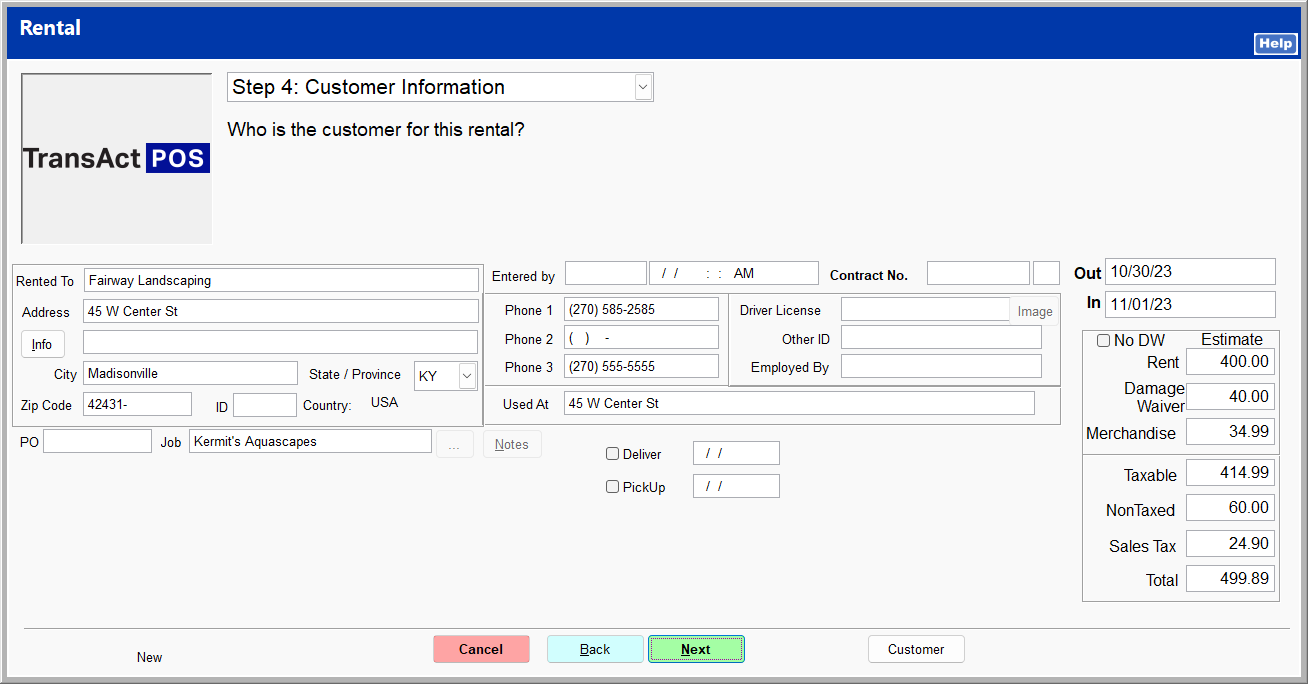
Step 4: Customer Information
Upon clicking Next on the previous screen, the Find Customer screen opens for you to select a customer. If the customer uses jobs, you are prompted to select a job. The customer and job are entered in the form.
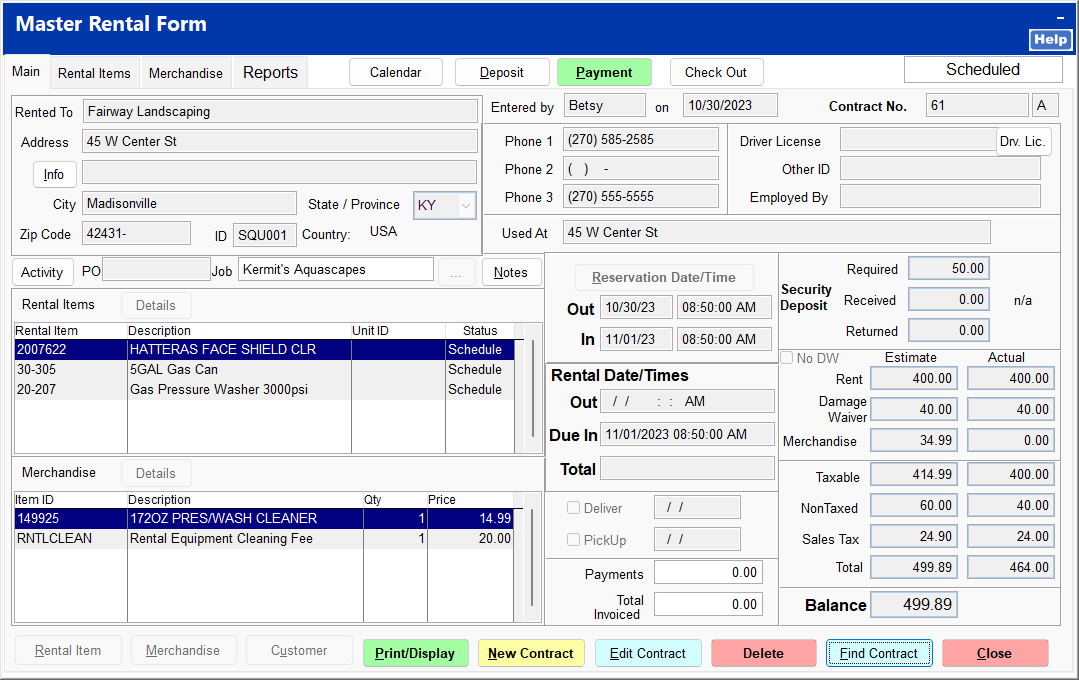
Step 5: Check Out
Click Check Out to check the rental item out for the customer to take immediately. Click Reserve to place the rental item on reserve for the customer to take at a time in the future.
The master rental form is generated using the information entered in the rental wizard. You can proceed to check out the rental item, accept a deposit, or simply close the master rental form.
For information on checking out a rental contract, see
Checking Out.