(c) Profile Systems Design Group, Inc. 2026 Build: 4.008.810 Help ID: 733
If you do not see the expected content,press CTRL + F5 to clear your Browser's cache.
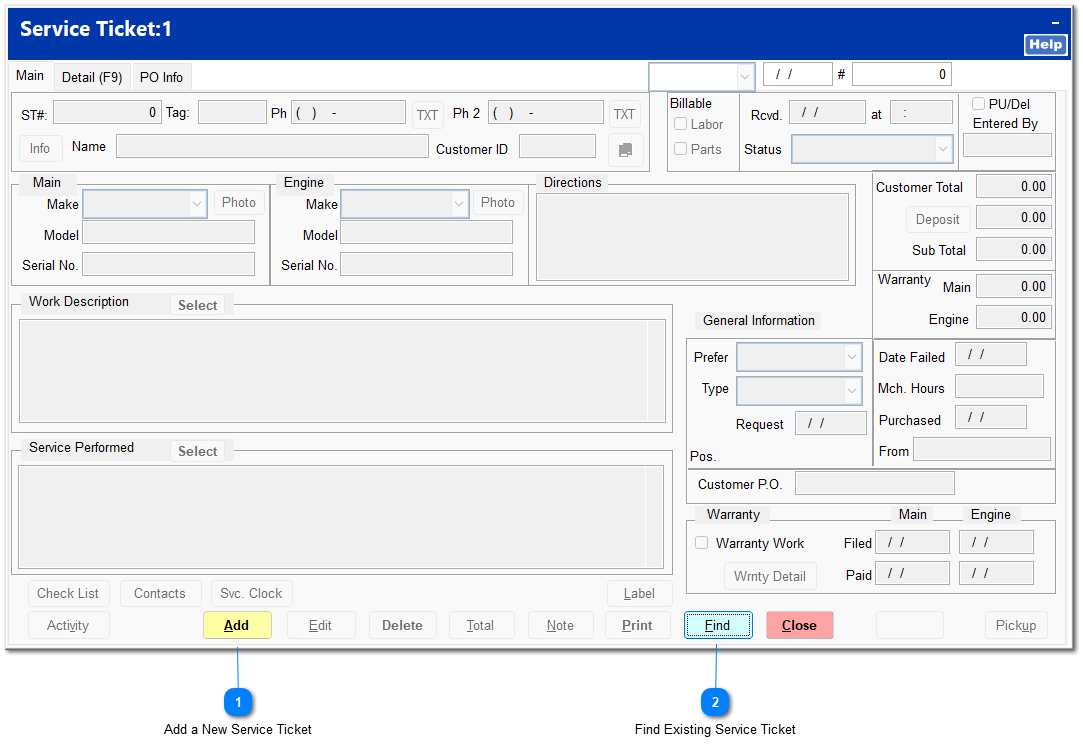
Service Tickets
There are two ways access service tickets:
POS | Service Tickets
Service | Service Ticket
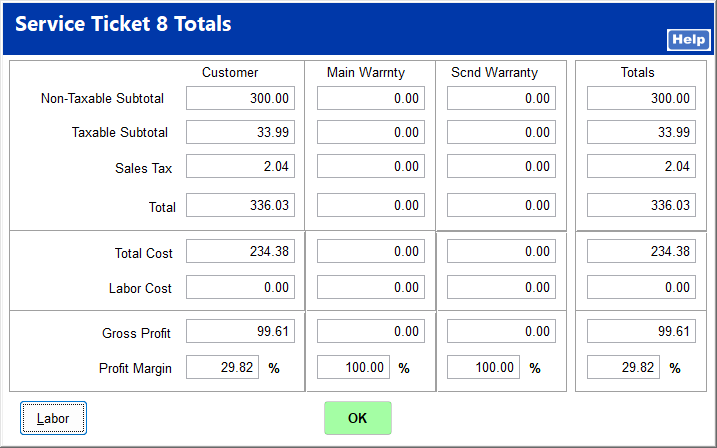
The Service Ticket screen contains three tabs: Main, Detail (F9), and PO Info. The Main tab contains basic information regarding customer information, equipment to be serviced, work description, and services performed, while the detail tab contains specific parts and labor related to the repair. The PO Info tab allows for quick ordering of a part needed to complete the service work.
Add a New Service Ticket
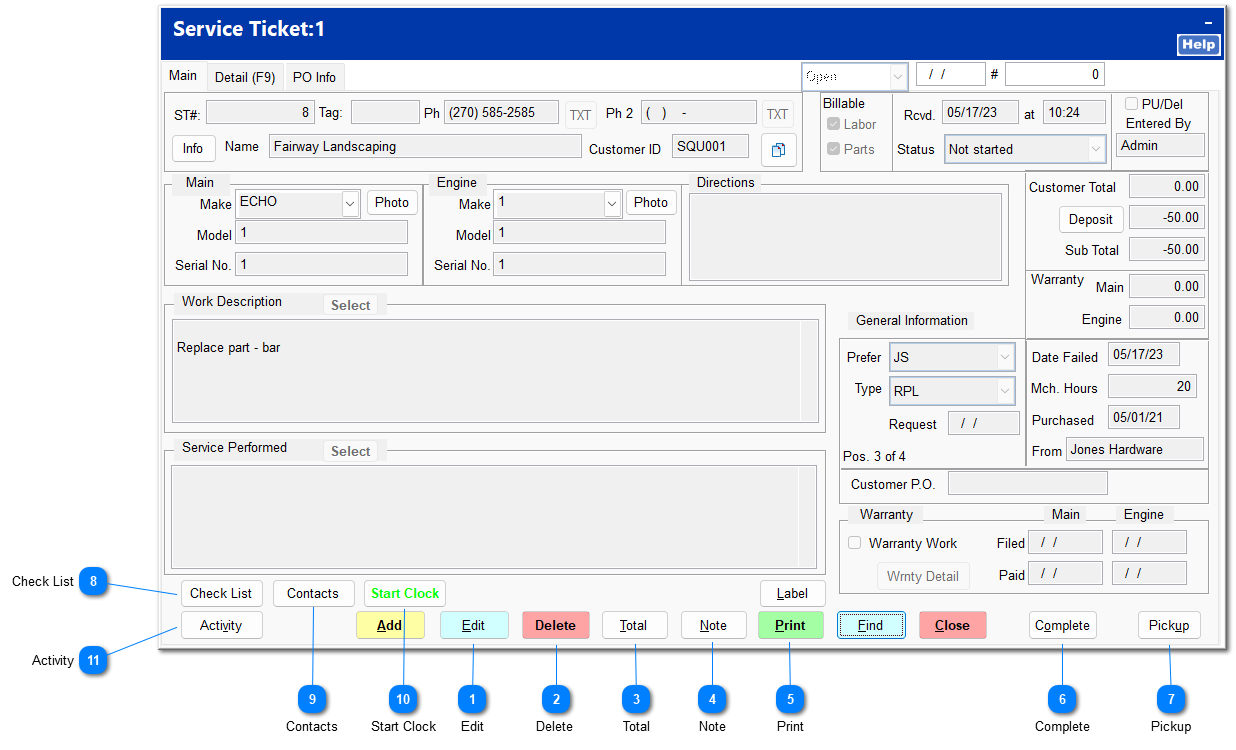
A new service ticket is created by clicking the Add button located on the Main tab. This opens the Find Customer window, and the user can select a customer from the store's AR customer listing or enter a new customer.
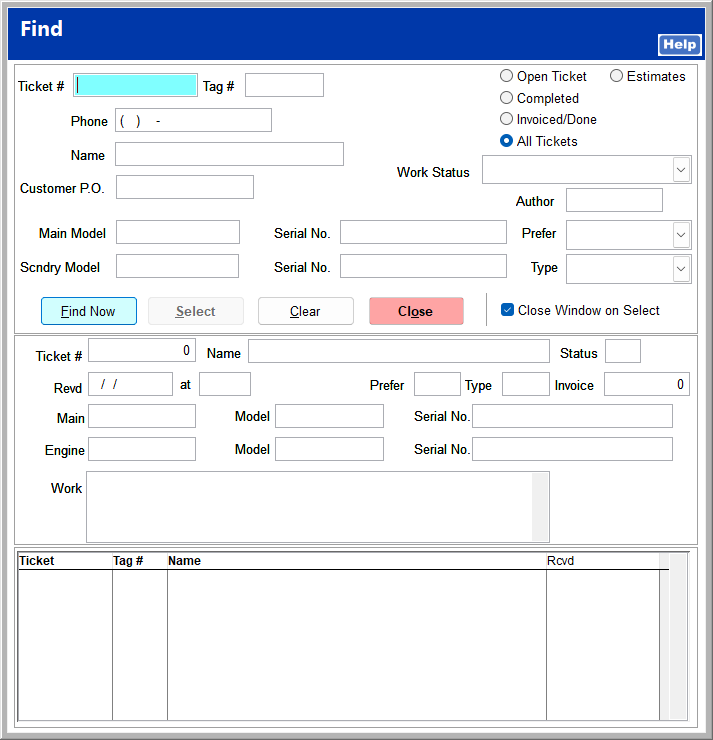
If available, you can enter the appropriate lookup criteria to locate the desired service ticket, and then click Find Now to display the matching service tickets. You can add the option to find a service ticket by additional criteria, like customer ID or last name, by selecting the Use the Advanced Find Form in System | Company Setup | Service Tickets 1.
If you click Find Now without any parameters, the system will display all service tickets in order of service ticket number.
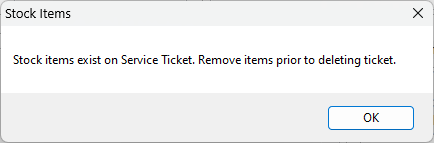
This deletes the current service ticket. If stock items have been added to a service ticket, you will receive an error message that the stock items must be removed prior to deleting the ticket.
The ticket can be deleted after the stock items have been removed.