To properly display this page you need a browser with JavaScript support.
To quickly assign location codes and area of items
Start the TAPDA application
Tap the Auto Location button
Scan the items - no interaction required
Option 1: To change to a new location
Tap the XXX Location button to turn off
Tap the Auto Location button to enter the new location
Option 2: To change to a new location
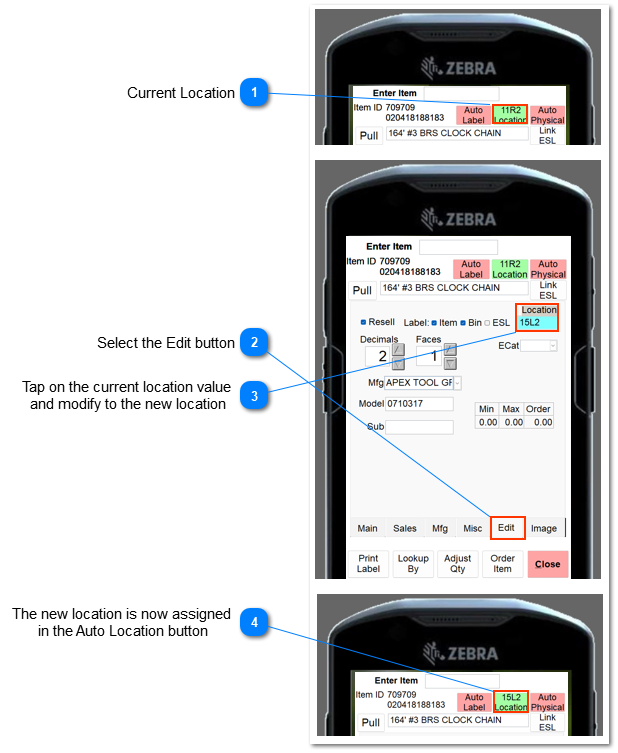
Current Location
Select the Edit button
Tap on the current location value
The new location is now assigned With the Edit of the Location completed, the system has assigned the revised location to the current item and will then be the new location within the Auto Location button. All items scanned from this point forward will be assigned to the new location as indicated within the Auto Location button.
The following prompts provide additional information.
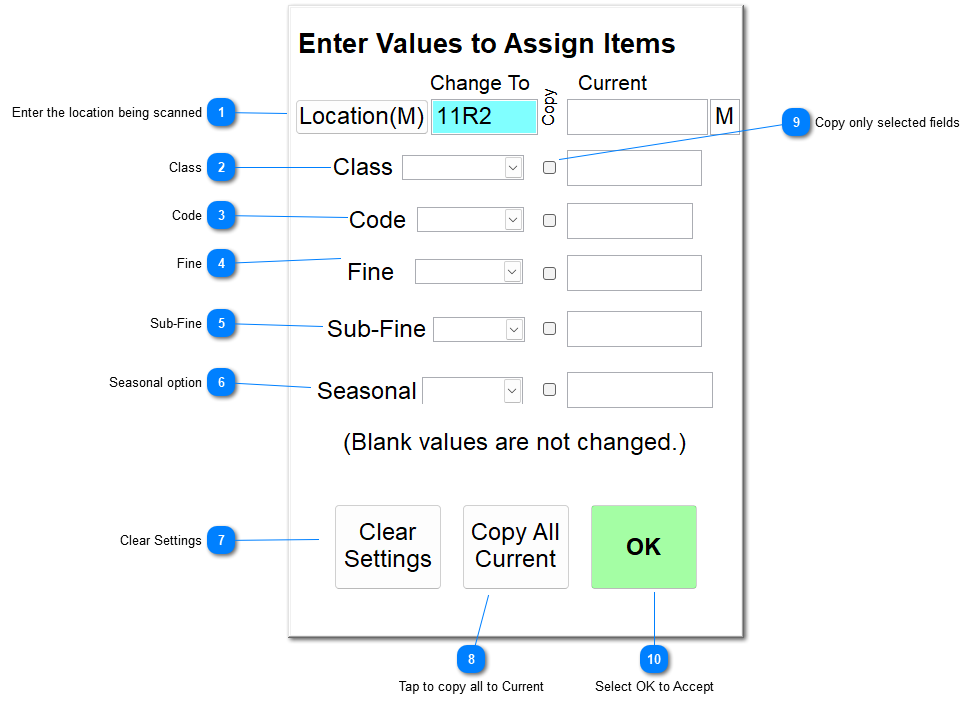
1) Tap or click on the Auto Location button to invoke the available features.
2) Enter Values to Assign Items Select the following option to be applied to each item scanned while the Auto Location is on (Green
Enter the location being scanned Once the location is entered, the Auto Location button will show the current location being applied to each item scanned.
Class Choose the appropriate selection.
Code Choose the appropriate selection.
Fine Choose the appropriate selection.
Sub-Fine Choose the appropriate selection.
Seasonal option Select for the Season List the desired option.
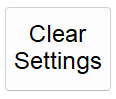
Clear Settings This option resets to the current options to blank.
Tap to copy all to Current Tap on the Copy All Current to copy all options of the Current fields based upon the currently selected item.
Copy only selected fields Check on the field to copy to the Current field based upon the currently selected item.
Select OK to Accept
3) Select OK to Accept selections 4) Prompt to change values?
Select Yes to Prompt
Select No to Automatically post
After the options have been accepted, the Auto Location button will turn green and present the current location being applied to all items scanned.
To turn off the Auto Location option, simply tap the Auto Location button and the button will change to red indicating that the option is not active.