×
Menu
Index

Auto Label

Auto Label provides access the following:


1) Tap or click on the Auto Label button

to invoke the available features.
 

2) Choose a Print an item Label Prompt

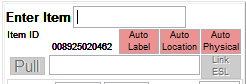
Upon selecting the Auto Label button, select one of the following actions built into this feature:
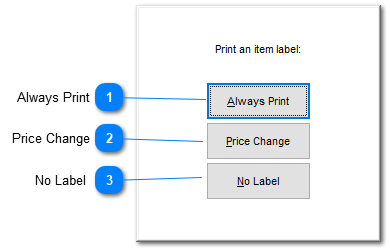
Auto Label
1

Always Print

1. Always Print
When selected, the system will automatically print a label for each entered into the Enter Item field irregardless of current price status - a fresh label will be printed for each item entered.
Prices will not change for Price for items that have the "Not Mass Price" checked within the Inventory Control | General Tab.
2

Price Change

2. Price Change
When selected, the system will automatically update the item the the new price and print a label for each entered into the Enter Item field that has a different retail price in the Primary Vendor's eCatalog.
 
Pick this option to print labels only for items that have a price different that that found within the eCatalog for the Primary Vendor
Prices will not change for Price for items that have the "Not Mass Price" checked within the Inventory Control | General Tab.
3

No Label

3.  No Label
When selected, the system will not print a label for each item entered.
 
If the either Always Print or Price Change options are selected, the system prompts the user for the Label and Printer information as seen below.
Confirm the Label Form, Number of Labels and Label Printer values and then select Close


3) Choose the desired Controls

Next the system presents the following screen to allow the user the indicated controls:
Auto Label
1

Auto Add

1. Auto Add
Check this option to allow the system to automatically add items from the eCatalog for items that are scanned but not found within the inventory.
2

Enter Price

2. Enter Price
When this option is checked, the system will prompt the user for the retail price of the item.  Typically this option is NOT checked.
3

Prompt for Class/Code

3. Prompt for Class/Code
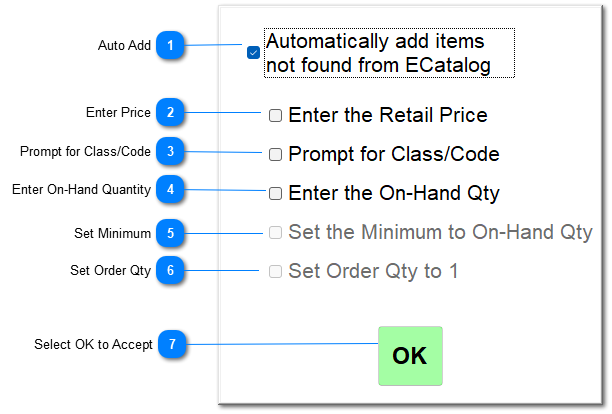
This option is available when scanning items in the aisle but may not be the most efficient use of time.  Look a Mass Item Changes to expidite this type of change and any volume of items. Typically this option is NOT checked.
4

Enter On-Hand Quantity

4. Enter On-Hand Quantity
Selecting this prompt will allow the user to enter the quantity of the item currently being scanned. Typically this option is NOT checked if the Auto Physical is in use.
5

Set Minimum

5. Set Minimum
The Set minimum to On-Hand Qty does just that.  When selected, the system will adopt the current On-Hand quantity as the new Minimum when this option is checked. Typically this option is NOT checked.
6

Set Order Qty

6. Set Order Qty
Checking this option will direct the system to set the Order Quantity to 1 for each item scanned. Typically this option is NOT checked.
7

Select OK to Accept

7. Select OK to Accept
 

4) Select OK to Accept selections

After the options have been accepted, the Auto Label button will turn green.
To turn off the Auto Label option, simply tap the Auto Label button and the button will change to red indicating that the option is not active.