(c) Profile Systems Design Group, Inc. 2026 Build: 4.008.810 Help ID: 268
If you do not see the expected content,press CTRL + F5 to clear your Browser's cache.
Creating a New Promotion
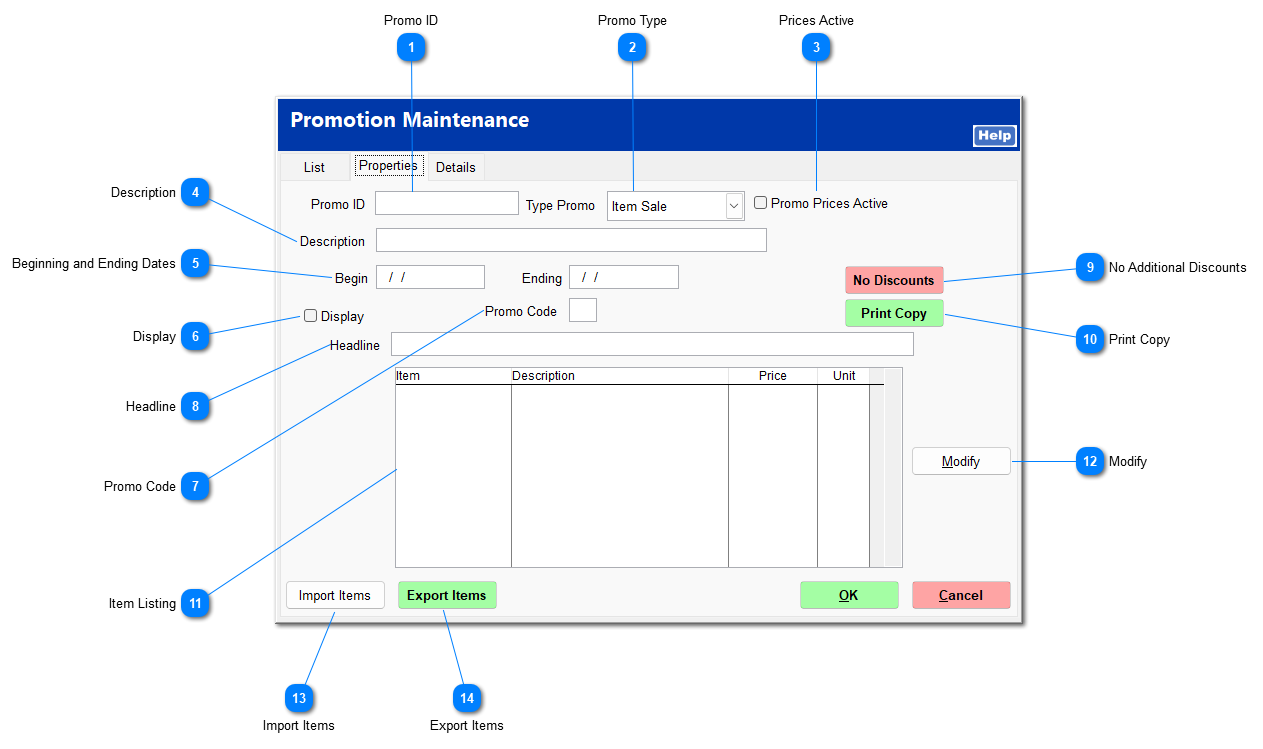
Upon clicking New, the Properties tab opens for you to enter the information for a new promotion.
Promo ID
Enter an ID up to 15 alphanumeric characters. This may be related to the catalog ID or sale list ID of the source document referenced by the promotion.
Select the type of promotion. This cannot be edited after the promotion is created.
Item Sale: Single selected items on sale
No Sales Tax: No sales tax on selected items
Retail Reset: TV only; sets the store retail price to the vendor retail price 30 days prior to the promotion and then resets to the store retail price when the promotion ends
DIB Loyalty/True Rewards: Vendor rewards club members receive sale prices
Rwd Group Sale: Rewards club members receive sale prices
Limited Qty: Allows you to limit the quantity of an item sold per invoice
Group: Customers in specified group receive sale prices; customer groups are set in AR | Customer File | Settings | Pricing
BOGO #1: Buy product x and get a credit amount at the time of purchase
Ex: Purchase Raid Ant Spray and get $1 off
BOGO #2: Buy a series of products and get a credit amount at the time of purchase
Ex: Purchase Ball Canning Jars and Ball food preservative and get $3 off
BOGO #3: Buy a particular series of products AND a quantity of another series of products and get a determined credit amount at the time of purchase
Ex: Purchase Scott's Turf Builder Lawn Food, Scott's EZ Seed Patch & Repair, and Scott's Turf Builder Rapid Grass Seed AND choice of Scott's EZ Feed Plus Weed Control or Scott's EZ Feed Plus Greening Power and get $10 off
BOGO #4: Buy a quantity of products and get a credit amount at the time of purchase
Ex: Purchase choice of 3 of Best Look Premium 2 In. Nylon Brush, Best Look 2 In. Flat White Natural Bristle Brush, Best Look Premium 9 In. Fabric Roller, Best Look Roller & Tray Set, or Best Look 12 In. Paint Shield Trim Guide and get $5 off
BOGO % Off: Buy product x and get a percentage off the item
Ex: Buy Wild Delight Safflower Bird Food and get 25% off
BOGO X & Y: Buy an item from list X and get an item from list Y for free
Ex: Purchase Pennington Kentucky 31 Grass Seed and get Greenscapes Frost Shield free
This is an on/off switch to turn promotion prices on or off regardless of the date range specified unless you utilize Automatically Start and Stop Promotions.
Automatically Start and Stop Promotions in System | Company Setup | Inventory Page 2overrides Promo Prices Active and activates the promotion according to the beginning and ending dates specified.
TransActPOS does not automatically start and stop the promotion based upon the beginning and ending dates if Automatically Start and Stop Promotions is NOT checked.
TransActPOS does automatically start and stop the promotion based upon the beginning and ending dates if the Automatically Start and Stop Promotions is checked.
This option reviews all promotions and unchecks Promo Prices Active if the current date is outside the promotion period. Conversely, it checks Promo Prices Active if the current date is within the promotion period.
This options allows you to build a promotion prior to the beginning date and save it. At midnighton the morning of the beginning date, the promotion prices are activated without you manually turning the sale on. At midnightin the evening of the ending date, the promotion prices are deactivated without you manually turning the sale off.
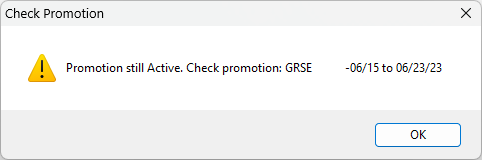
If Promo Prices Active is still checked after the promotion ending date, a message is shown upon opening TransActPOS indicating that the listed promotions are past their ending date are are still ACTIVE, as shown below. The promotion remains active until it is manually turned off by unchecking Promo Prices Active within the indicated promotion(s).
Enter beginning and ending dates for the promotion. The promotion begins at midnight on the morning of the beginning date and ends at midnight on the evening of the ending date.
These dates only apply if Automatically Start and Stop Promotions is turned on in System | Company Setup | Inventory Page 2 AND Promo Prices Active is not checked.
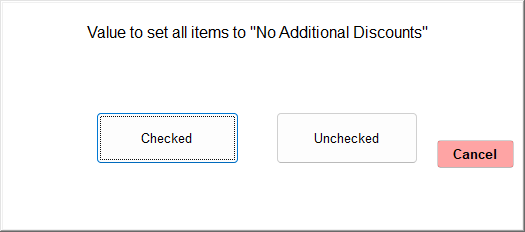
Clicking No Discounts opens a window for you to select whether to allow additional discounts or not. Clicking Checked excludes the promotion items from receiving any other discounts. Clicking Unchecked allows additional discounts to apply.
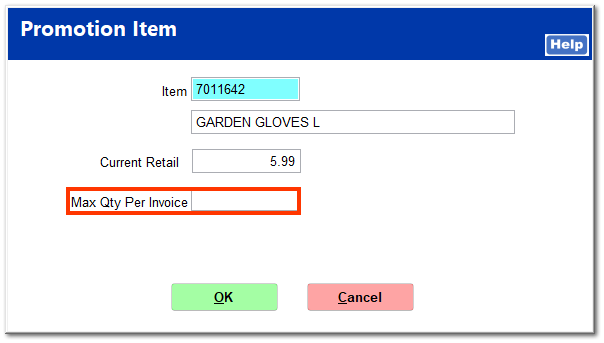
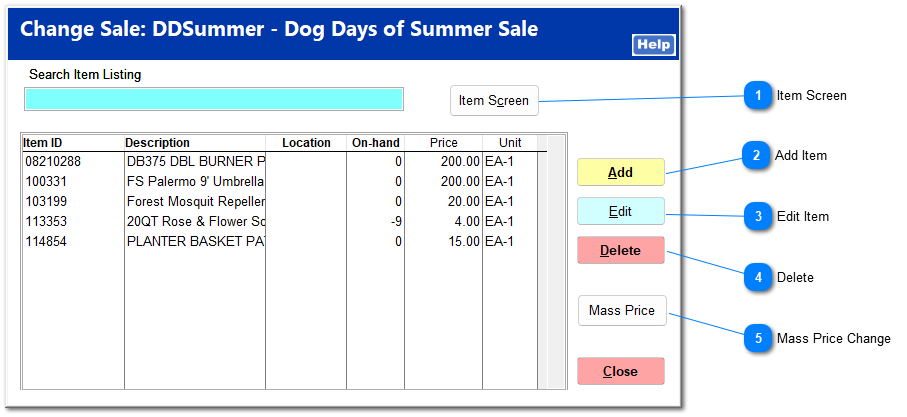
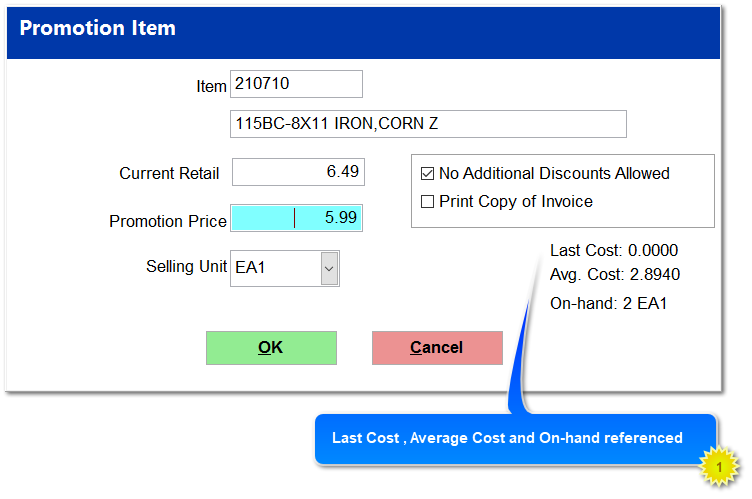
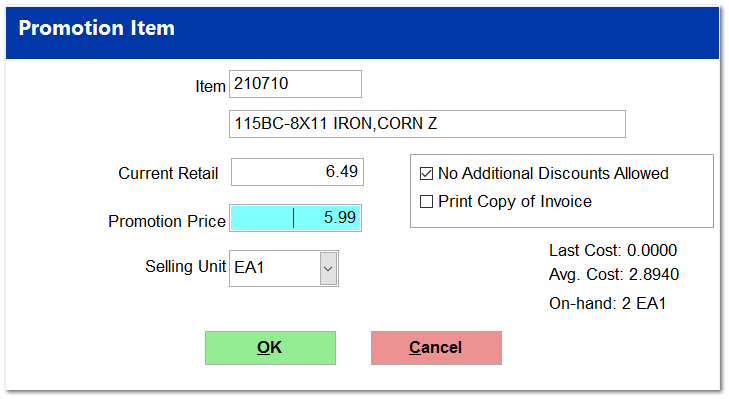
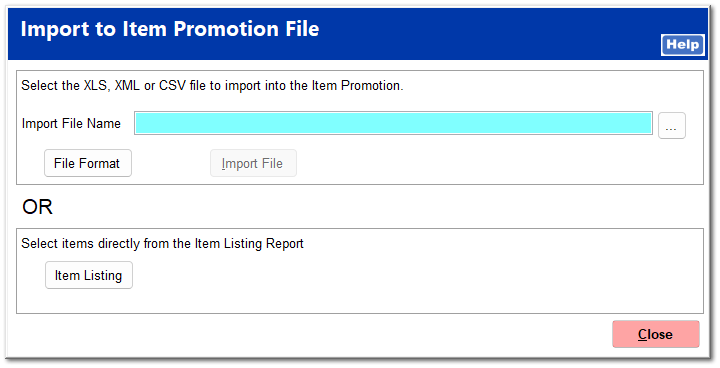
This allows you to add another item to the promotion listing. Enter an item ID in the Item field, and press Enter. The item description, current retail price, and selling unit are transferred from the IC inventory file. Enter a promotion price, and click OK.
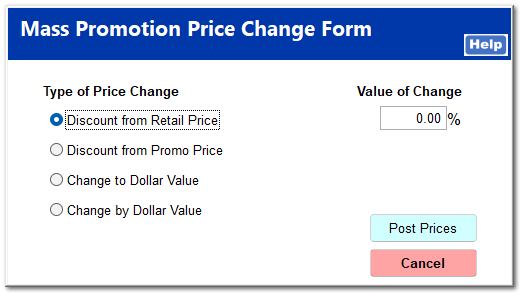
This allows you to make a price change to all items in the promotion listing. Select the type of price change, enter the value of the change, and click Post Prices.