(c) Profile Systems Design Group, Inc. 2026 Build: 4.008.811 Help ID: 2532
If you do not see the expected content,press CTRL + F5 to clear your Browser's cache.
Rental (Shift + F2)
Prior to creating rental contracts, the Rental module options must be set up in System | Company Setup | Rental Manager Pg 1, Rental Manager Pg 2, Rental Manager Pg 3, Rental Manager Pg 4. For more information on setting up the options in Company Setup, see the video Rental: Company Setup. Additionally, inventory files for rental items must be set up in IC. For more information on setting up rental item inventory files, see Rental Items.
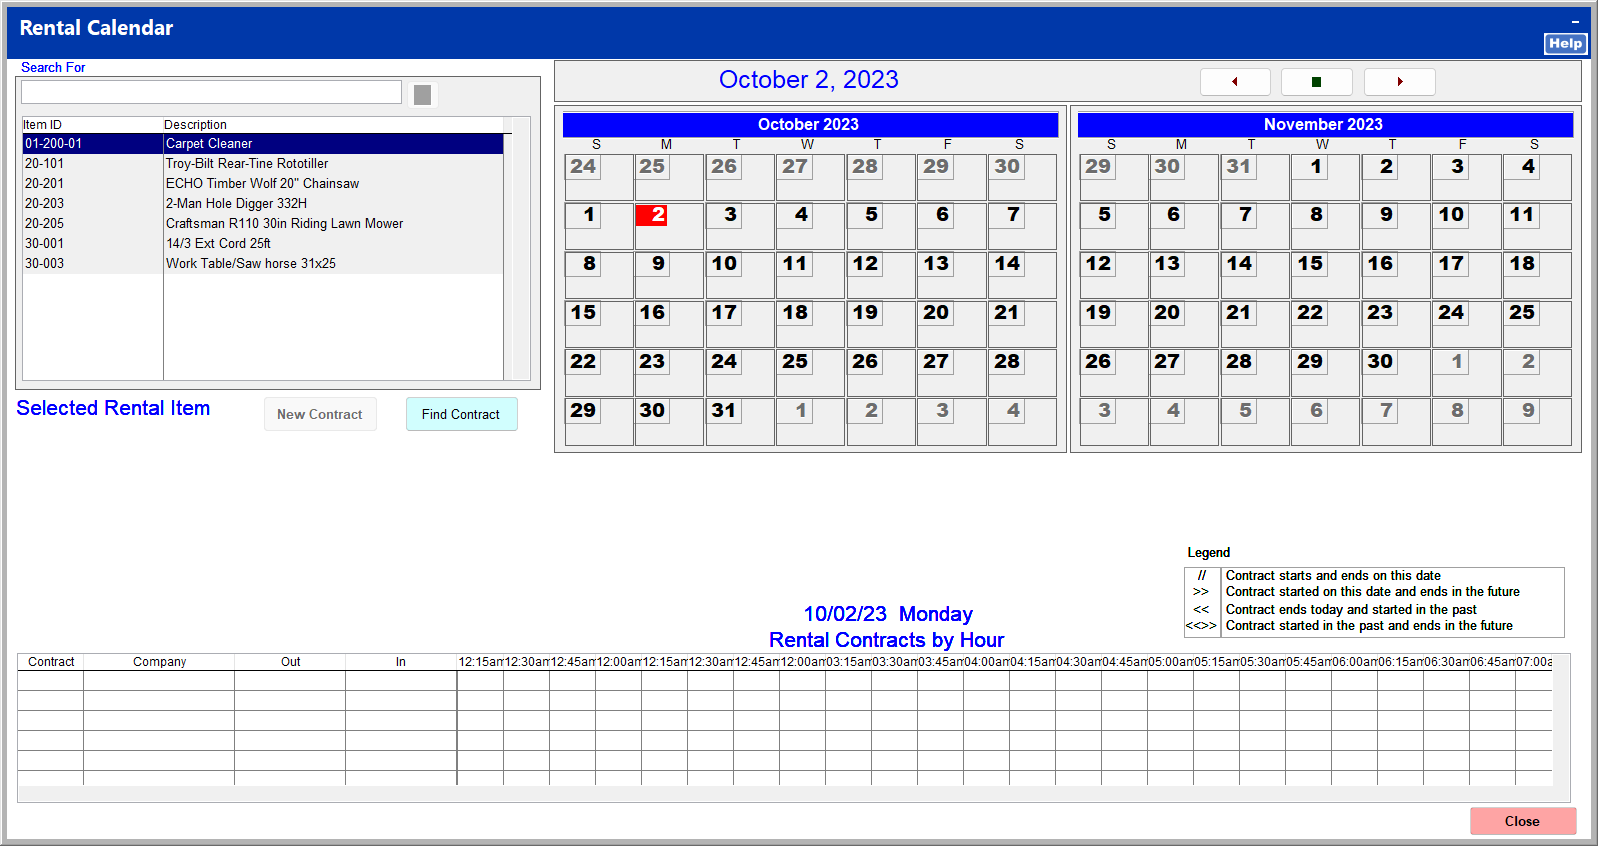
Upon clicking Rental, the Rental Calendar opens, displaying a list of rental items and month calendars. Rental contracts for the current day are displayed below. You can find an existing contract or create a new one. For more information on the rental calendar, see Rental Calendar. Uncheck Utilize Rental Calendar in Rental Manager Pg 4 to bypass the Rental Calendar.
Clicking Find Contract opens the Find screen. Enter any available criteria, and click Find Now to search for contracts. Click Find Now without entering any information to display all existing contracts. Uncheck Find ONLY Open Contracts to also display closed contracts.
Select a contract, and click Select to open the master rental form and view the contract details.
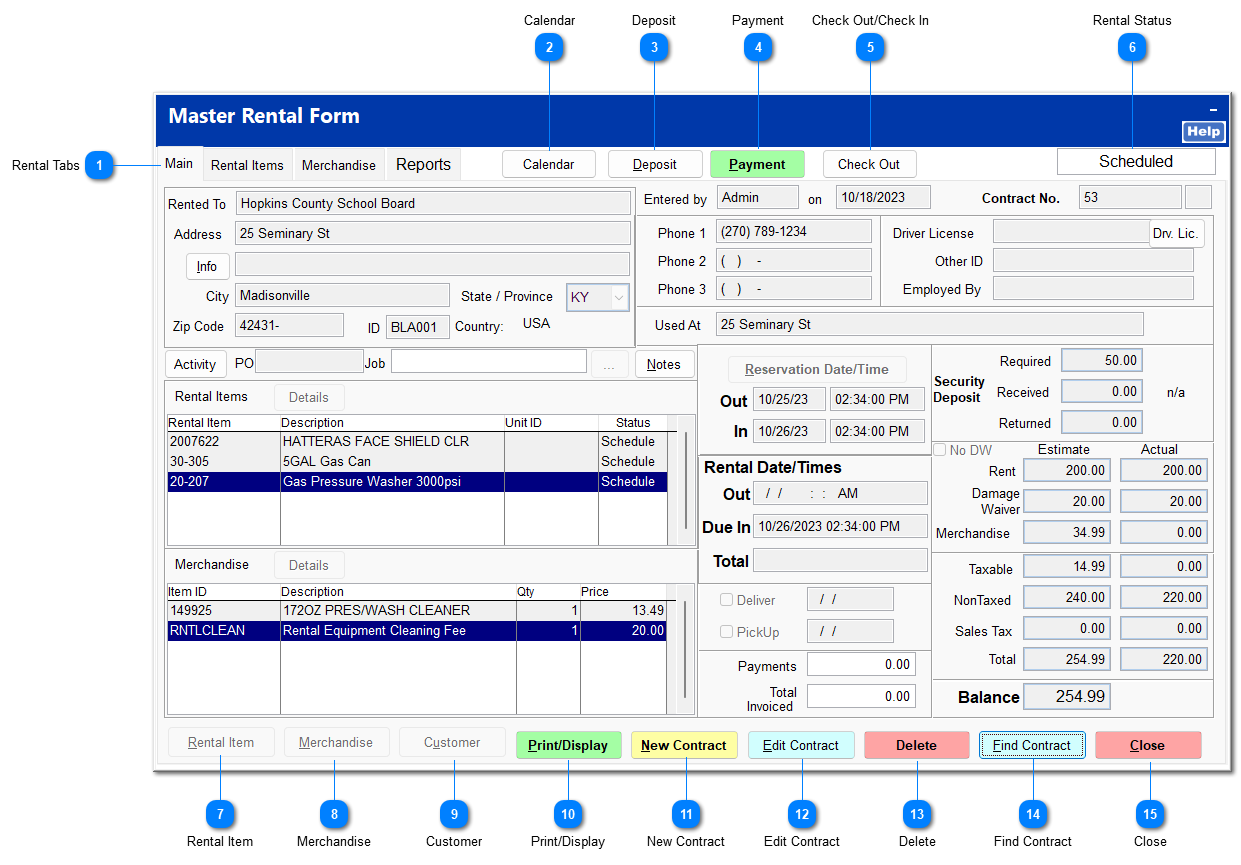
Rental Tabs
The Main tab contains customer information and overall contract information. For detailed information on the Main tab, see Rental Main Tab.
The Rental Items tab contains detailed rental item information. For detailed information on the Rental Items tab, see Rental Items Tab.
The Merchandise tab contains detailed merchandise item information. For detailed information on the Merchandise tab, see Merchandise Tab.
The Reports tab provides access to a few reports related to this contract. For detailed information on the Reports tab, see Rental Reports Tab.
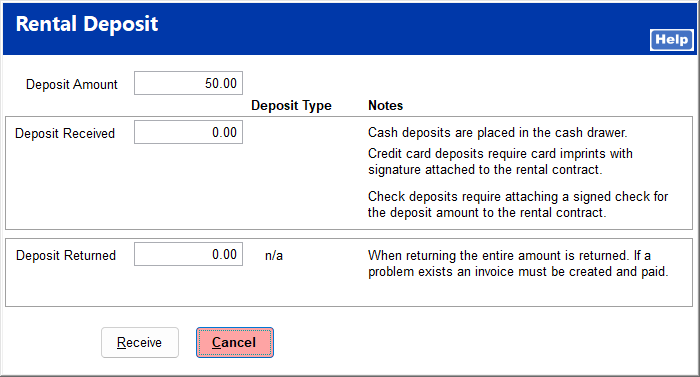
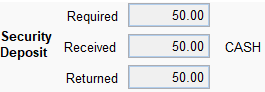
If a deposit is required, click Deposit to receive it from the customer. The deposit amount indicated in the rental item inventory file is automatically entered. This amount cannot be changed at the time of creating a contract or receiving a deposit. To enable deposits, check Utilized Deposit process in System | Company Setup | Rental Manager Pg 4.
Click Receive to accept the deposit from the customer.
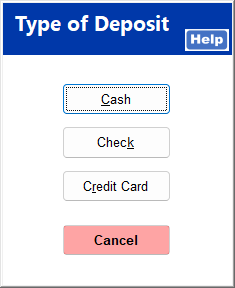
Click on the deposit type.
To return the deposit to the customer upon check-in of the rental item, click Deposit, and then click Return.
Click on the deposit return type.
The deposit amounts are updated on the master rental form.
The status shown changes to reflect the status of the rental contract.
Scheduled indicates that the contract has been created and the rental item is reserved but has not been checked out.
Checked Out indicates that the rental item is currently checked out to the customer.
Returned indicates that the rental item has been checked in but the contract has not been closed. Upon checking in a rental item and completing invoicing, you are given the option to mark the rental contract as Closed.
Closed indicates that the rental contract has been invoiced and closed.
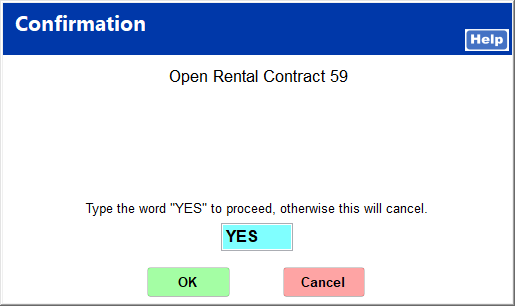
To reopen a closed contract, click Open to the left of the Closed status.
Confirm that you wish to reopen the contract by typing YES and clicking OK.
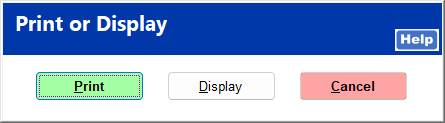
This allows you to print or display the rental contract.
The rental contract is formatted to print on pre-printed rental agreement forms. For more information on pre-printed forms, see Rental Agreement Forms.